Calendar Invitation: Your Response To The Invitation Cannot Be Sent
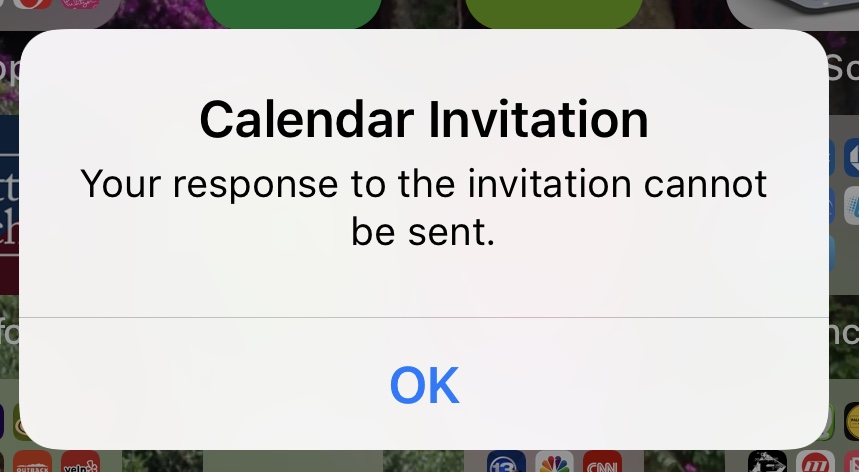
Do you get this iOS Calendar error popup constantly? The error message says: “Calendar Invitation. Your response to the invitation cannot be sent” (see the image below). You tap OK but a few minutes later this pops up again? It is highly likely that you are getting this error because you responded (accept or reject) to a calendar invitation, and your response, for some reasons, could not be sent and thus you keep getting this notification.
This article explains how you can troubleshoot this error. If you are having this issue as well, this article will help you fix it:
See also: Can’t Remove iOS Apps
Calendar Invitation Error
Please try each fix until you resolve your problem:
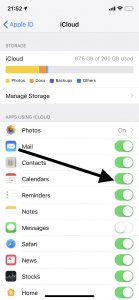
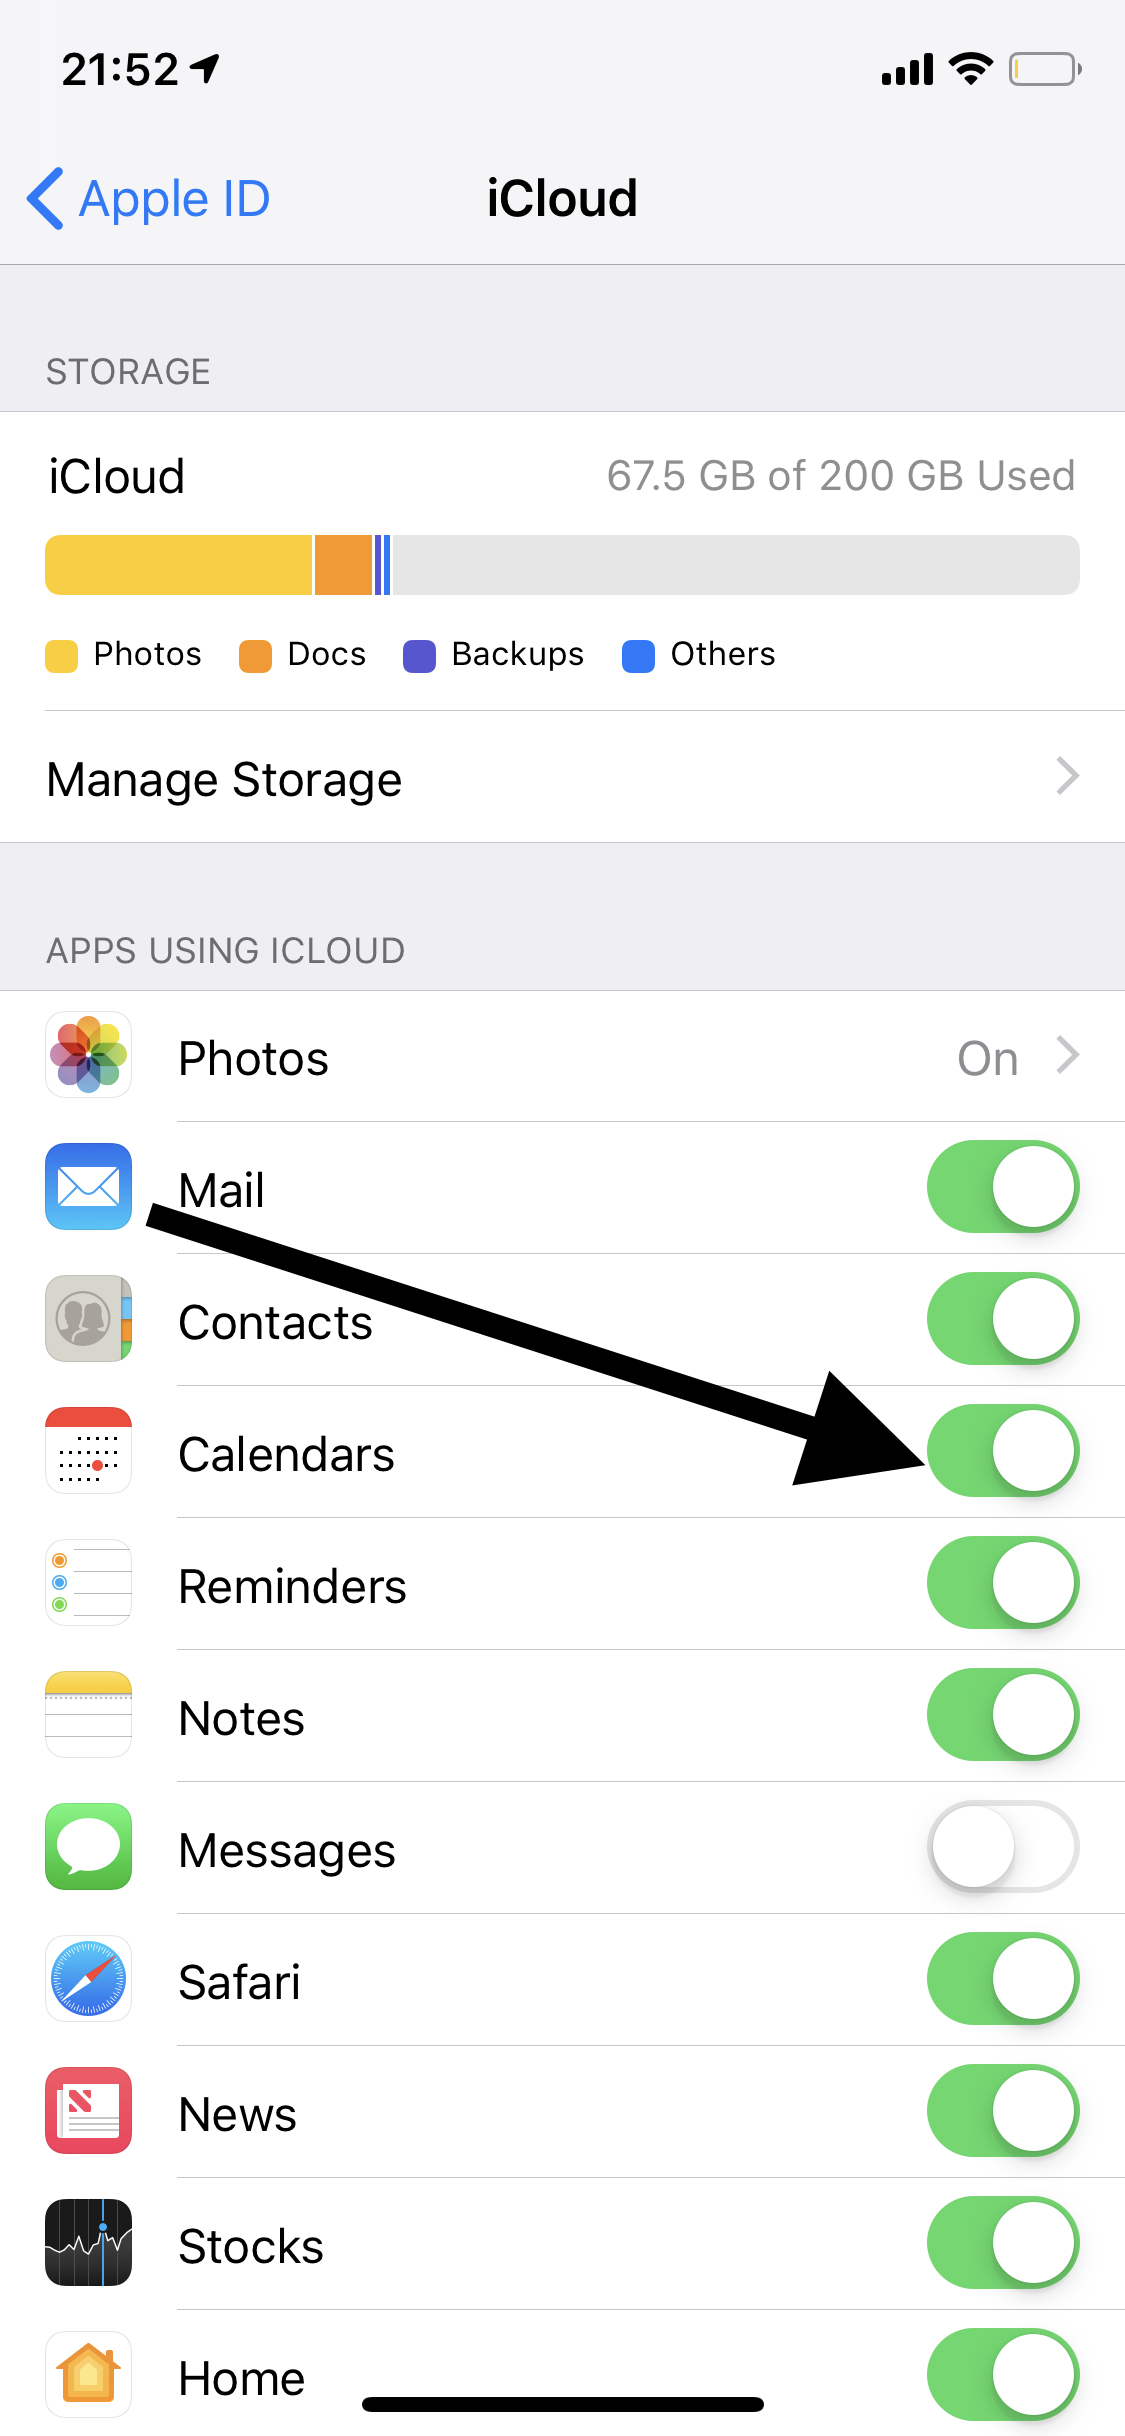
- On your iOS device, iPad or iPhone, tap Settings > Your Name > iCloud
- Toggle off “Calendars”
- Wait a few minutes
- and then turn “Calendars” back on.
- Update your iPhone to the latest version of iOS software. Here is how:
- Tap Settings > General > Software Update and if there is an update available, follow the directions to update your phone.
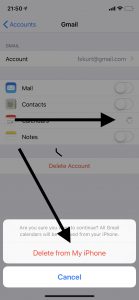
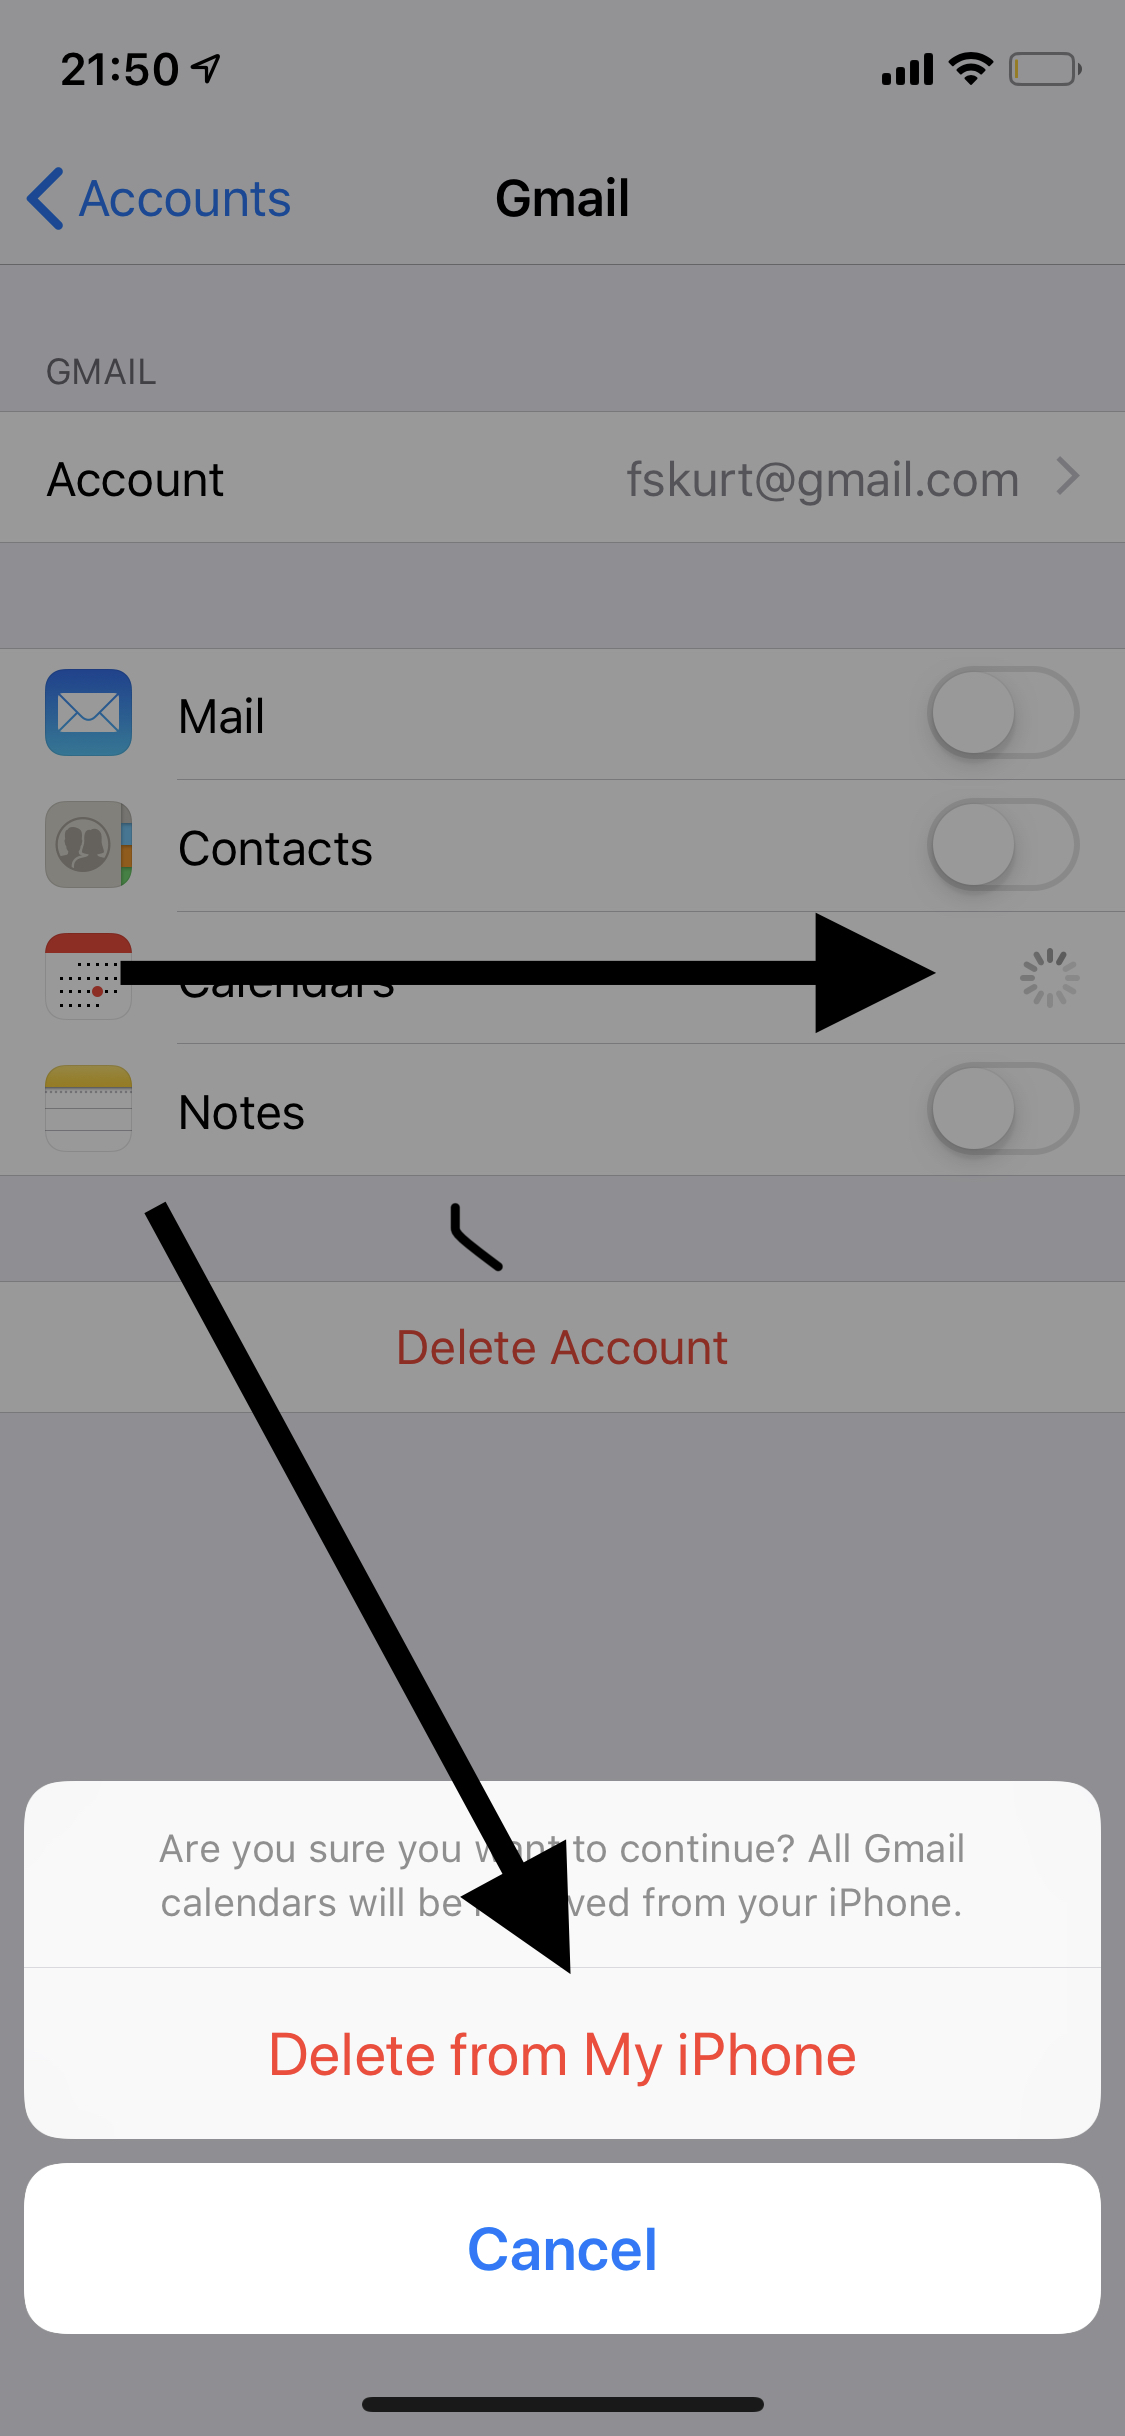
- On your device, tap Settings > Passwords & Accounts
- Then select the account (under the accounts section) Note: Select the account that linked with Calendar (iCloud, Exchange, Gmail etc)
- Slide to turn off “Calendars”. You will be asked to confirm, it will read “Are you sure you want to continue? All calendars will be removed from your iPhone” Tap the red Delete from my iPhone icon to confirm your selection. Do not worry, we will turn this on later and your calendar will sync again.
- Now turn off your device (you can do so by going to Settings > General > Shut Down)
- Turn your device on
- And turn Calendars back on.
- You may want to repeat this process for the other accounts also that you have on your device.
- Force close the Calendar app and reopen again. Here is how:
- If your device has a Home button then double press the Home button. This action will bring up the most recently used apps. Find the Calendar app (you may swipe right or left). Swipe up to close it. If your device does not have a Home button then swipe up from the bottom of screen and then find the Calendar app and swipe up to force close it. Then reopen it.
Please after each step, check to see if your issue persists.
If you performed all of the troubleshooting steps above, and if you are still experiencing this problem, you may want to contact Apple support. Apple Support offers live chat or Genius bar appointments.
Hello,
I followed all the points and I solved.
My Apple is Iphone XR with outlook calendar .
Thanks a lot for this useful instruction.
#3 worked.
My Cloud held my appointments. What a pain. Makes me feel like carrying an appointment calendar again. Too stressful and annoying.
Grateful for the assistance.
#3 work perfectly.
#3 worked. Thanks!
what if the notice WILL NOT stop flashing long enough for me to do any of this 🙁 I am so frustrated!!!!
Worked! Many thanks, excellent advice
#3 worked. Thank you 🙂
worked!
Worked after number 3 but I was holding my breath re the calendar. Fortunately all backed up to computer and iCloud. Fixed the problem thank god!
No. 3 fixed it. Many thanks
UGHHHH…I followed the steps and it deleted my entire calendar and I cant get it back.
Same…arrrgh. His comment: “Do not worry, we will turn this on later and your calendar will sync again.” is a joke.
All I have now is a phone with no calendar and no knowledge as to how to get it back. And of course iphone stores are all closed for COVID at the moment.
The following step was of no help as my phone (xs) does not have a “home” button:
“Force close the Calendar app and reopen again. Here is how:
If your device has a Home button then double press the Home button. This action will bring up the most recently used apps. Find the Calendar app (you may swipe right or left). Swipe up to close it. If your device does not have a Home button then swipe up from the bottom of screen and then find the Calendar app and swipe up to force close it. Then reopen it.”
Suggestion to the author: If you’re going to provide detailed instructions that requiring breaking something (deleting calendars) as one of the steps, make sure you provide equally detailed instructions on how to fix it. I couldn’t be more pissed off right now.
I agree that the author should have been more explicit on how to re-synch calendars, but I did figure it out, and hopefully you did too!! Go to iCloud calendars, turn off, say “keep on iphone” then “merge”. I got all of my calendar appointments back.
#3 worked for me. Thanks!
#3 Worked for me too and such accurate instructions. Thanks so much.
One thing that would have been nice to know:
“Deleting the calendar from the phone will remove any calender entries that (for some reason) haven’t sync’d to the cloud.”
My phone has a problem with pushing entries created on the phone to Exchange Server, so some entries that are in the phone calendar never show up in Outlook.
But I don’t have to worry about them now, because they are gone. Thanks.
All the way thru #4, but it didn’t work for me. I’ll chat with Apple support then go to genius bar if necessary. This happened once before, and without getting to Apple Support (I was busy for so long), the issue eventually self-resolved. I appreciate the clarity of your guidance.
#3 worked!! Thank you!
Thank You.#3 did the trick.
This is an infuriating problem to have – especially on a brand new iPad! I called my company IT department and they could not/would not help me. ONE Google search and your site showed me how to fix the problem in about 2 minutes. Thank you macReports!
In my case, the solution described in 3. solved the problem.
If you are deleting the calendar from your iPhone, will you lose all the appointments you have stored already?
Yes. But if your calendar appointments are saved somewhere else (for me they are synced with the calendar on my computer) you will be able to refresh them and have them reappear on your phone.
At the end of option 3, as the instructions said I need to turn back on my calendar; however, when I did, I didn’t see any of my calendar appointments as I was expecting. That’s because in Option 1 I turned off the syncing feature and never turned it back on. I then followed option 1 instructions to get back into iCloud and turned on Calendar. When I did that, all of my calendar appointments reappeared.
#3 works! Thank you!
I can’t get my old calendars back after step 3, ive now lost the calendar invite completely? help
I cannot get my calendars back either. Did you find a solution?
Step 3 works! Thanks!
Had this problem for few weeks, so frustrating.
Really appreciate your guide.
Option 3 worked for me! I appreciate these instructions very much and have bookmarked this page in case ithappens again!
Thank you! It works!
3rd option worked….wow that was frustrating. I thought I was being hacked.
Thank you! It works!
#3 for my exchange account work! Thank You!!!
Very well written instructions! Thank you
#3 worked for me (#1 & #2 did not). Thanks…so glad to be rid of that annoying message!
Great. Option 3 worked for me. Thanks so much.
Wow. Finally. #3 worked for me also. I had tried 1 and 2 to no avail.
Total brilliance! I have been trying to fix this for three weeks. Option 4 worked like a charm!
Option 3 worked! Thank you!
Great job! I called Microsoft and was on the phone with them for ages and could not get it fixed. You did it. Cannot tell you what a relief it is.
Thank you for the solution. No. 3 worked for me
Option 3 worked for me too.
Thank you!! This error was making me contemplate (edited)!! Option 3 (using the exchange) worked for me.
#3 worked. Thanks!
Thank you! The 3rd option worked!
Step 3 worked for me! Thanks
Thanks, Step 3 worked for me.
Thanks so much–it worked!
Option 3 worked for me.
It worked, thanks
Thank you so much! It worked!
None of these worked for me.
I’ve tried all of them and it still does’nt work😞
Option 3 worked.
Thanks much.
Thank you!
Option 3 is the one to go with
It works
this worked (option 3). Note that it takes forever for the calendar to sync back up to your iPhone–don’t panic
I think No. 2 actually WORKED – this error has been driving me nuts!
3rd option worked. I was ready to throw my phone away. Thanks for the help!
FIXED!!!!!! Thank you!!
Nr 3 worked for me! Thank you!
Option 3 worked for me. Thank you!
That was good info. The email account (exchange) worked for me.
The passwords & accounts worked for me! Thank you so much for these tips. What an aggravation trying to use my phone when the error message popped up multiples times.
Ditto, very useful
For me also. Great relief. Thanks.
It worked! Thanks.
The last option worked for me! You have no idea how long I had been trying to fix it. THANK YOU
great troubleshooting!!