How To Record Your Face and Screen On Your Mac
In this article, I explain how you can record your face and screen at the same time so that you can create engaging and fun videos. Note that there are several apps that can do this. This tutorial shows you can create a screencast using the built-in Mac apps and hardware. So that you will not need to use any other third-party apps. We will use QuickTime Player.
If you want to audio-only recording, see this article.
There are many advantages to creating screen videos. For instance, nowadays, teachers are recording your lessons so that their students can watch them anytime.
These types of videos will create recordings of the actions on your computer screen with accompanying audio and your face. This will let you provide quick video explanations or tutorials. For example, you can create Youtube tutorials using the method described in this article.
How to Screencast (Mac)
Steps:
1-Launch QuickTime player. It can be found in the applications folder.
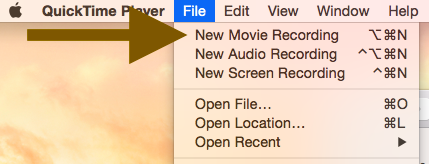
2-Select File > New Movie Recording.
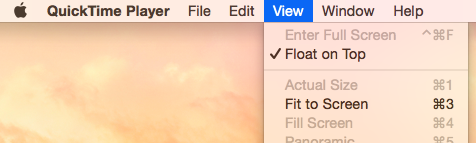
3-Select View > Float on top so that your camera window will be on top of any other application anywhere on your screen. If you do not select this, your video may not record you.
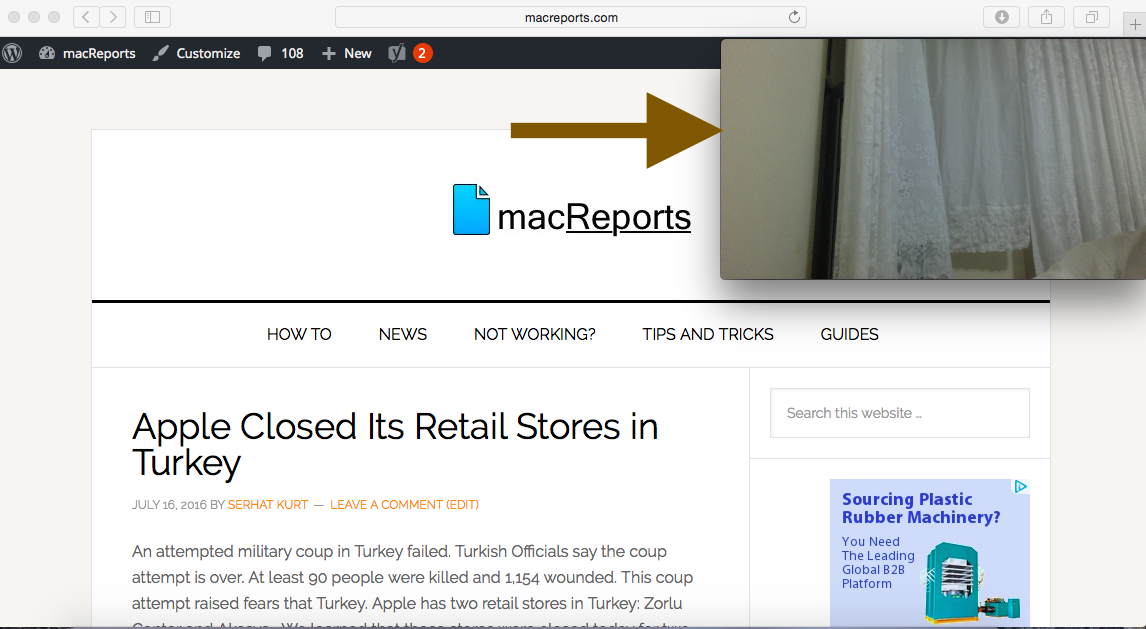
4-Now you can resize the camera window. You can move this camera view anywhere you want (left, right, top, bottom, etc).
5-Now again, in QuickTime Player, select File > New Screen Recording
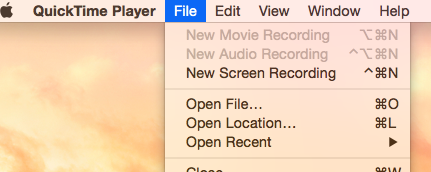
You will see this:
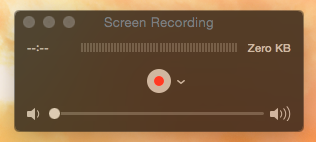
You can change some settings by clicking the arrow next to the Record button. You can record your full screen or part of your Mac screen. You may want to arrange your screen (where will your camera be etc?) before you start your recording.
6-When you are ready to start recording, click the red record button. You have two options: (a) if you want to record your entire screen, click anywhere on your screen to start the actual recording (b) or you may drag to select an area.

7-Now you are recording your screen and your camera view (e.g. your face). When you are done recording you may press the Command-Control-Esc keys. After you done, you may also edit your video using Quicktime. For instance, you may go to QuickTime > Edit > Trim to remove the unwanted parts of your video.
Other notes:
- You can also press Shift-Command (⌘)-5 to create video and capture still images of your screen.
- Please note that if your Mac does not have a built-in camera, you can use an external camera.
- You can use an iOS device connected to your Mac to record a video on your device.
See also:
Thank you! This worked well for creating sign language videos while capturing powerpoint presentation slides.
Nice, this is exactly what i needed to record my youtube videos
Hi. Thanks for this. It has worked but there is a delay in the recording with my voice being quicker than the actual movie of me talking making it look very badly dubbed. Is there a way around this?
Hi,
Is there a recommended way to add a background image before I record so that I don’t show my office background but maybe a solid colour or landscape or city backdrop? How can I do this before I press record. Ie: Like adding in a virtual background in Zoom before you join in on a call. Many thanks. Appreciated. Dennis
Why there is no voice ?
You have to click on options and then select for microphone Macbook microphone
I tried to use this to record myself talking over a powerpoint presentation, but as soon as I put the powerpoint into slideshow mode the Quicktime controls disappeared. Is it possible to do this?
this was weird. It didn’t work for me. ;(
I am able to record the screen and myself as a preasenter. However I cannot see the presenter window on the screen recording
Hello, unfortunately I see the video controls on camera preview. Any way of turning this off?
I had this problem, but I was able to resolve by sliding the mouse pointer out of the camera preview window to the left/right/bottom (instead of top). Once you slide off your mouse in these directions, the controls disappeared.
Thank you! This helped!!!
Didn’t realise Quicktime could do this!!! Really really handy little tip, thank you 🙂
Nah I can not change taps it wont any one see my face so i can not slid (the for finger slide on mac)with it letting me record
Thank you. Great Work, is there a way to remove the background of the self video?
Thank you. I like the simplicity and clarity of your instructions.
However…one hour later and I was still trying to figure out how to get the screen recording the video of myself PLUS audio! Turns out that’s separate. Who knew? Anyway, I’m giving up for today because I still don’t know how to playback the screen recording with the audio and I’m exhausted.
When you select to screen record, next to the record button is a little down pointing arrow, click it and it will show you your microphone options. Select internal microphone and you should be good to go.
THANK YOU, Serhat. This is EXACTLY what I was looking for. And to think the solution was so simple. Great job. I can’t believe it’s so hard to find the solution on Google. I’m glad I kept looking, Thanks!!
I am doing all of the steps you mentioned, yet, when I finish recording and watch the video, I can’t hear myself talking. Is there a way to fix this?
click the arrow by the red button and then click internal mic
Hi- Great explanation of the process. I tried it and it worked well except for the audio of my voice is off from the PIP video window I put at the bottom of my screen. Any ideas how to fix that?
I had the same issue which I resolved by selecting “Internal Microphone” from the options hidden in the drop-down menu (click the little arrow beside the Record button.
You are AWESOME!!! I just spend a few days trying to find a suitable program to do this and didn’t even think of trying what you suggested here—but it works perfectly!! I LOVE using quicktime so this is just perfect.
Thanks again!
Lance
Can you control the pixel width/height?
Great, thanks! I want to record my Keynote slide presentation and also have my face on screen. Is there a way to do that? When I rehearse or record the slideshow, it automatically goes full screen and takes over even when my quicktime window is supposed to be floating on top.
I’m doing the same… The only solution I could come up with was to export my keynote as a PDF, then open it in Preview. You have to view the PDF in window mode, if you go fullscreen you get the same problem as in Keynote. When I did the screen recording I dragged a box so it only shows the PDF pages, not the rest of my screen, or the preview tools etc. Then I could keep my video floating on top, it’s a pity you can’t make the video smaller though, I think the smallest size is still too big and it gets in the way.
Okay I know how to do that now but how do you record yourself and an iPhone screen with the audio and everything perfectly. I want to record myself and a gameplay
Thank you so much! It helped me doing my school project!!
This is perfect for what I was looking for. I’d also recommend Acethinker Free Screen Recorder which I have used for many years. It supports recording system and microphone or both. I always take it to record videos and upload to YouTube so that I can share with friends. It works so well that I haven’t found some defects.