How to Install Homebrew on Mac
Homebrew is a command line package manager intended for advanced users that simplifies the installation of software on macOS computers. It automates the process of downloading, compiling, and installing various software packages and libraries from source code or precompiled binaries. In this article, I explain how you can install Homebrew on your Mac.
What you need to install Homebrew
- A 64-bit Mac, either Intel or Apple Silicon. MacOS 10.14 Mojave is the last version that supports 32-bit software.
- macOS Monterey or later.
- Command Line Tools (CLT) for Xcode. I will explain how to install this later in this article if you do not already have this. You have two options:
- You can install CLT before installing Homebrew, as we explain below.
- The Homebrew installation will also check if you have CLT, and if you do not, CLT will be installed automatically.
Steps to install Homebrew
- Open Terminal on your Mac. You can use Spotlight or go to the Applications/Utilities folder.
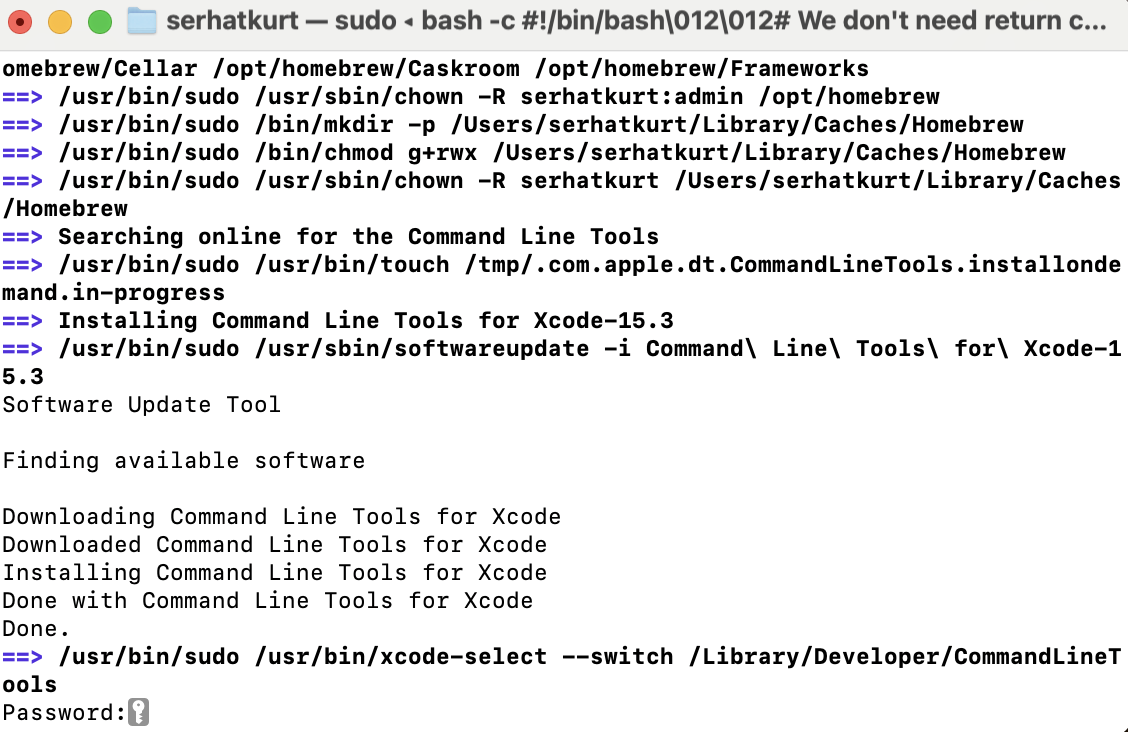
- First, we will install macOS Command Line Tools. Skip this step if you have already installed it. Enter the following command and hit Enter. Again, you could also skip this and go to step 3 directly, as installing Homebrew will check for CLT and install it if you do not have it.
xcode-select --install- Install Homebrew. Enter the following code and hit Enter:
/bin/bash -c "$(curl -fsSL https://raw.githubusercontent.com/Homebrew/install/HEAD/install.sh)"
Now, follow the onscreen instructions. You may be asked to enter your admin password. If you don’t have CLT, it will be installed first:
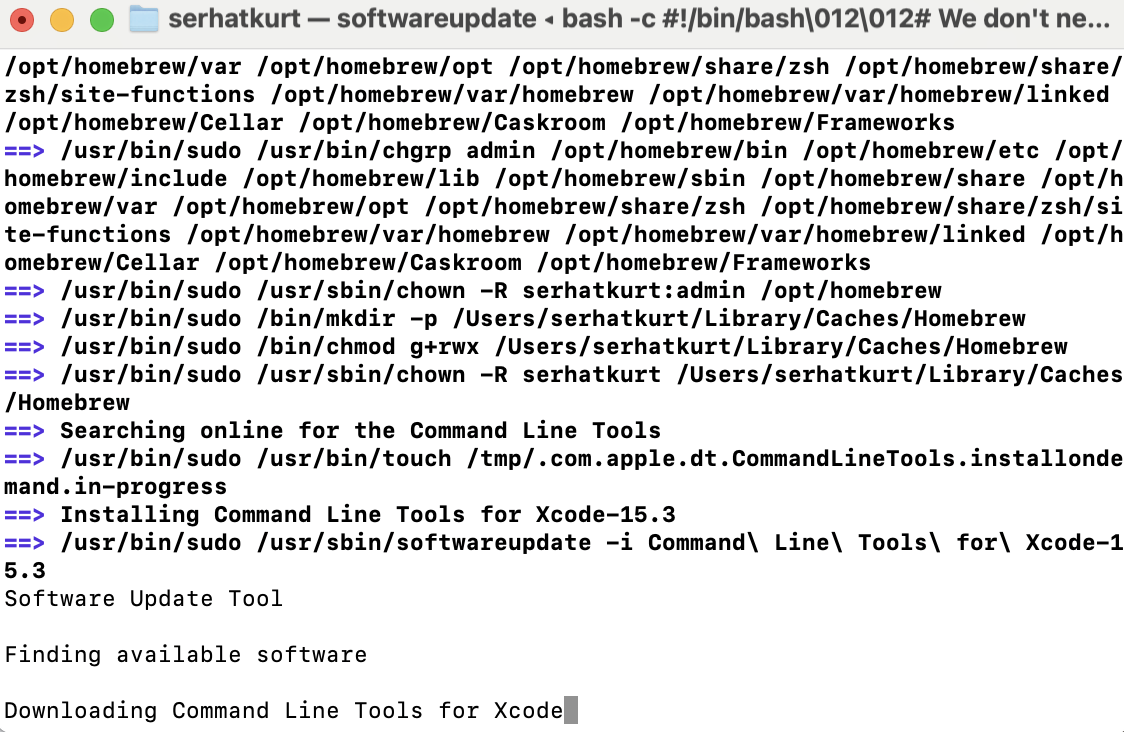
Installing CLT may take several minutes. After it has finished, you may be asked to enter your passcode again.
Then, Homebrew will be installed. This may take around a minute.
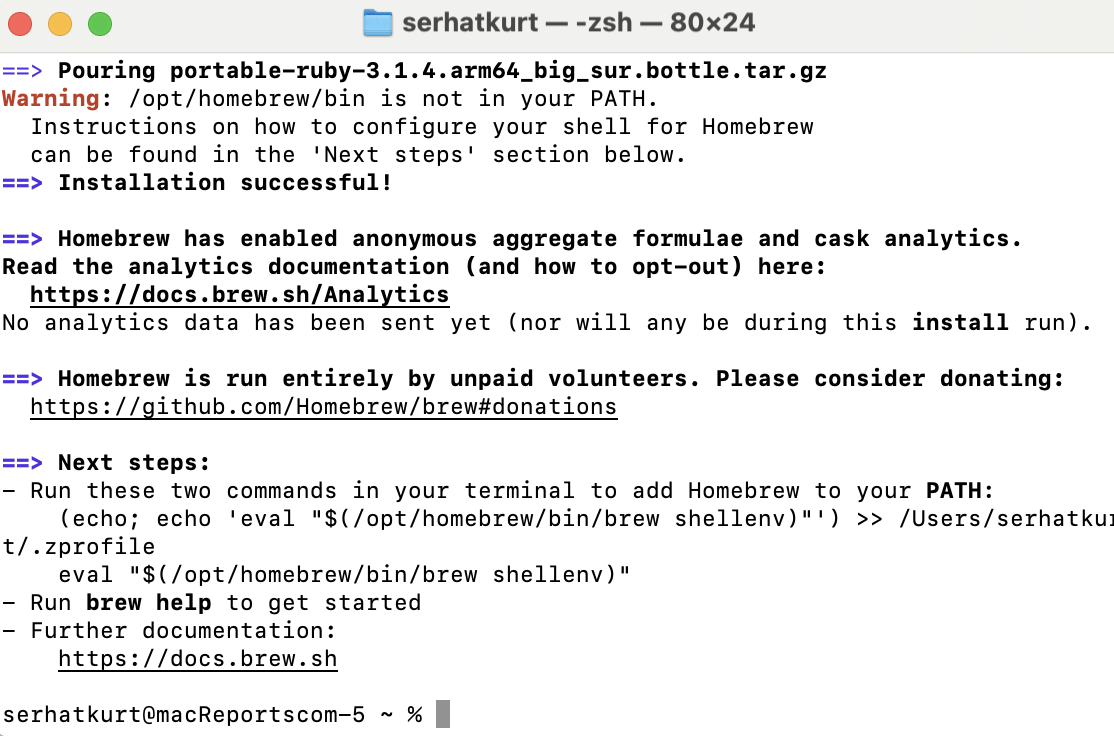
Then, as the Terminal indicates under Next steps, run the commands (echo; echo ‘eval “$(/opt/homebrew/bin/brew shellenv)”‘) >> /Users/serhatkurt/.zprofile
eval “$(/opt/homebrew/bin/brew shellenv)” and you are done.