How to Set Up a Mac mini
I recently purchased a new Mac mini. I already have a MacBook, two large external monitors, (too many) keyboards and a mouse, so it seemed like a no-brainer to go with the mini. One of the questions I had was, “Will it connect to my (non-Apple) Bluetooth keyboard and mouse so I can use those during the setup?”
If you just got a new Mac mini, you may be wondering how to go about setting it up. Even if you’re an experienced Mac owner, you may worry that you can’t simply turn it on and follow the onscreen instructions like you would with most Apple products. In this article, we’ll go over what you need to set up your new Mac mini, and we’ll answer questions, such as whether you need a wired keyboard and mouse or if Bluetooth will do.
What you need to set up your Mac mini
- A display and the appropriate cable to connect it. You can use the HDMI port and/or one or more Thunderbolt ports to connect the display(s). For more on setting up displays with your Mac mini, see Connect a display to Mac mini.
- A keyboard and mouse or trackpad – wired or wireless. If you are using a new Magic Trackpad, Mouse or Apple Keyboard, they should pair automatically. If you are using other Bluetooth accessories, make sure you know how to put these in pairing mode. For example, my Logitech MX Master 3S has a button on the bottom that I pressed to select a different device connection (numbers 1-3). Then, a light flashed until it connected. My NuPhy keyboard required me to press Fn–3 for three seconds, and then its light flashed until it was connected.
- If you already have an Apple ID, you will need that and your Apple ID password. If you don’t have one, you can create one during setup.
- If you have another Apple device, like an iPhone or iPad, you will want that nearby. You may need to verify something 2FA style during the setup.
- You will need your old Mac nearby if you wish to transfer data. There are a few ways you can transfer data, so you may want to learn more about how to transfer data to your new Mac.
- Your Wi-Fi password if you are not using an ethernet connection.
- Several hours if you plan to transfer data from an old computer.
The steps to setting up your new Mac mini
Booting up and connecting accessories
- Connect your external monitor to your Mac mini and plug the monitor into power.
- If you are using a wired keyboard, mouse or trackpad, connect those.
- If you will be using an ethernet connection, go ahead and attach that.
- Have your iPhone or iPad nearby if you have one, and if you will be transferring data from another Mac, have it set up nearby and plugged into power.
- Plug in your Mac mini and press the power button.
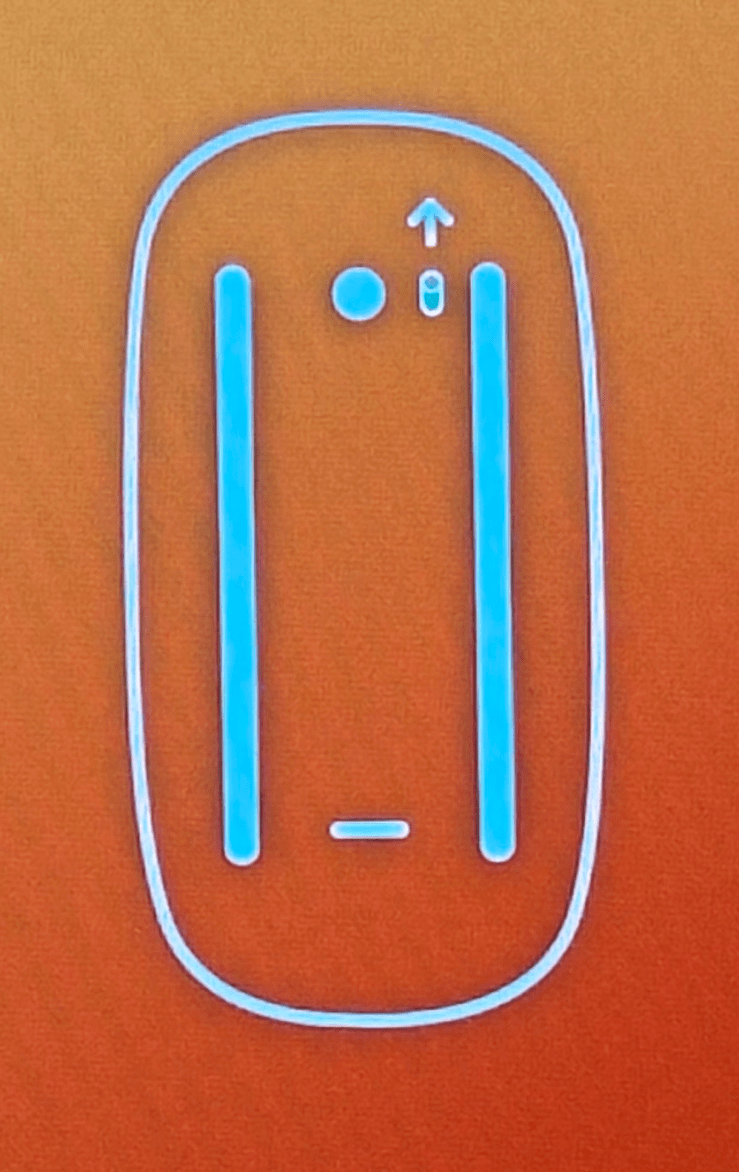
- You may see animations indicating you should turn on your mouse or trackpad. If you have a new Magic Mouse or trackpad, turn it on. Otherwise, put your mouse in pairing mode and wait for it to pair, then follow the onscreen prompts.
- If you are using a Bluetooth keyboard, put it in pairing mode and wait for it to connect.
The setup process
- Follow the onscreen prompts regarding language, region and accessibility.
- Select your Wi-Fi network and enter the password.
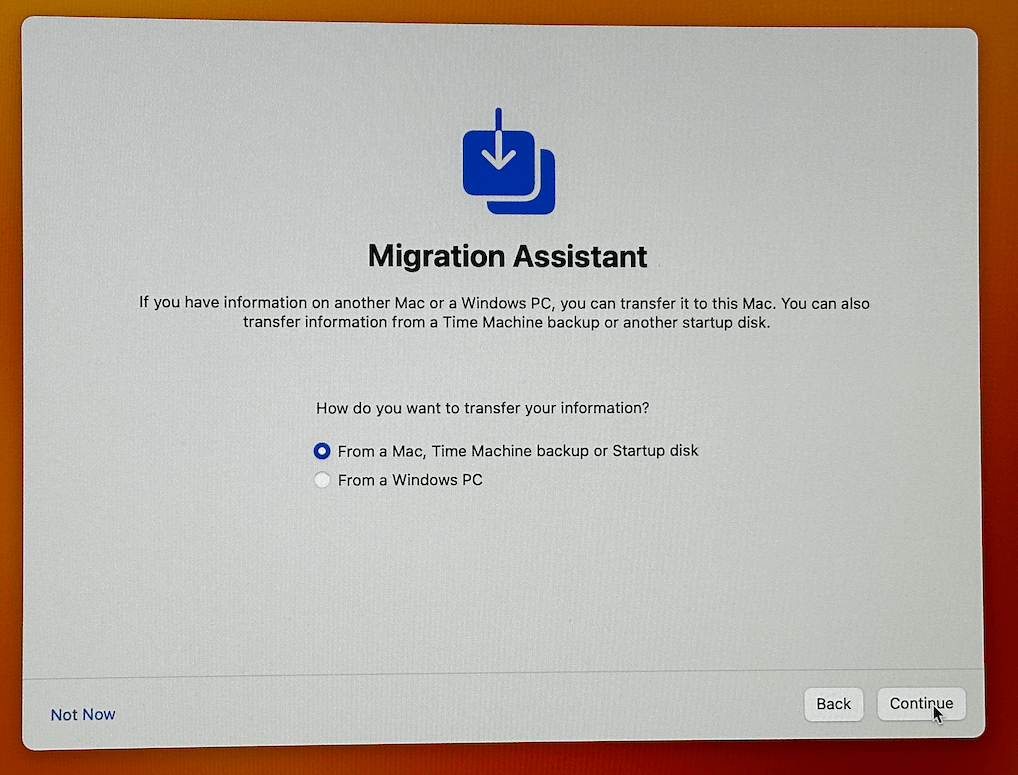
- When you see the Migration Assistant screen, you can choose to transfer information from a Mac, Time Machine backup or startup disk, or from a Windows PC. You can also choose Not Now in the lower left corner of the window. You can always transfer your data later using Migration Assistant if you prefer; however, transferring your data now using Migration Assistant might be the most straightforward way to do it.
- If you choose to go ahead and transfer your data, there will be onscreen prompts you can follow, but you may want to learn more about using Migration Assistant.
- For the purposes of this how-to, we will choose not to transfer our data.
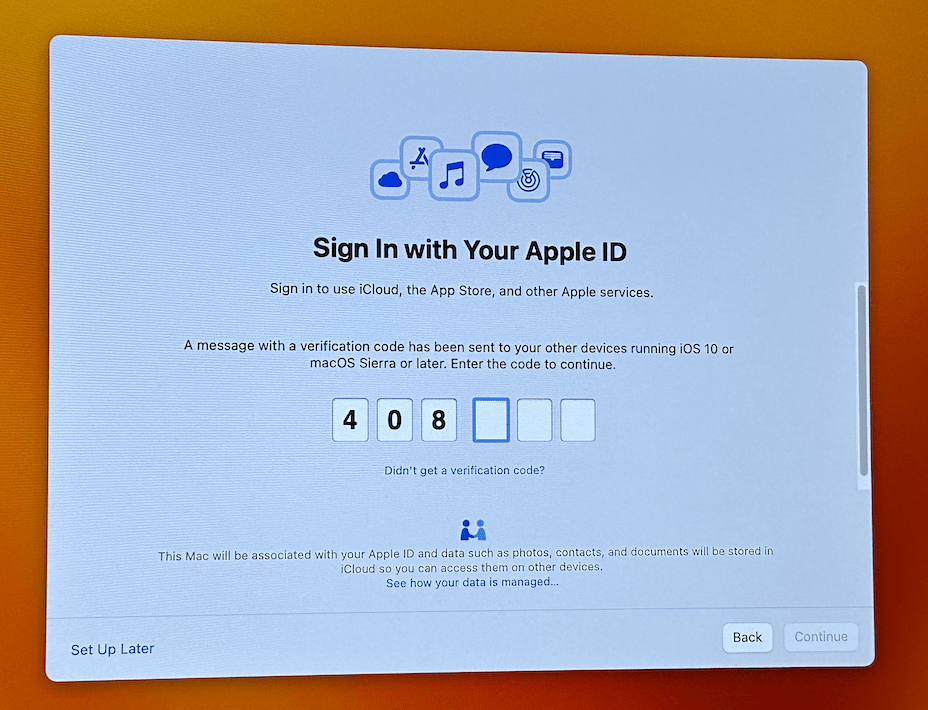
- Now, sign in with your Apple ID or create a new one if you don’t already have one.
- Use your iPhone or iPad to allow, and then enter the passcode displayed on your iPhone on your Mac mini.
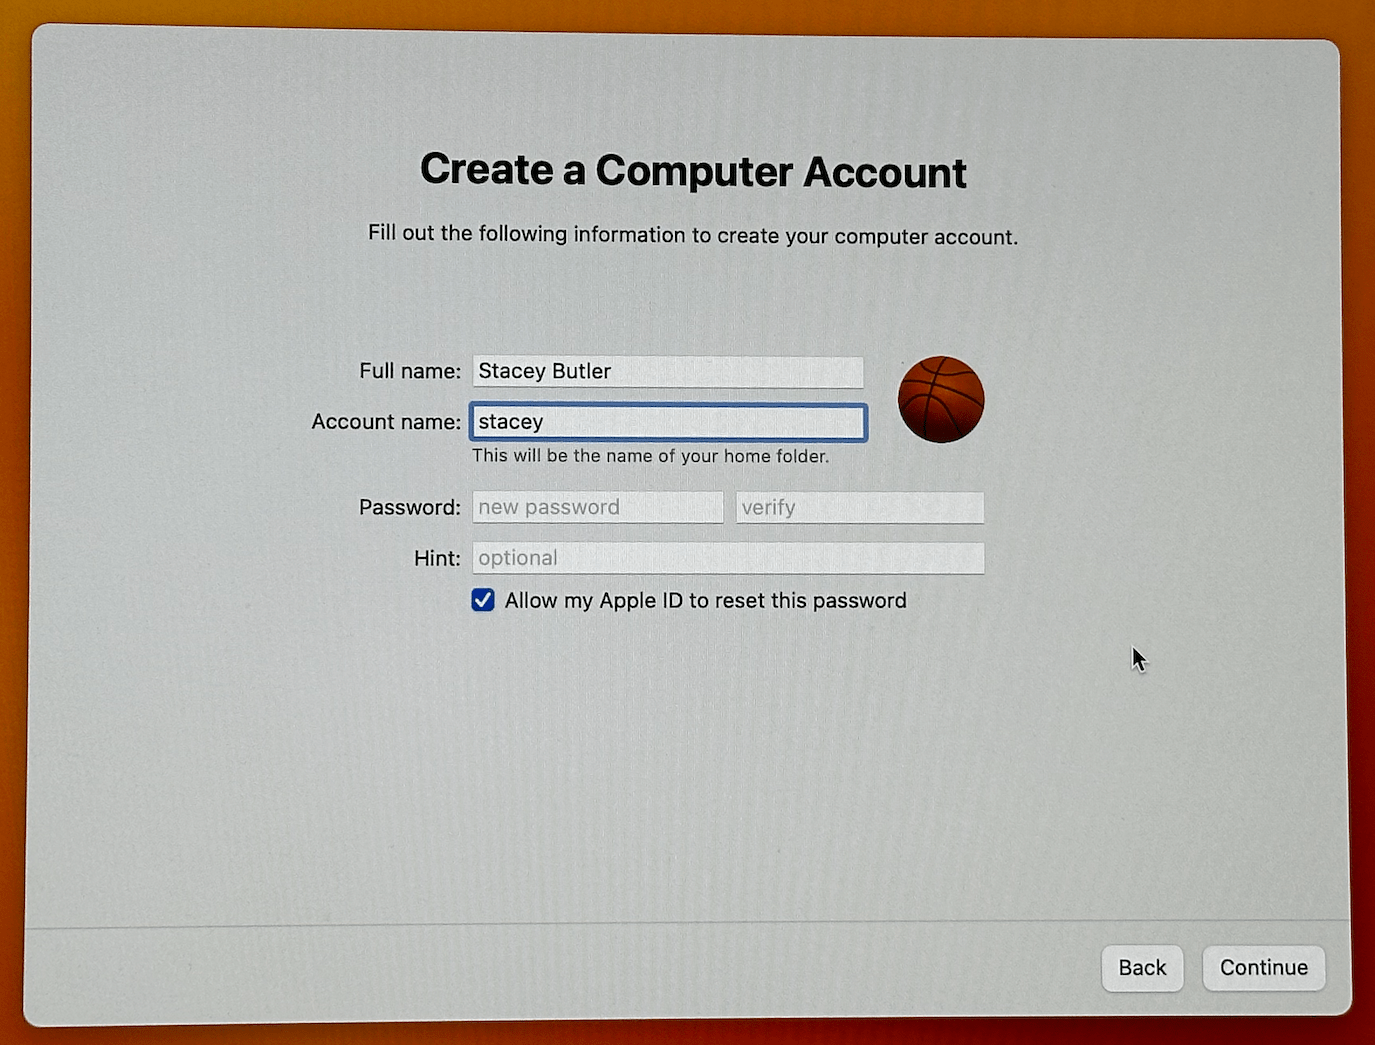
- Create a user for your Mac. Choose the account name and password and put down a hint if you like. Definitely write down or save your password somewhere safe. It is a good idea to allow your Apple ID password to reset your user password in case you forget it. Definitely keep your Apple ID password safe somewhere (or in multiple places).
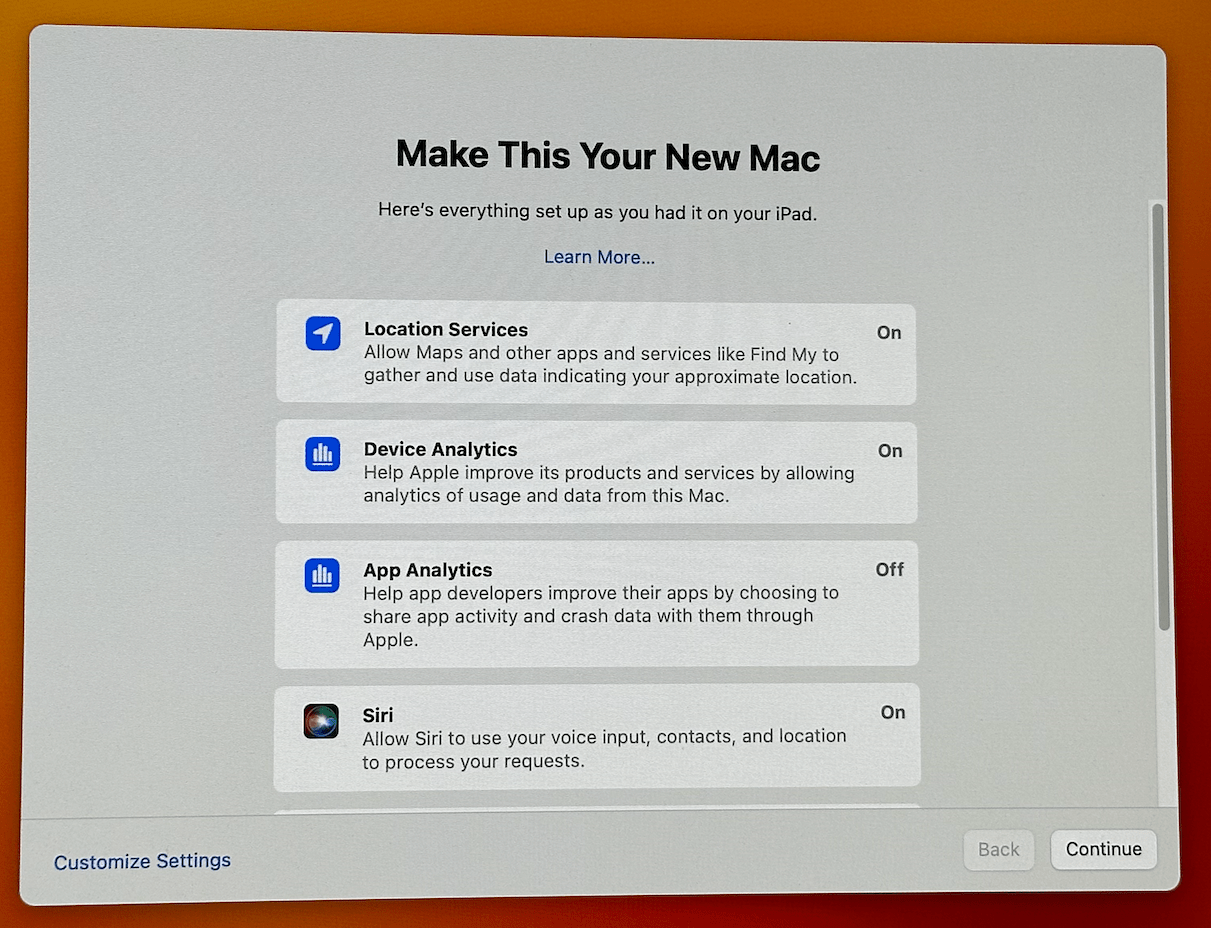
- If you already have Apple products, you will see settings from one of your devices. My new Mac mini chose my iPad. I chose Customize Settings so I could change some of these. After this, you will see an option for FileVault disk encryption. You may want to learn more about FileVault before you agree to encrypt your disk.
After you finish the setup process, your Mac mini will open to the familiar desktop view. If you have a lot of iCloud data, that may take some time to transfer to your new Mac, but otherwise, you are ready to start using your new mini.
Related articles
- Mac Set Up Stuck, Can’t Accept Terms and Conditions, Fix
- Is System Data Taking Up 50, 100 GB or More Storage on Mac? Learn Why and How to Clear It
- Mac Stuck On “Setting up your Mac”, Fix
- How To Reinstall Mac OS on Your Mac
- How to Set your Mac to Use Different Network Connections: Wi-Fi, Ethernet, etc.
- How to Back Up your Mac with Time Machine

