How to Suppress Background Noise in Zoom on Mac
Even though many have gone back to the office, Zoom meetings are still a regular part of many people’s work week. Especially if you are working from home, background noises can be a distraction for others in the meeting. In a pinch, you can always mute your mic, but that is inconvenient, and if you do this often enough, you will surely forget to unmute on occasion.
Zoom provides you with many settings that you can adjust, including audio. In this article, we will tell you about the different microphone and noise suppression settings in Zoom and when to use them. In order to use the noise suppression features, you should have Zoom desktop client 5.2.0 or higher.
The Audio menu in Zoom’s Settings
To open up the Audio settings menu in Zoom:
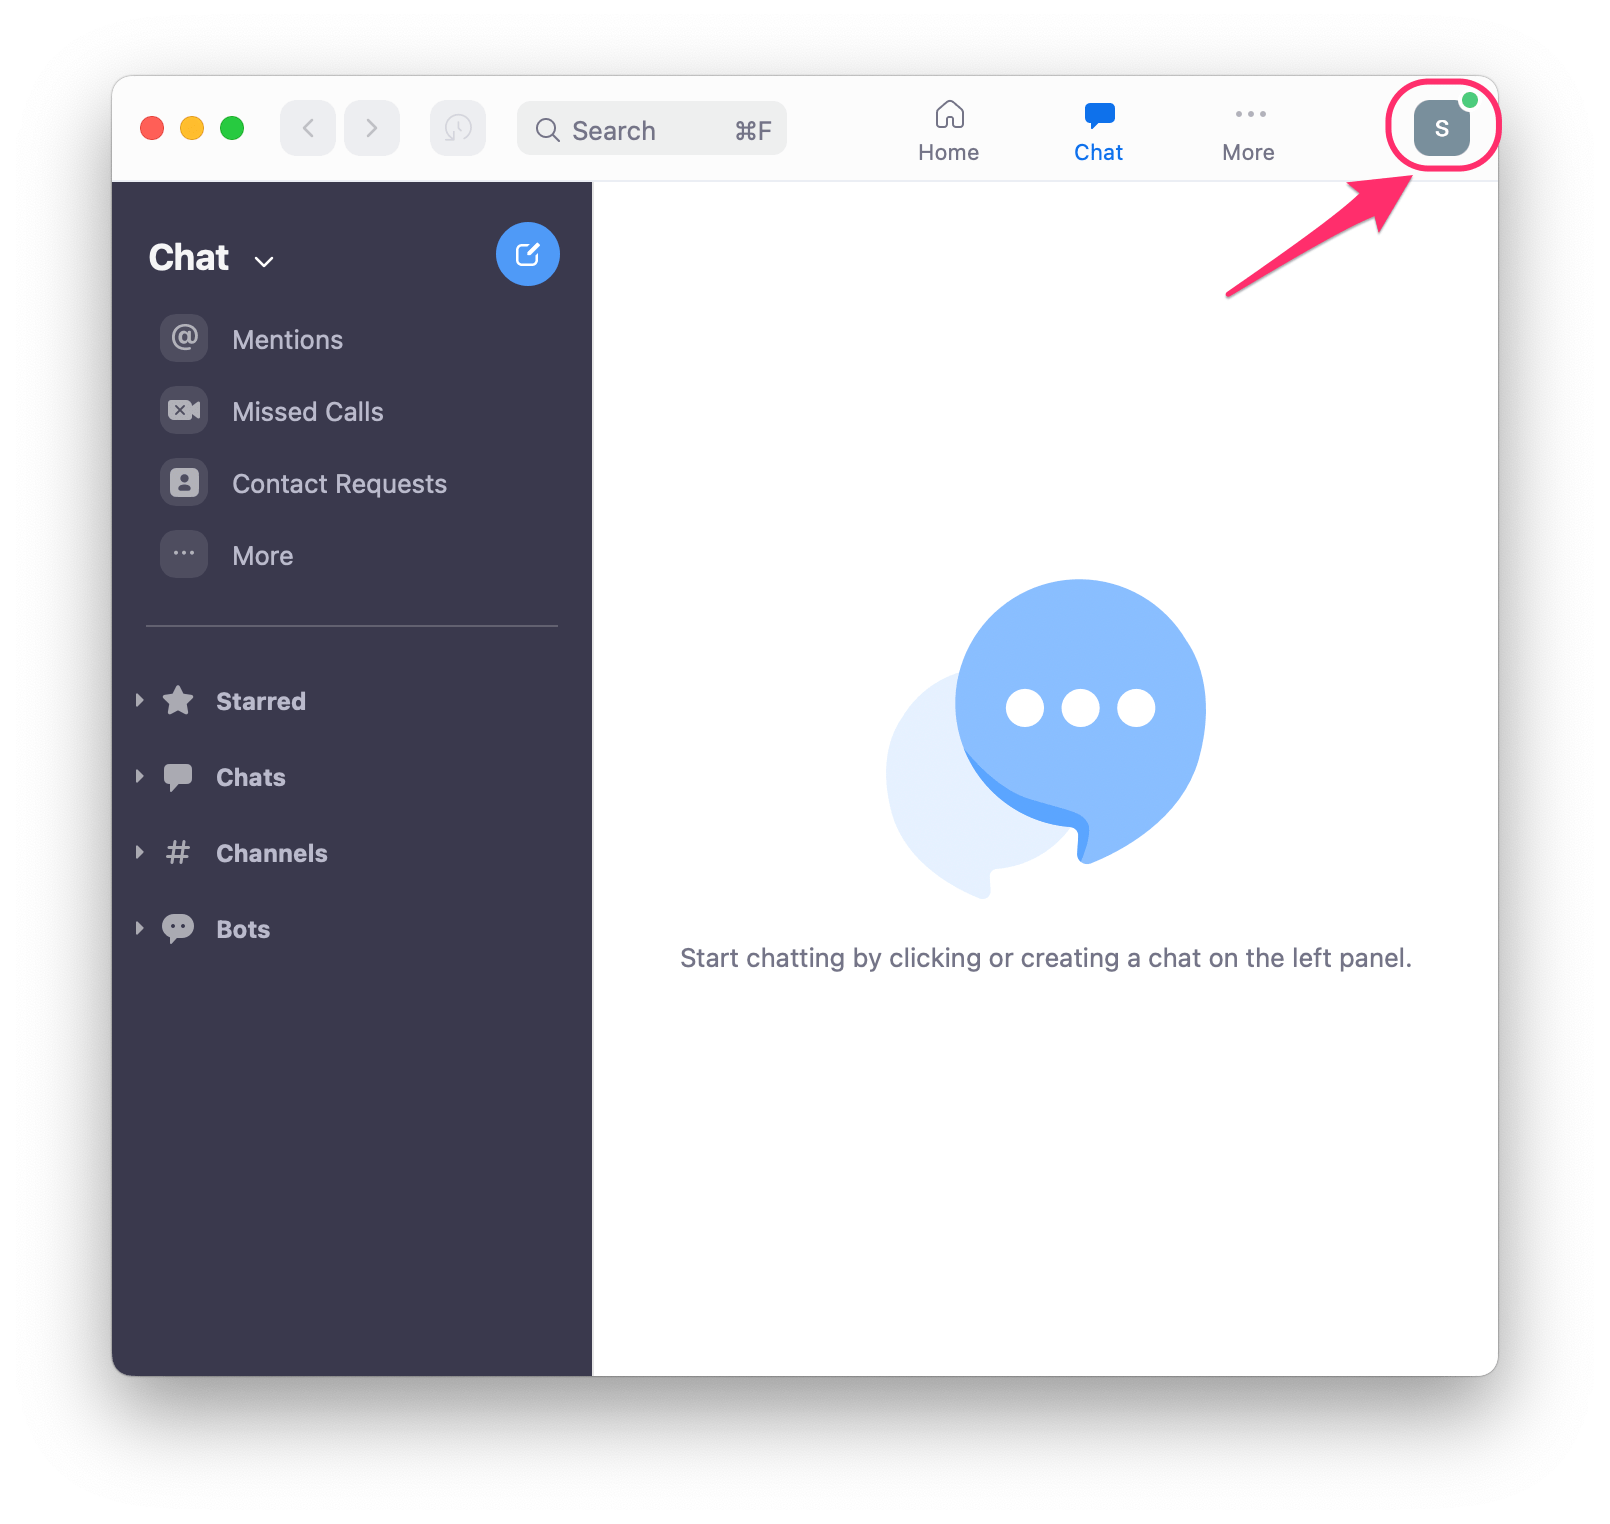
- Open up Zoom on your Mac, then click on your user logo (or profile picture) in the upper-right corner of the Zoom window.

- Scroll down and click on Settings, then select Audio from the left side menu.
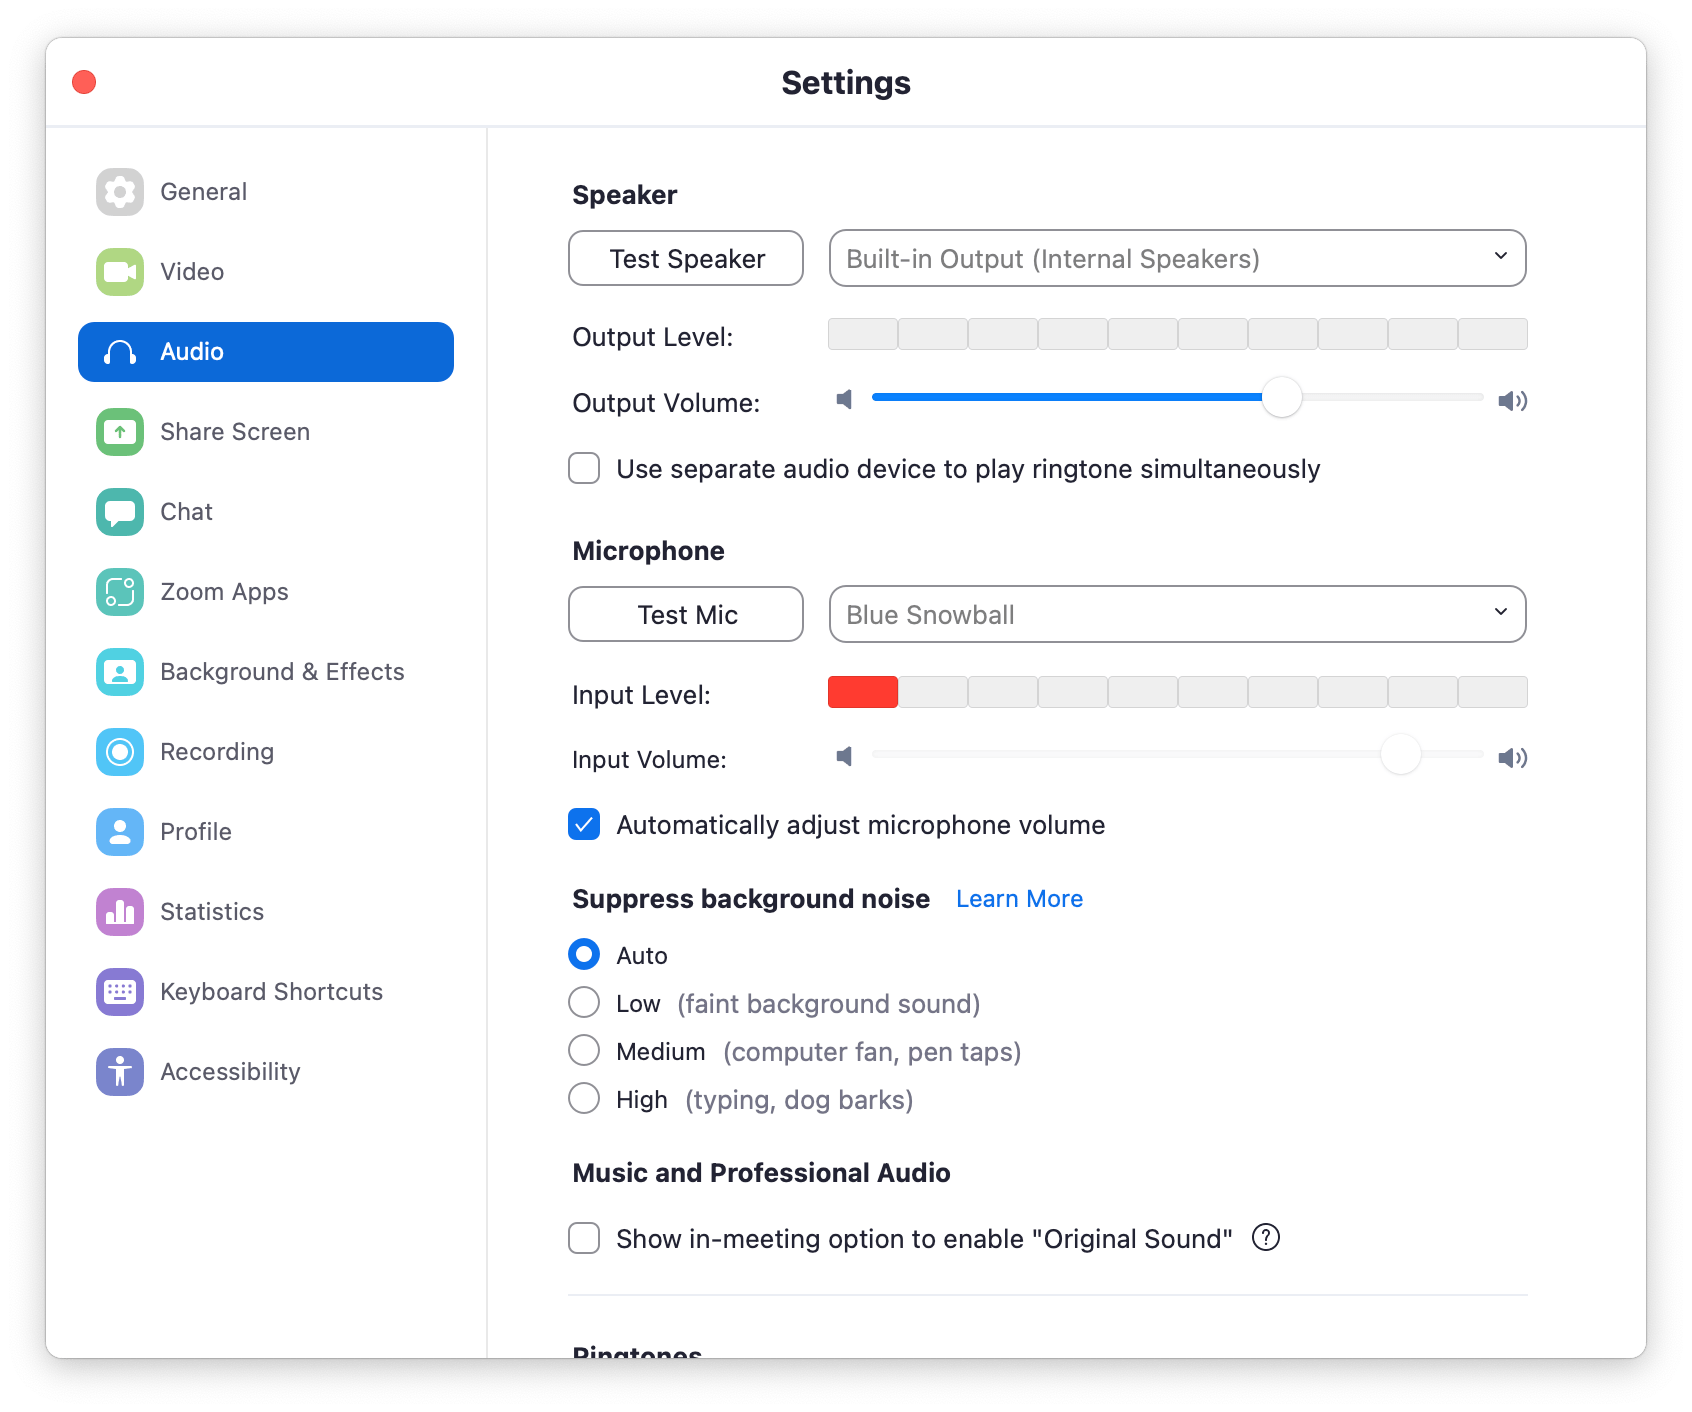
In the Audio menu, you will see sections titled: Speaker, Microphone, Suppress background noise, Music and Professional Audio and Ringtones. We will focus on the Microphone and Suppress background noise sections.

Microphone settings
Before we get to the noise suppression section, we’ll take a brief look at the microphone settings.
Under the Microphone section, you can:
- Choose your microphone from the dropdown menu.
- Test your mic by speaking into it and observing the Input Level indicator.
- Click on Test Mic to record yourself, and then listen to the recording.
- Either select “Automatically adjust microphone volume” or deselect it and choose your desired volume on the Input Volume selector.
Suppress background noise
In this section, you can choose from four noise suppression settings:
- Auto: This is the default setting for noise suppression. It generally provides a medium level of noise suppression. It does, however, adjust to the background noise and will increase the level of suppression if louder noises are detected. This should detect whether the background noise is music and if it is, it will not be blocked.
- Low: This setting will allow the most background noise through. It will block some faint noise. If you want your music to be heard through Zoom, this is a good option. If you are trying to play music with high fidelity, you should select “Enable Original Audio” from the advanced audio settings. (Go to the bottom of the window and click on Advanced.)
- Medium: This setting is great for the usual office background noises: computer fans, tapping pens, etc.
- High: Use this setting if you have particularly loud noises in your office environment. If you are at home and have a dog that likes to bark while you are in a meeting, or if you are a fan of those clacky mechanical keyboards, you may want to use this setting.
Test your chosen setting
One of the nice features of the Zoom audio settings menu is that you can try out the effects of the different noise suppression settings.
- With the Zoom audio settings menu open, select one of the background noise suppression options.
- Under the Microphone section, watch the Input Level indicator as you make a noise. Try out the various noise suppression settings to see which one best blocks the noise.
Related articles


