How to Customize Your iPhone Lock Screen in iOS 16
The latest iOS includes several new and useful features. Here we will focus on the one that stands out the most; as soon as iOS 16 is finished installing, you will notice changes to the way your Lock Screen looks. With the new Lock Screen, you can add widgets, change the font and explore new wallpaper options. You will also see a new look for notifications and a media player that includes album art.
To use these new features, first, update your iPhone to iOS 16 by going to Settings > General > Software Update and selecting iOS 16.
Add a customized Lock Screen
Choose a wallpaper
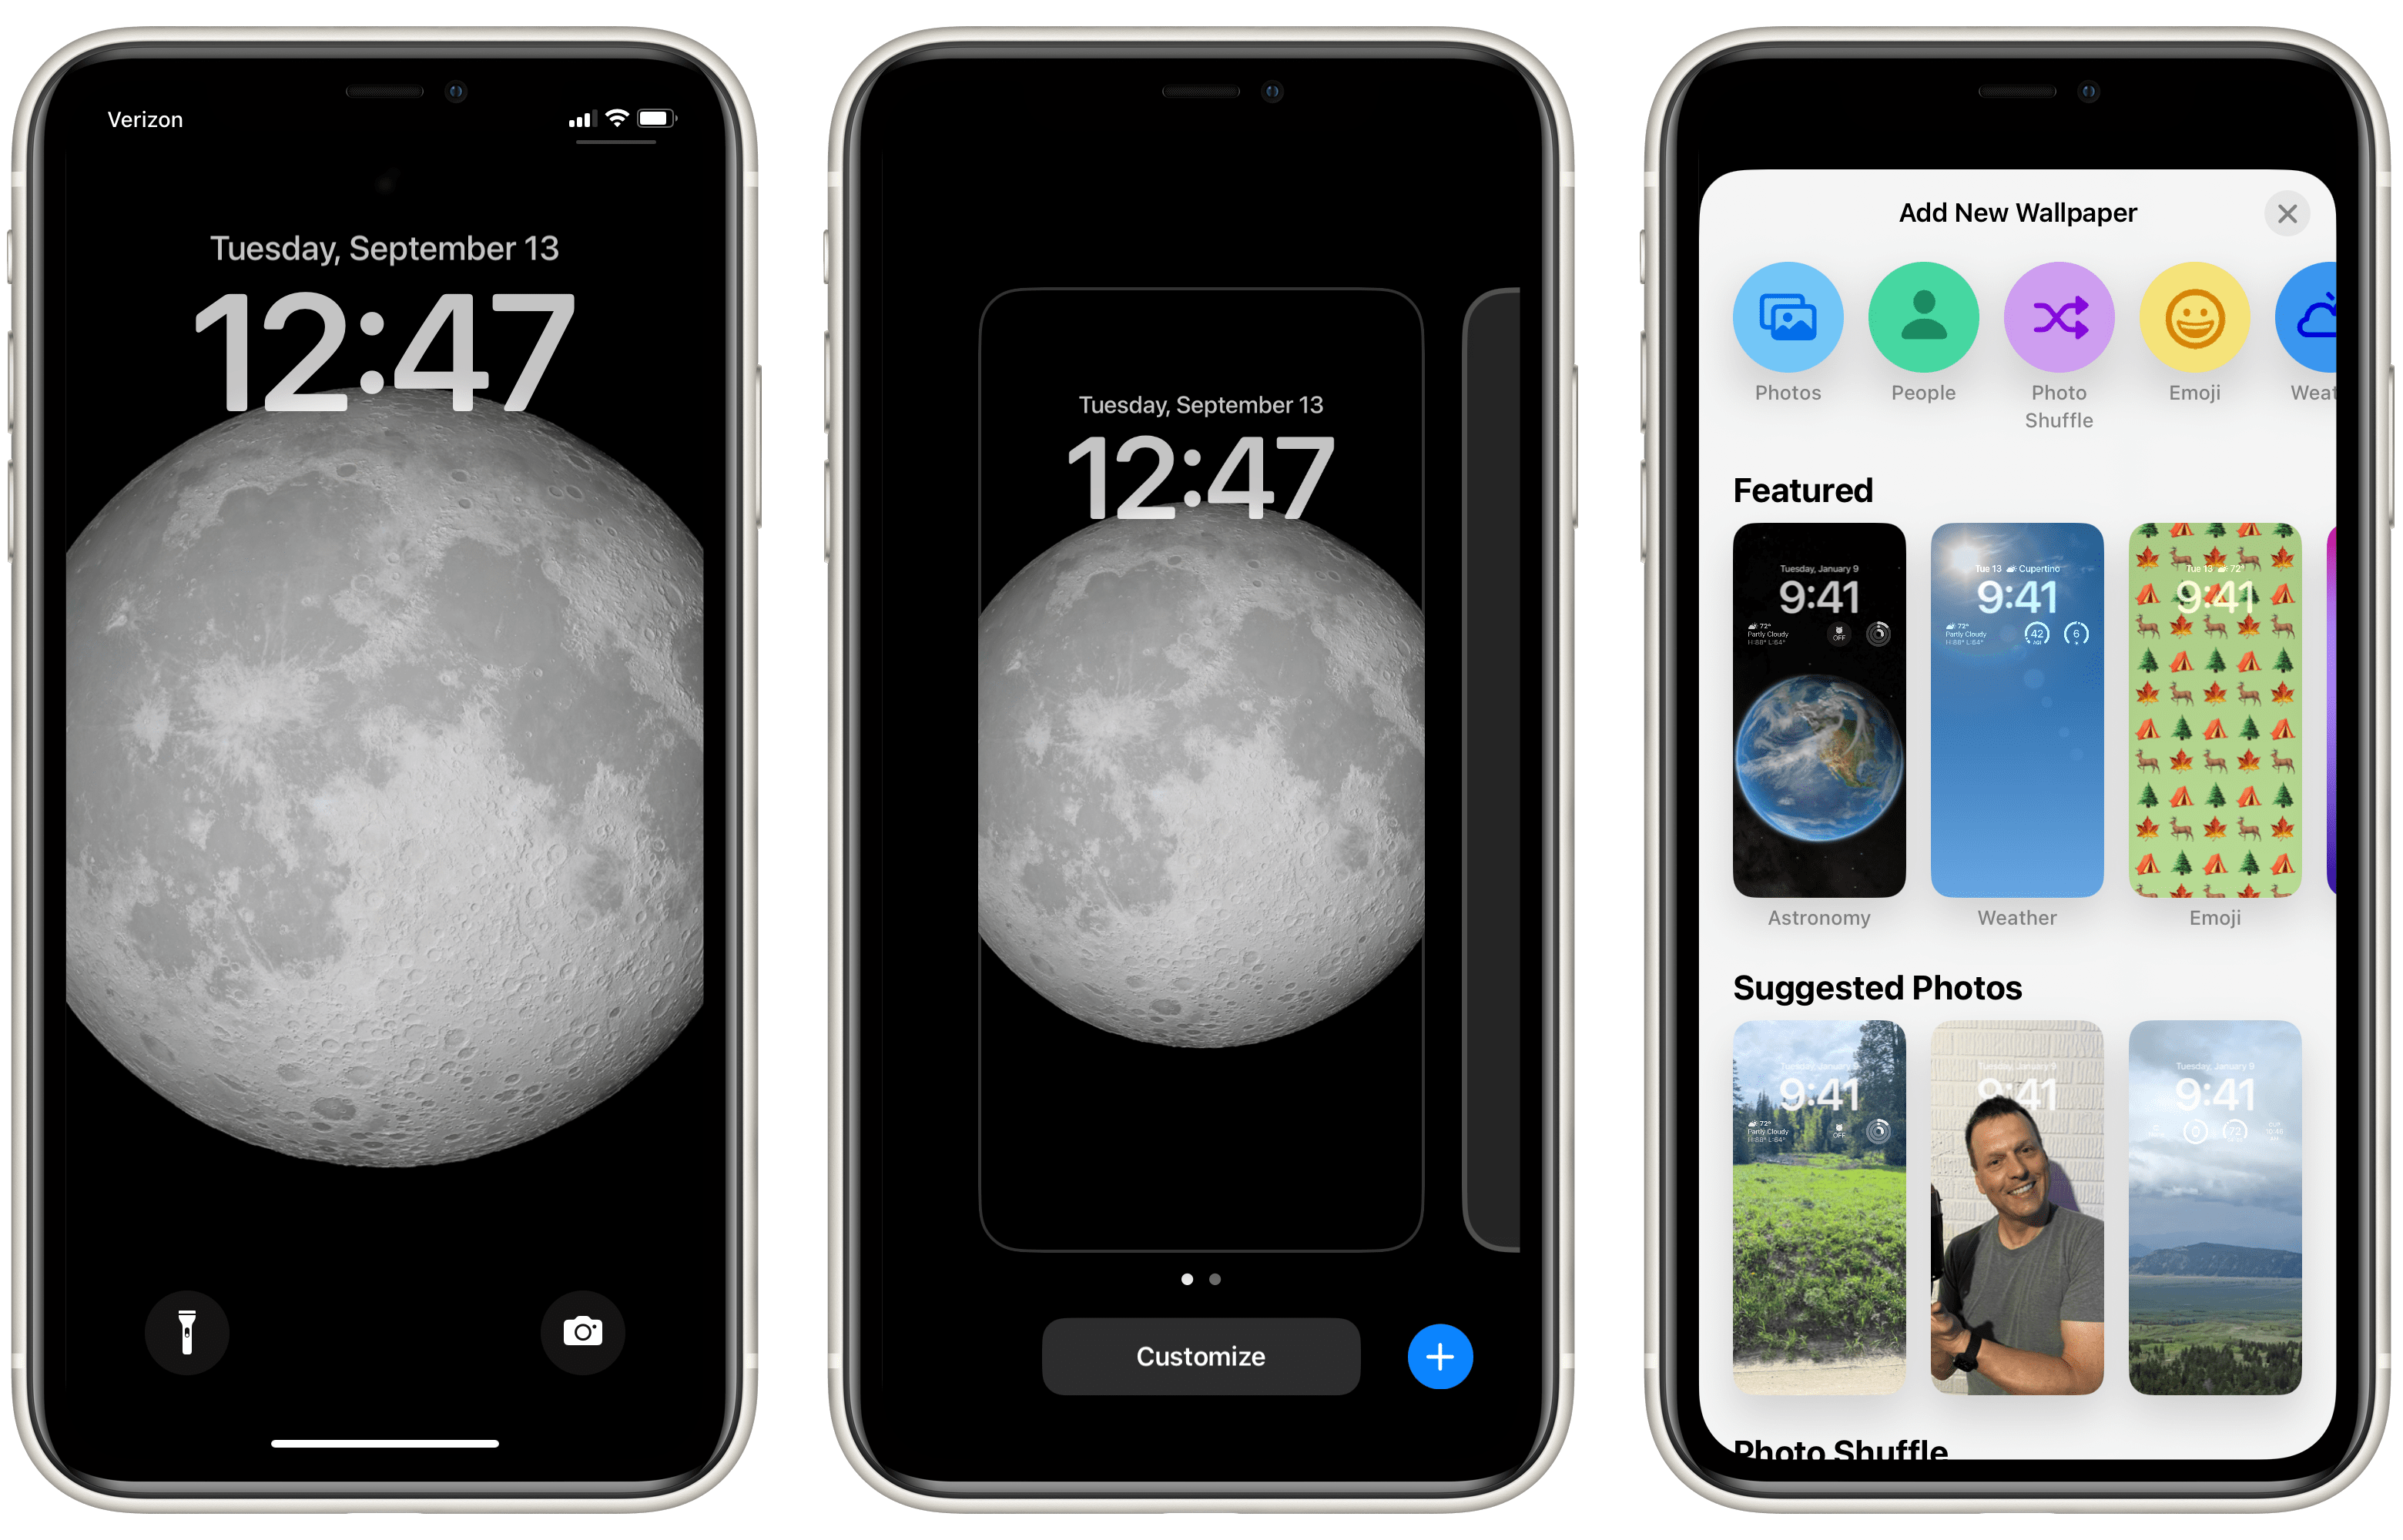
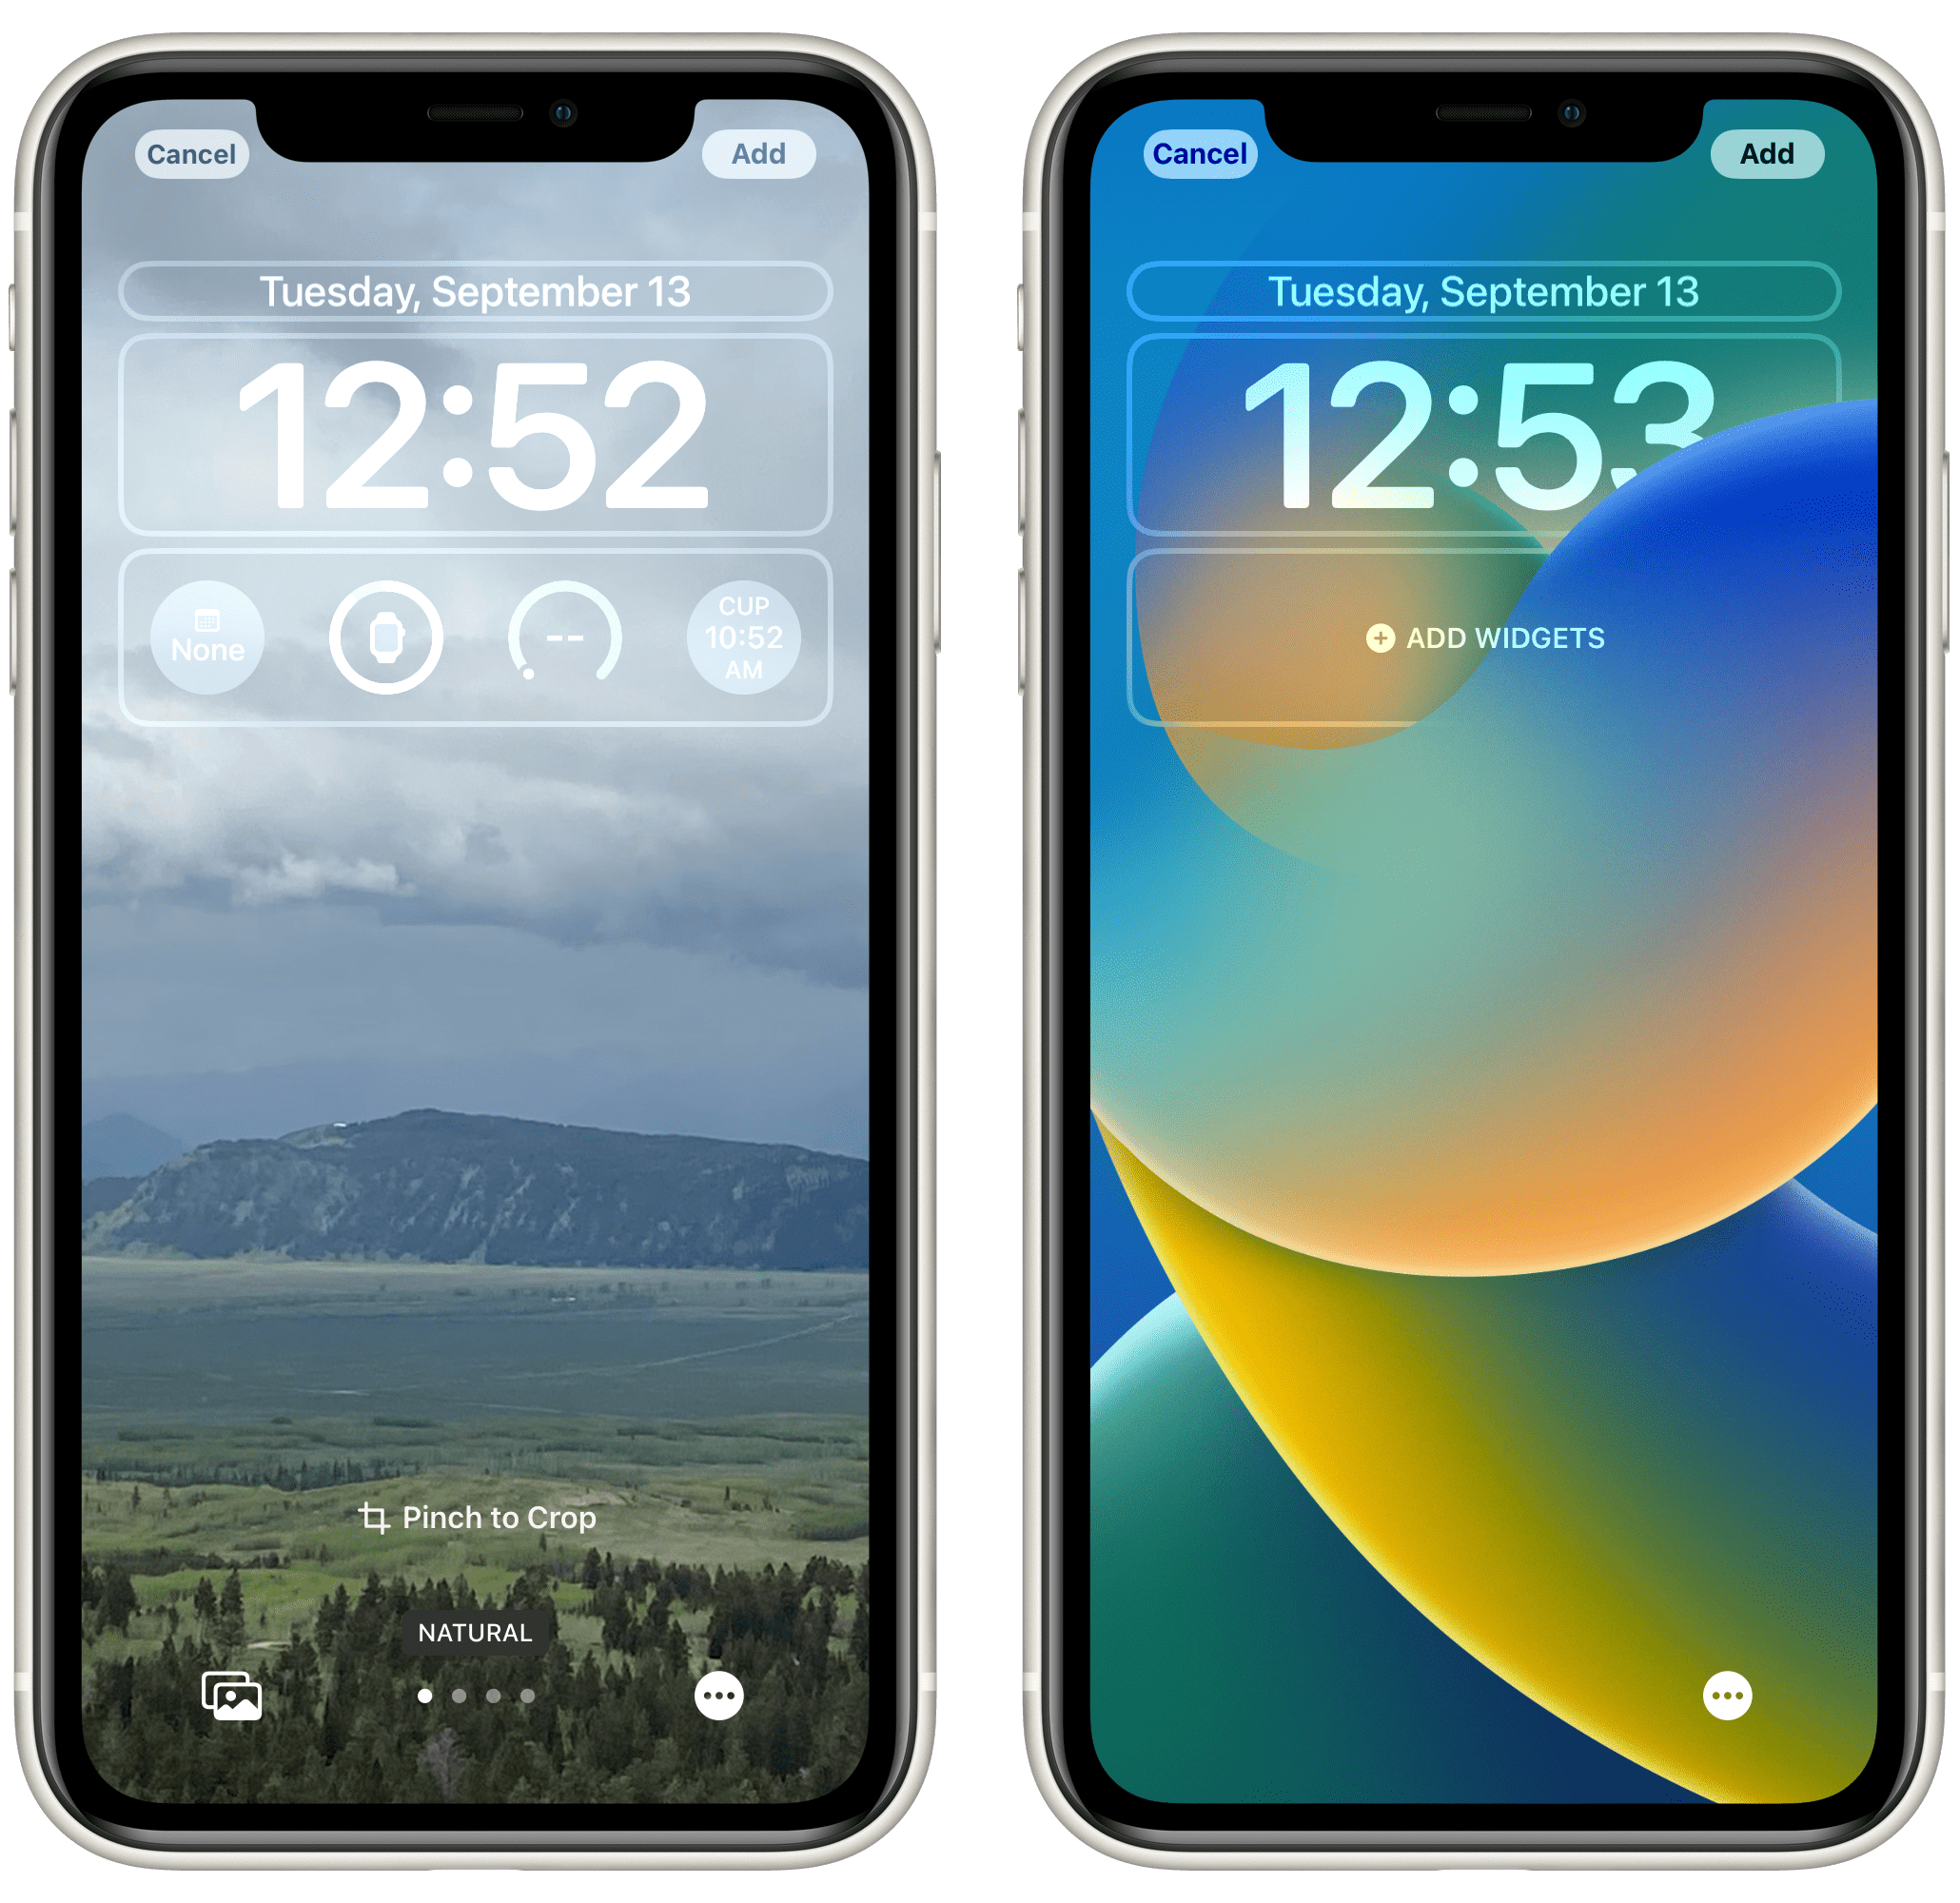
- Press your finger on your iPhone’s Lock Screen until a “Customize” screen shows up.
- Tap on the blue plus button to add a new Lock Screen.
- Choose your wallpaper. Scroll down to see all of the options.
- Some of the wallpaper choices come with widgets, for others, you can add widgets. All can be customized.
Add and customize widgets
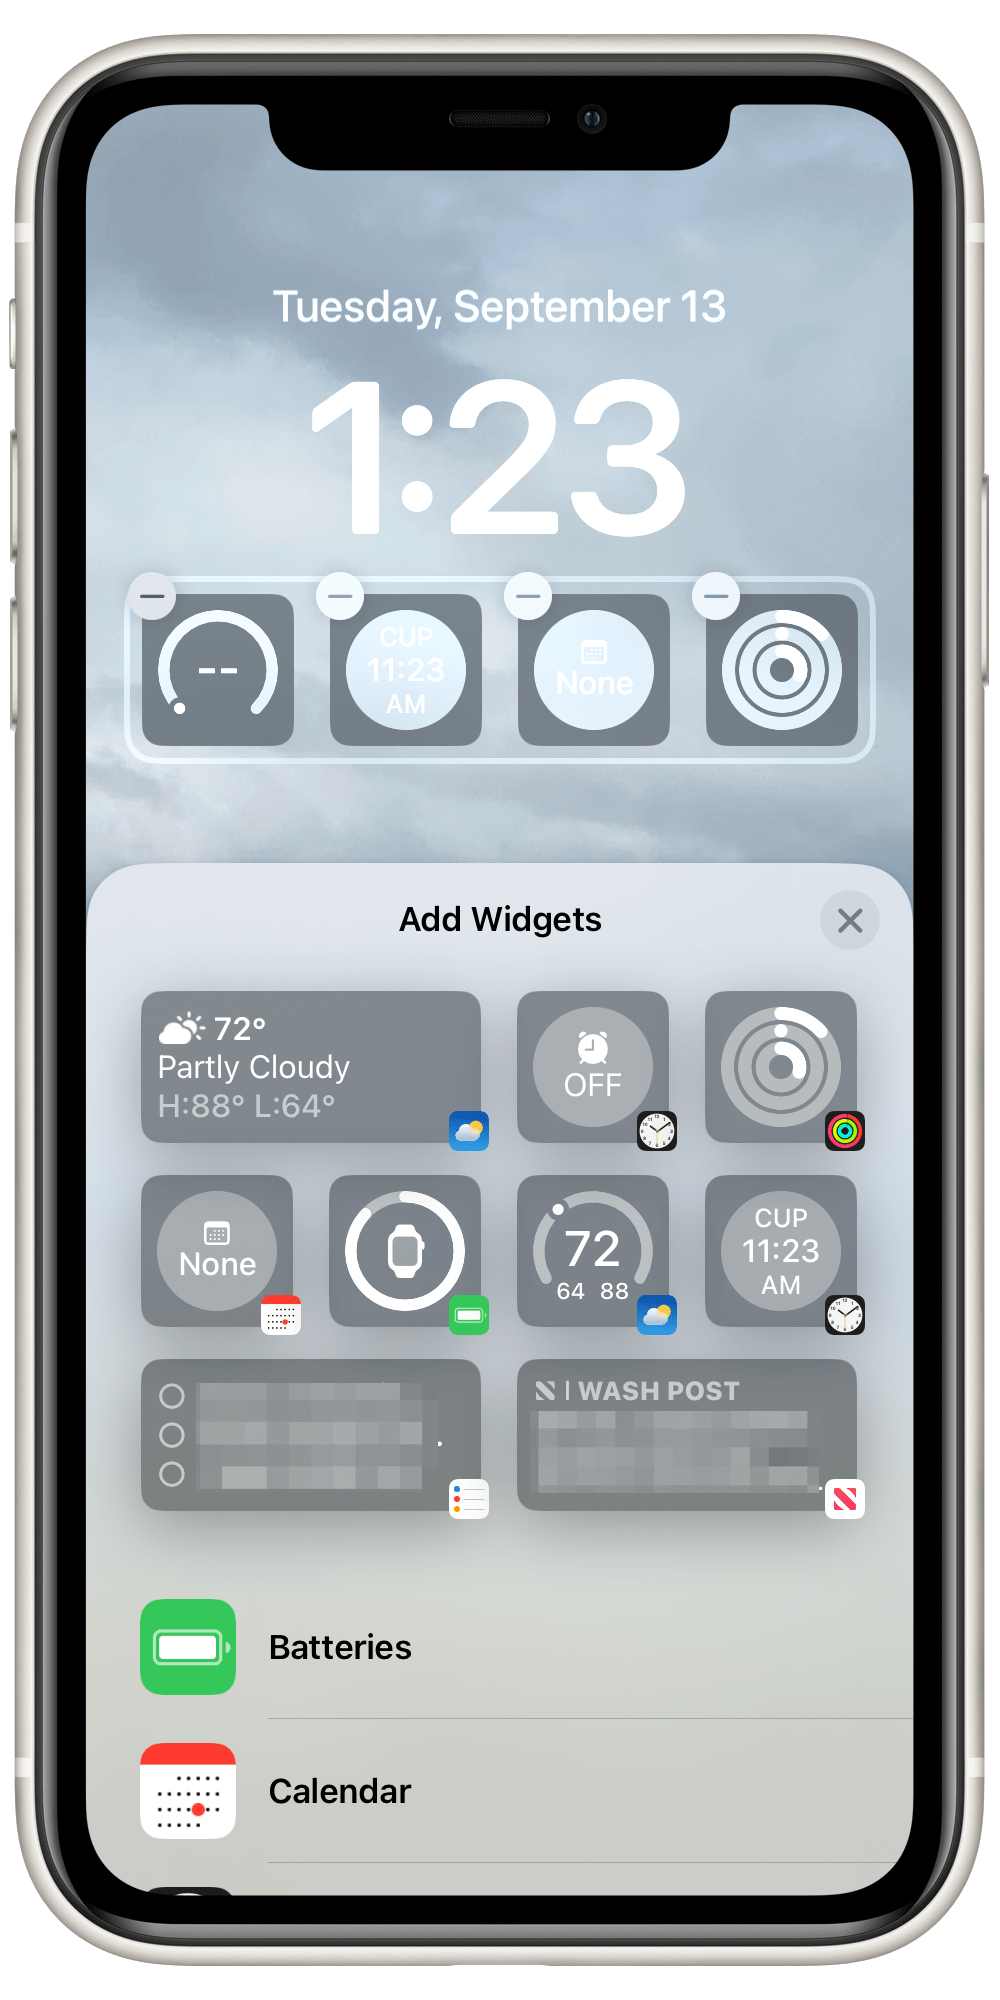
- With your new Lock Screen wallpaper open, tap in the box with widgets or on Add Widgets, located underneath the time.
- Tap on one of the widgets under Add Widgets to add it. If you don’t have enough space, you will need to first remove one or more widgets by tapping on its minus sign. For more widget options, tap on an item from the list below the suggested widgets. For example, if you scroll down and tap on Weather, you will see eight different options for Weather widgets.
- You can also customize the widget located above the time. Tap on it to see your widget options.
Change the font
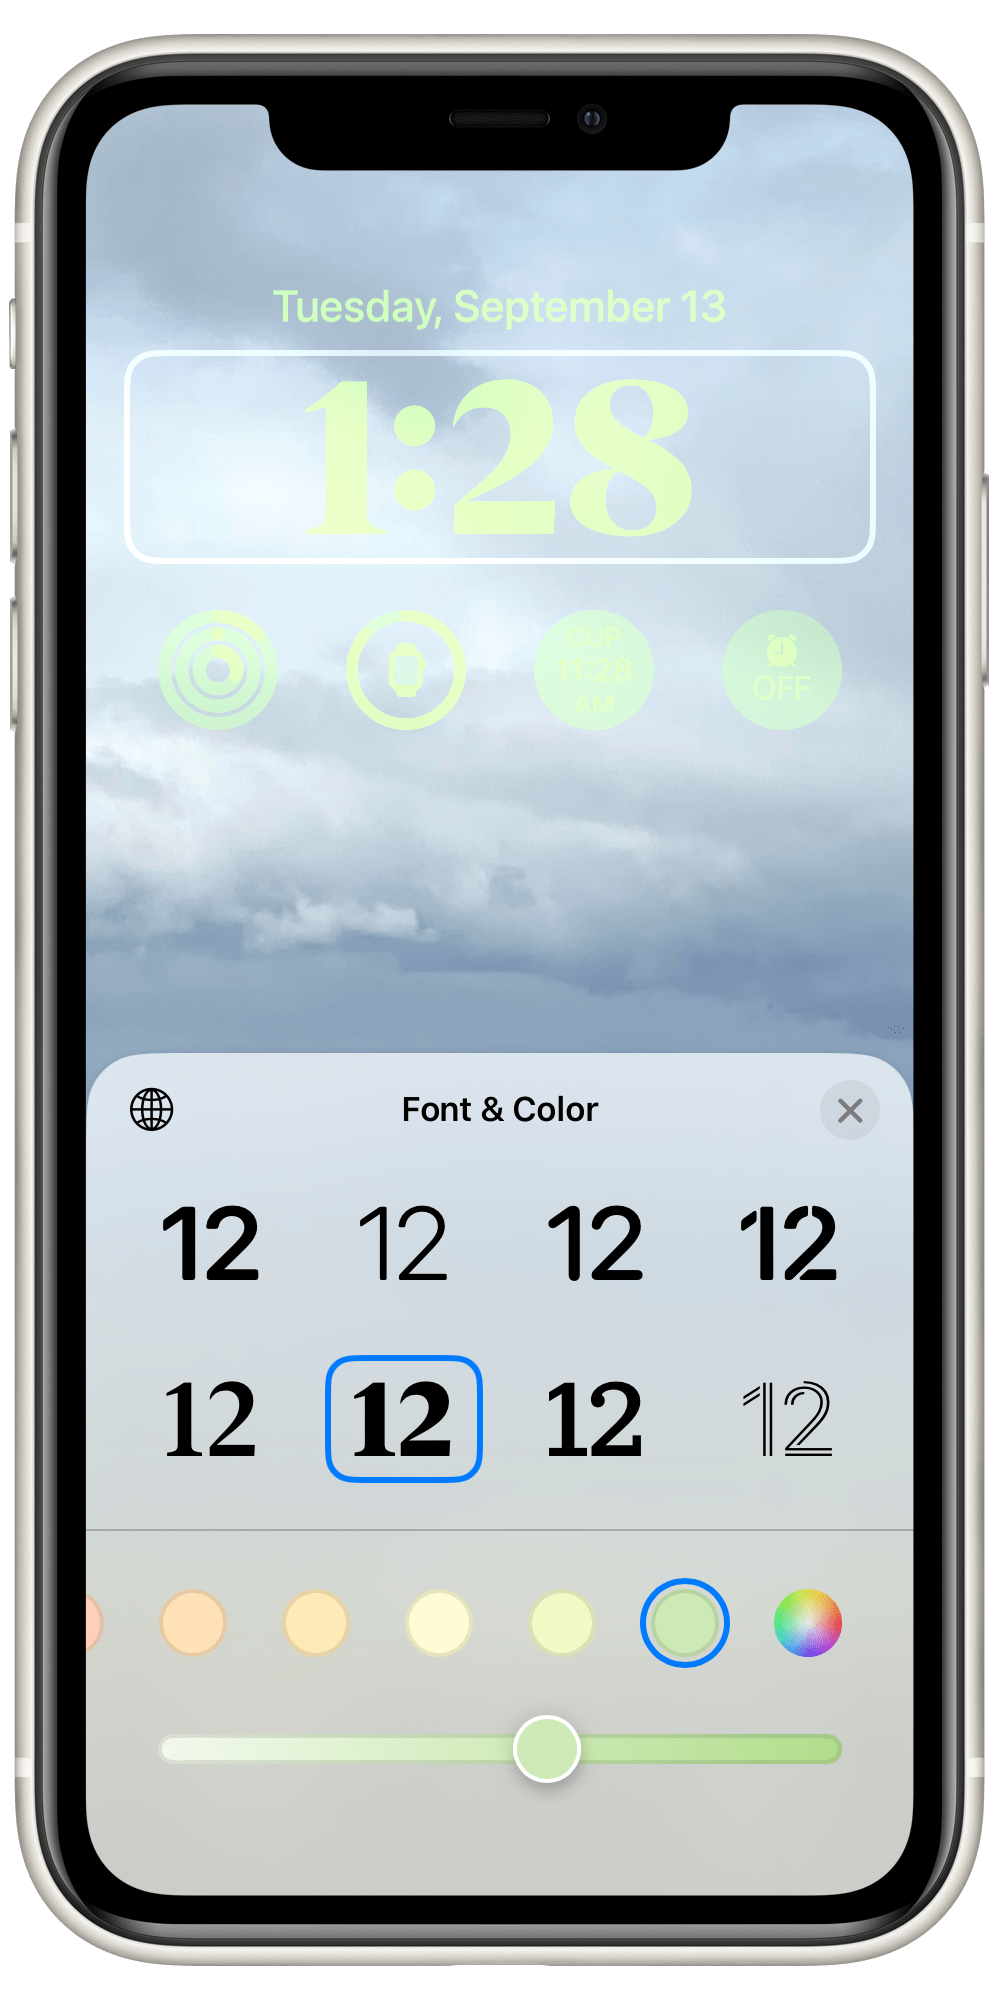
- Tap on the time. You will be able to customize the font and color.
- Tap on your preferred font, then tap on a color. Scroll left and right to see all colors. Once you have tapped on a color disc, you can refine the color using the slider.
Other customizations
Before you finish your customized Lock Screen, you can do a few other things to alter its appearance. Not all options are available for all wallpapers.
- You may see “Pinch to Crop.” This means you can zoom in on your wallpaper image using two fingers.
- If you are using a photo, you will see the word “Natural” above the dots near the bottom of the screen. Swipe left and right to see your wallpaper in Natural, Black & White, Duotone or Color Wash. For other wallpapers, you may see other options above the row of dots at the bottom.
- Tap on the three dots near the bottom-right of the screen. For a photo, you can choose Depth Effect (for certain wallpapers) or Style Color (for Duotone and Color Wash options). For other wallpapers, you may have other options available.
Add your new Lock Screen
Don’t forget to tap on Add after you have finished customizing your Lock Screen. Otherwise, your new screen will be lost, and you will need to start over.
- After you finish, tap Add in the upper-right corner of your screen. Tap Done if you are editing a Lock Screen you have already created.
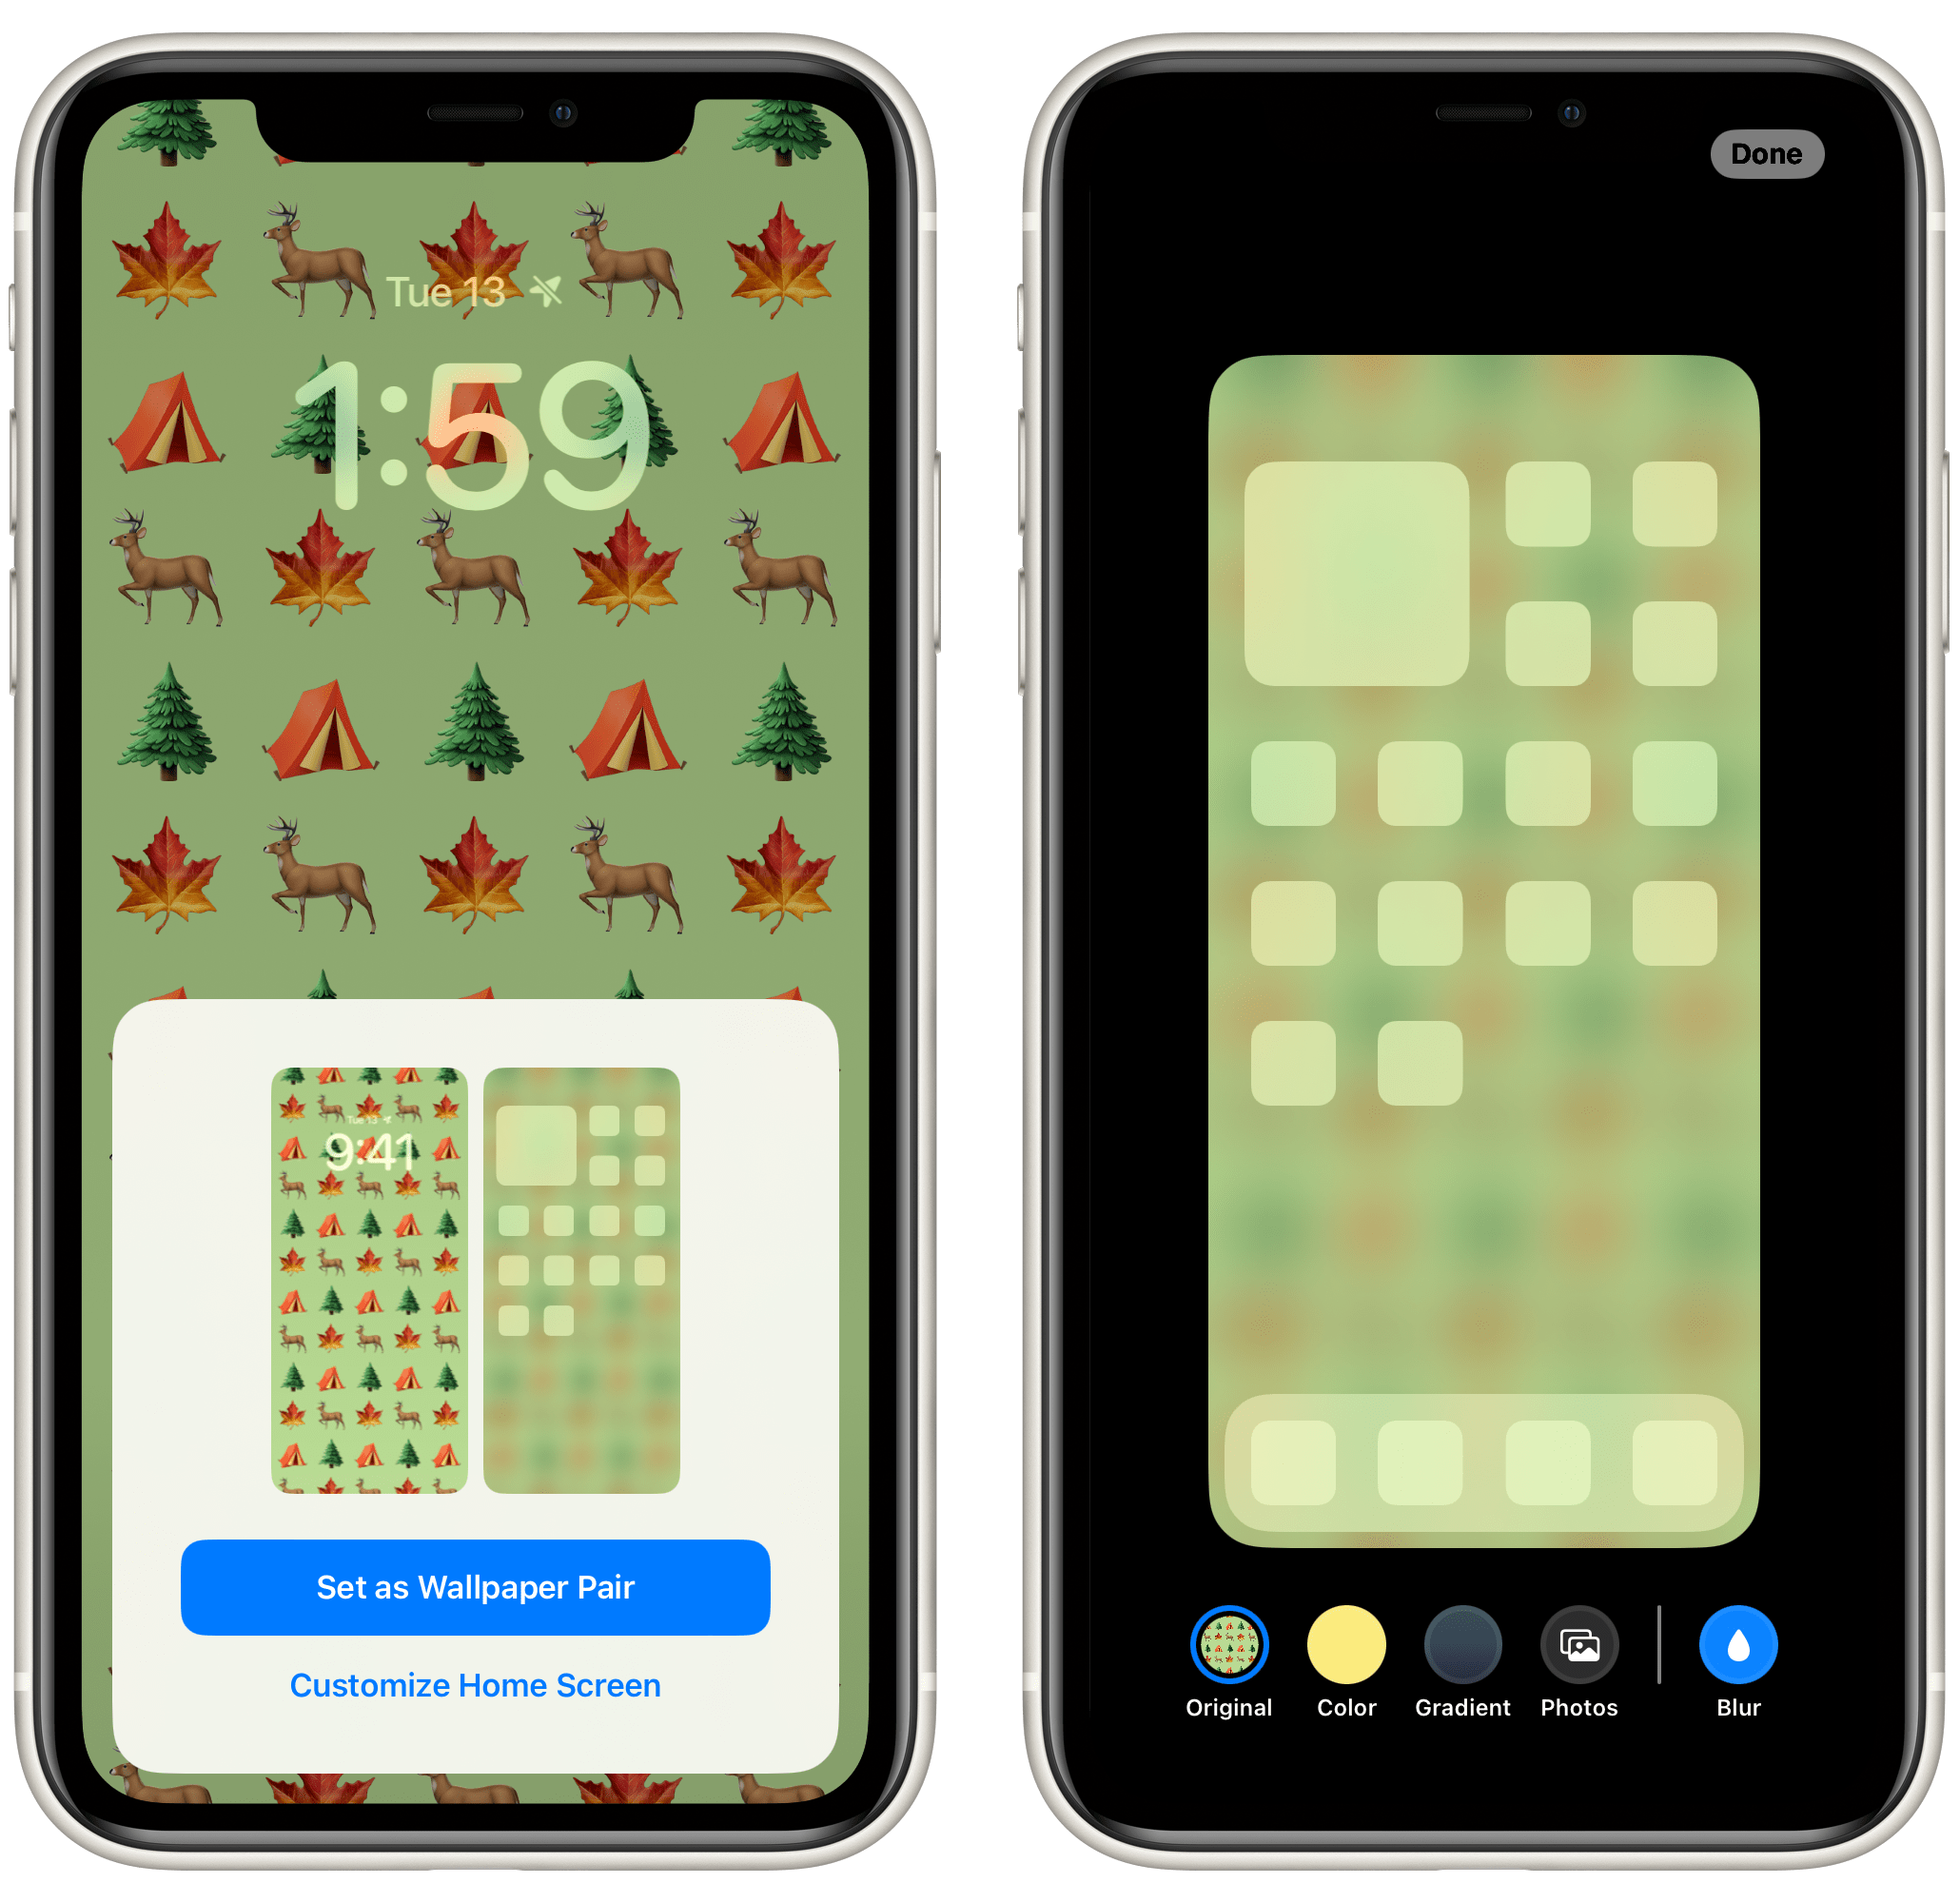
- You will see a popup with the options: “Set as Wallpaper Pair” and “Customize Home Screen.”
- Set as Wallpaper Pair: The popup shows a preview of what the Home Screen will look like — a blurry version of the Lock Screen. If you like it, choose Set as Wallpaper Pair.
- Customize Home Screen: If you don’t like the wallpaper pair option, you can choose a different Home Screen. If you tap on Color or Gradient, you can tap on it again to choose a different color. You can also choose a photo or tap on Blur to use your Lock Screen image without the blur.
- Tap on Done after you choose your Home Screen.
Additional notes:
- To make use of some of the widgets on your Lock Screen, you’ll need to turn on Location Services, which may reduce your battery life.
- You can use the steps in the article to make many different Lock Screens, and anytime you want to switch Lock Screens, just press on the Lock Screen to open up your Lock Screen options and choose another one.
We created a video version of this article:
Related articles

