What is FileVault and How to Turn It On and Off
FileVault is a disk encryption feature to help protect the data stored on your startup disk. How this works is that your content is converted into code in real time that cannot be deciphered easily by those who don’t have authorization. This feature would be especially critical in the unfortunate case of your Mac being lost or stolen. FileVault can also protect you from malicious apps.

FileVault explained: How it works
You may have many documents and other important data stored on your startup disk. This is where FileVault comes in. FileVault uses an XTS-AES-128 encryption algorithm with a 256-bit key to prevent your files from being seen or copied by unauthorized users. When you use FileVault, you can have peace of mind.
Apple first introduced FileVault with Mac OS X 10.3 Panther in 2003. Originally, it was limited to encrypting a user’s home directory. It was using a disk image approach. This one is now referred to as Legacy FileVault. It is still available in earlier versions of macOS. However, since then, there have been significant improvements. Now you can encrypt the entire startup volume.
So what happens when this is enabled? Your startup disk is encrypted. This means that even if someone stole your hard disk, the data would be unreadable. To make it readable, you would need to know the computer password, iCloud details or the recovery key.
How to Enable or Disable FileVault
By default, this feature is disabled. When you turn on FileVault, there may be a performance hit, but it is likely that you won’t notice any difference. You need to be an administrator to enable or disable it.
Turn on or off FileVault on macOS Ventura or later
- Open System Settings.
- From the left sidebar, click Privacy & Security.
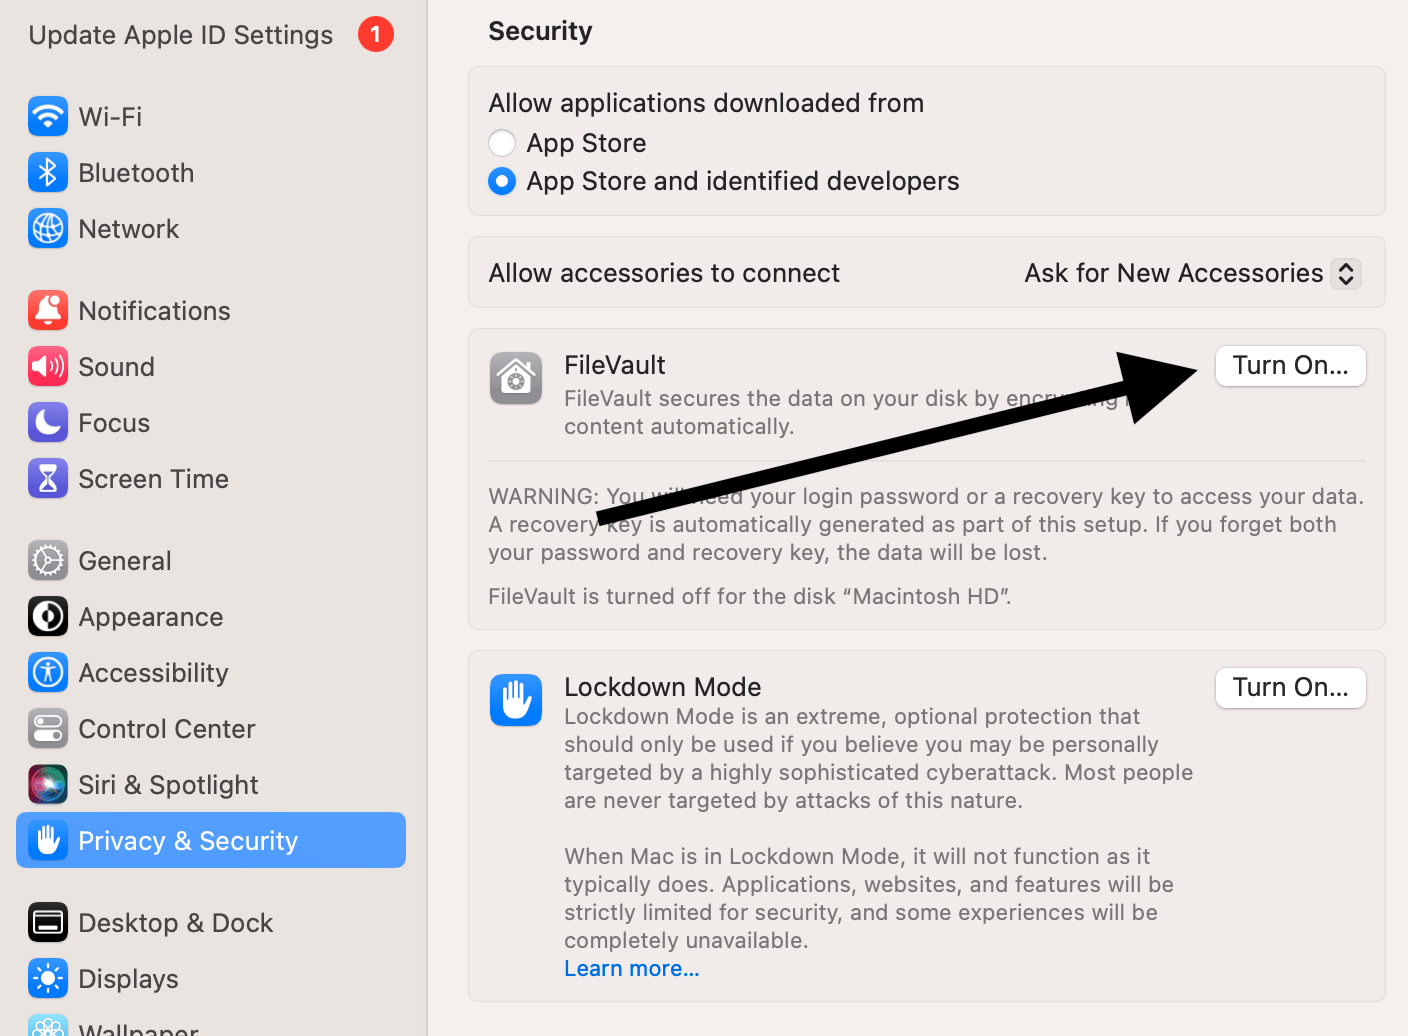
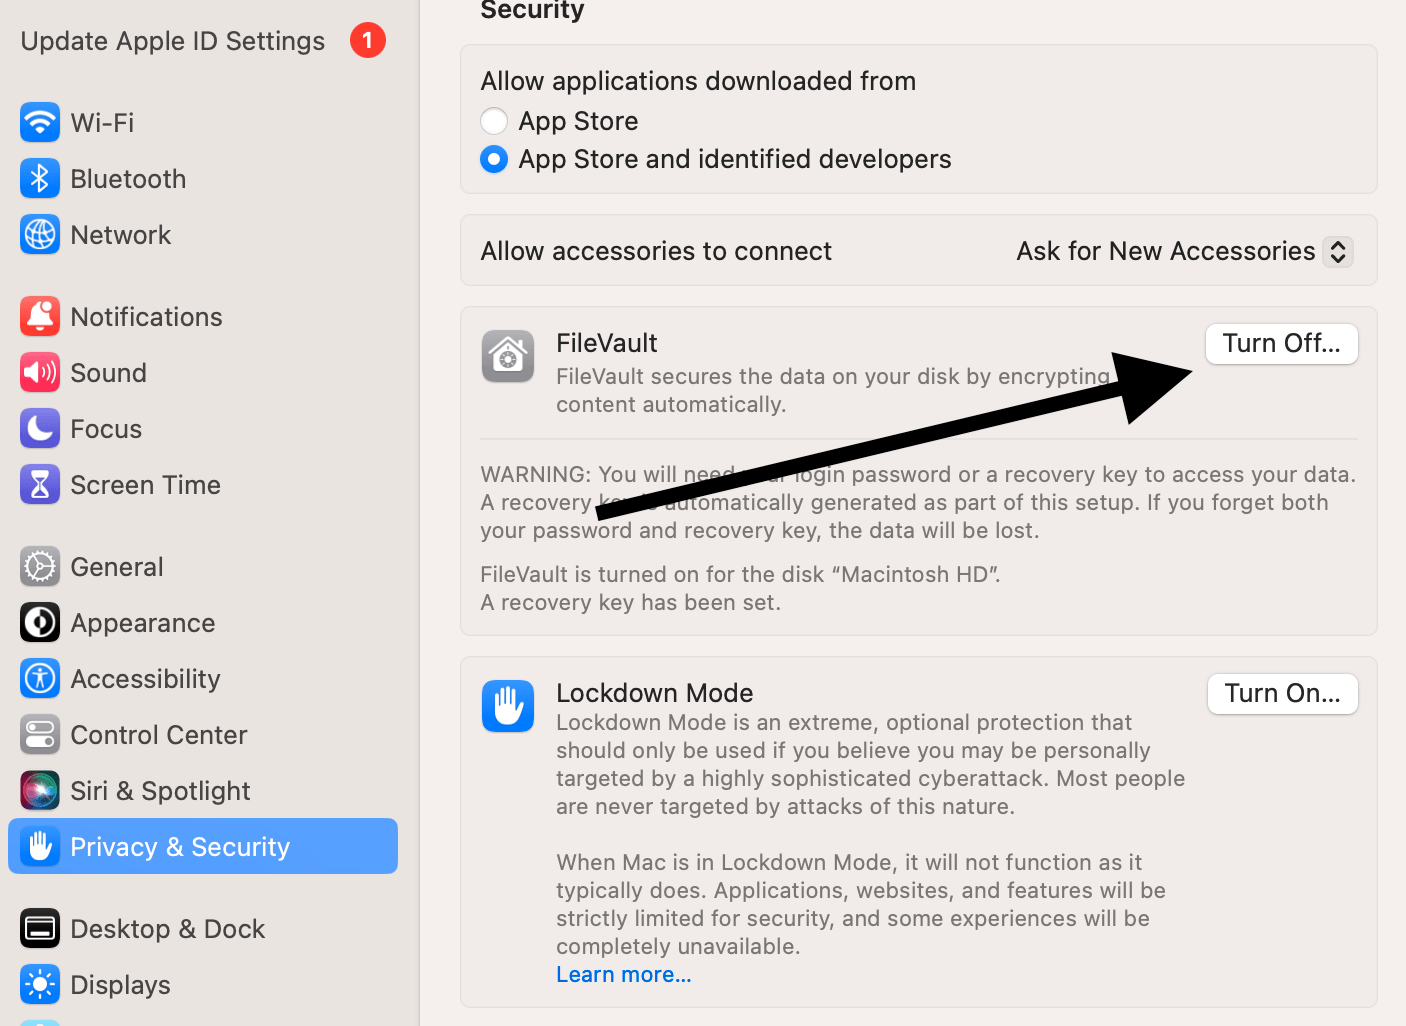
- Scroll down and find the FileVault section. Then:
- If you want to turn it on, click the Turn On button. Then you will be asked to allow your iCloud account to unlock or reset your password if needed. If you do not want to use iCloud, you can also create a Recovery Key. If you use iCloud, this is the simpler choice – there is no key to remember. Select one and click Continue. Then the encryption process will start.

- If you want to turn it off, click the Turn Off button. Then you will be asked to enter your (computer) password. Enter it. Then a popup will appear asking you if you are sure you want to turn it off. If you are sure, click Turn Off FileVault.

If you want to turn it off, your data will be decrypted. Just like turning with turning it on, depending on the size of your data, turning it off can also take some time. However, you can still use your Mac while the process is completed.
Turn off FileVault for macOS Monterey and earlier
- Click System Preferences.
- Click Security & Privacy.
- Click FileVault.
- Unlock the section to make changes by clicking the Lock icon. You will need to enter your password.
- Then turn on or off FileVault.
FileVault recovery key
Your FileVault recovery key consists of letters and numbers, like a password, created by your Mac. This can be used to log in or access your documents or other data. It is essential to keep this somewhere safe. If you lose this key and forget your login password, your content will be lost. We previously wrote about how you could find your recovery key and what options you have if you forgot it.
Can’t turn on FileVault?
Are you trying to enable FileVault, but it is not working? This may occur if formatting information is damaged. You will need to run Disk Utility to fix any possible formatting errors. Disk Utility can be found in the Utilities folder of the Applications folder. Double-click to open the app and then run First Aid.
Related articles


