How to Add or Remove Columns in Finder
Finder is the file manager for macOS. In Finder, you can look for your files and learn basic information about each file. When you are using the list view in Finder, the data you can see at a glance is determined by the columns in the Finder window. In this article, we’ll tell you how you can add and remove columns from the view.
The list view in Finder
Finder has four different views that you can use while you are browsing your files: icon, list, column and gallery. You can switch to a different view using the buttons in the Finder toolbar. They each have their advantages, and which one you prefer to use is up to personal preference.
The main advantage of the list view is that you can view information about all of the files in a particular folder all at once. For example, you may be looking for a particular file. Maybe you don’t know or remember its name, but you know the folder it is in, the file type and the approximate date you last opened the file. The list view can help you quickly narrow down the possibilities without clicking on many different files to see what they’re about.
Add or remove a column from the list view
Adding and removing columns from the list view is easy. This lets you really customize what you see when you use Finder. Some file information may be completely irrelevant to you; you can remove that column. There also may be information you can’t currently see that could really help you find the files you’re looking for.
To customize the columns you see in Finder list view for a particular folder:
- Open Finder and choose a folder to view.
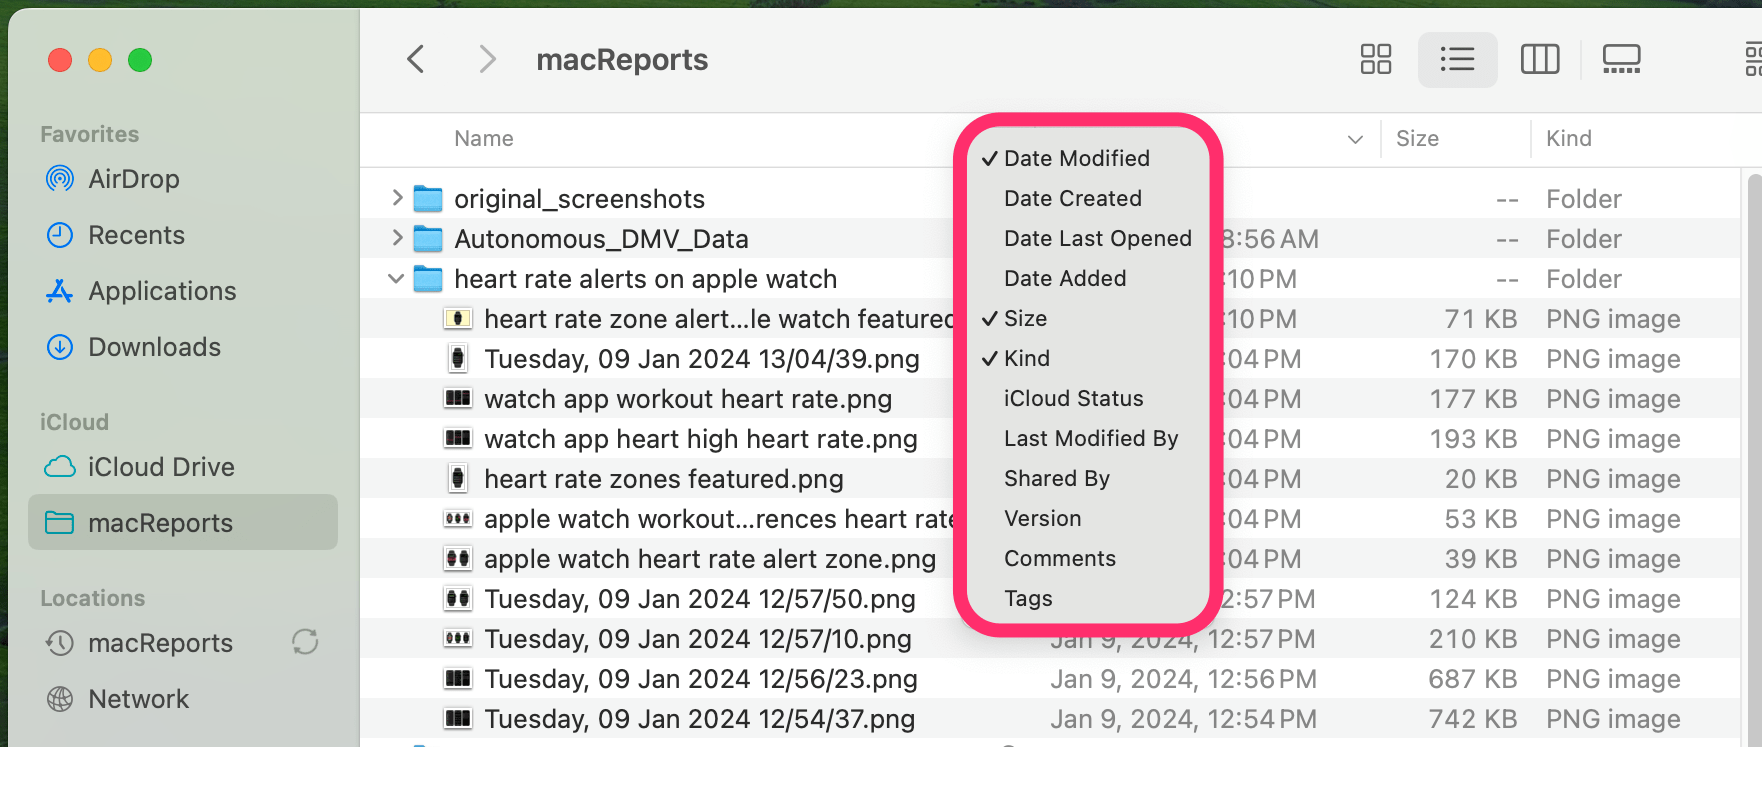
- Right-click or Control-click in the header row, which says Name, Size, etc.
- A menu of options will appear, and you can click on options to either select or deselect them. After you make a change, the menu will disappear so you will need to right-click again for each change you want to make.
Now, if you want to use the same view, including the set of columns you are using, you will need to set the view as the default. See “The default view for folders” section below for more details.
Rearrange columns
After you get all of the columns you want in Finder, you may want to rearrange them. For example, when you are using Finder, the window size is sometimes too small to see all of the columns. You can reorder the columns by clicking on the column header and dragging the column to another position.
Other tips for Finder list view
The Path Bar
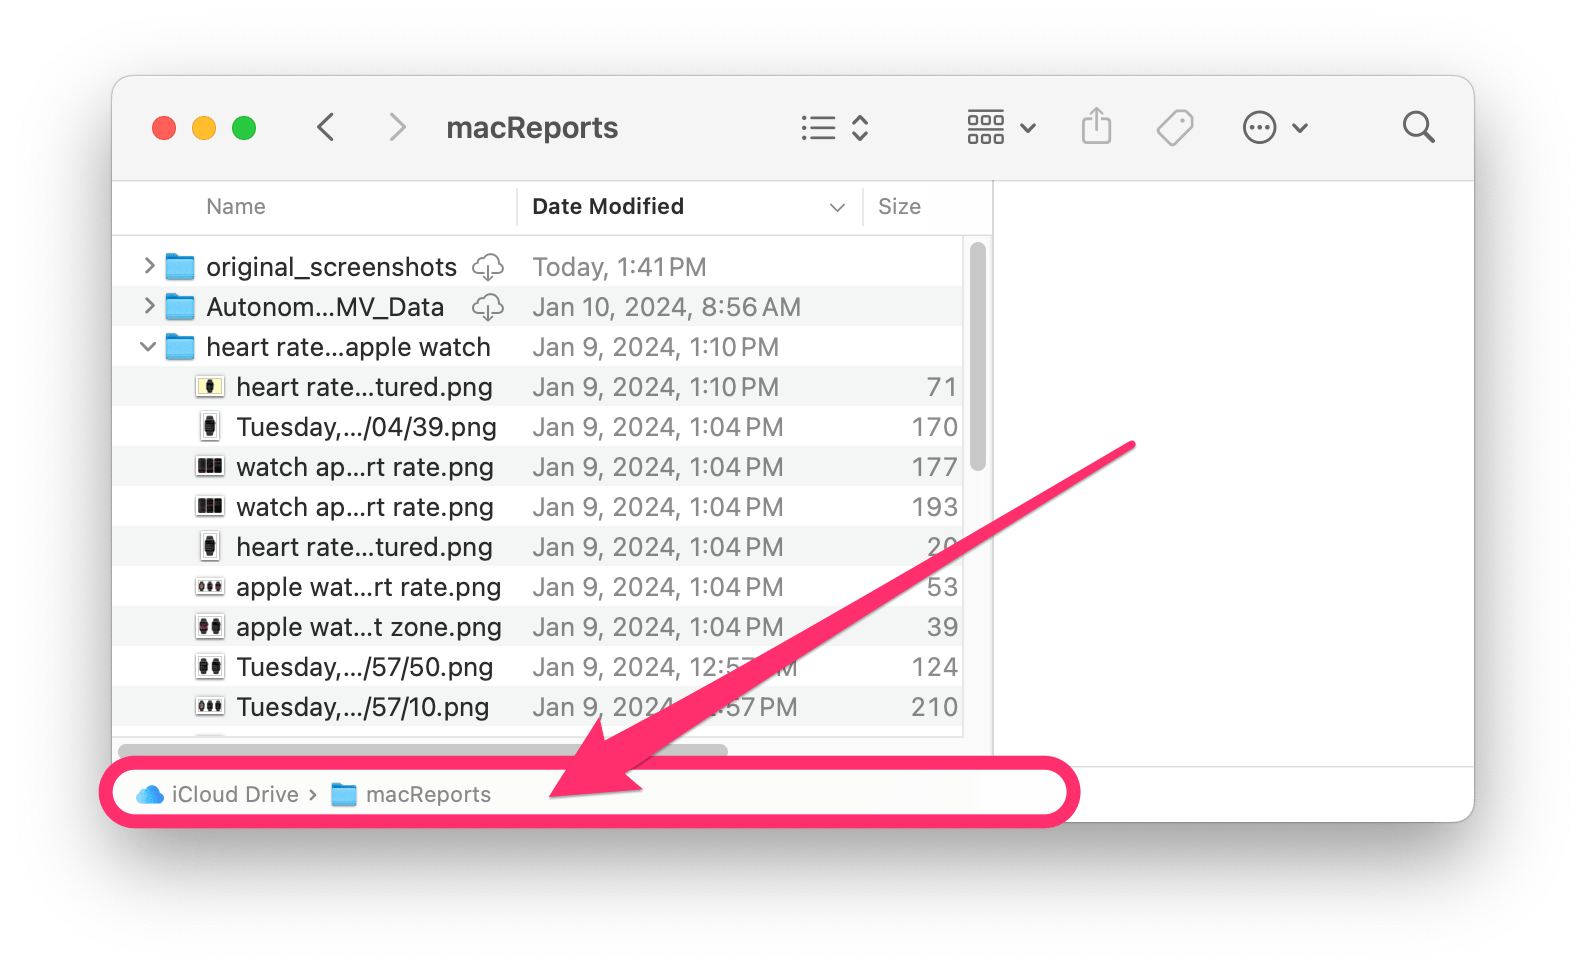
One of the downsides to using the list view in Finder is that once you open a folder, you can’t see all of the folders it is contained in. This sequence of folders, each enclosed in the next higher up, is also known as the path. The good news is, you can make it so Finder always shows you the path:
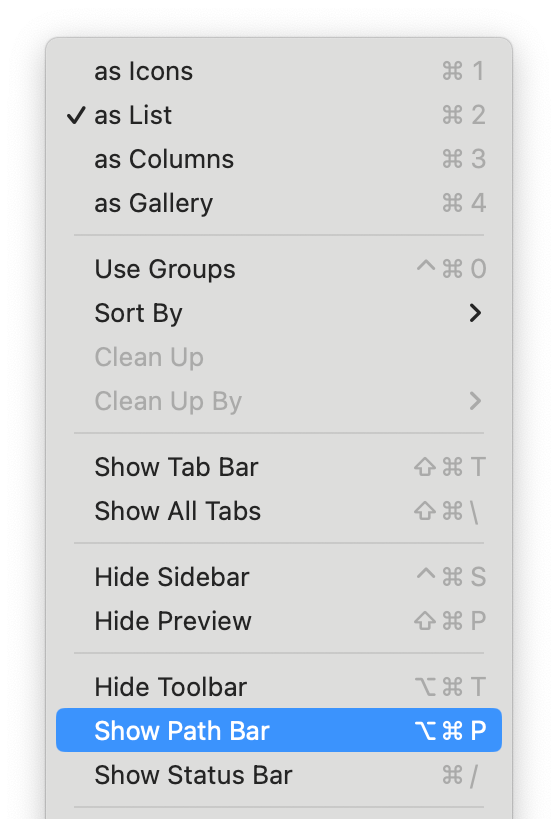
- With a Finder window open, go to the top menu bar and click on View.
- Click on Show Path Bar.
- Now, the path will appear at the bottom of the Finder window. You can also click on the folders you see in the path to easily go back to one of the enclosing folders.
The default view for folders
So if you have customized a view for a particular folder and want to use it for all (or some) other folders, you can do that. If you don’t set a view as default, you may find yourself customizing each of your folders individually. So, here is how to set a view as default:
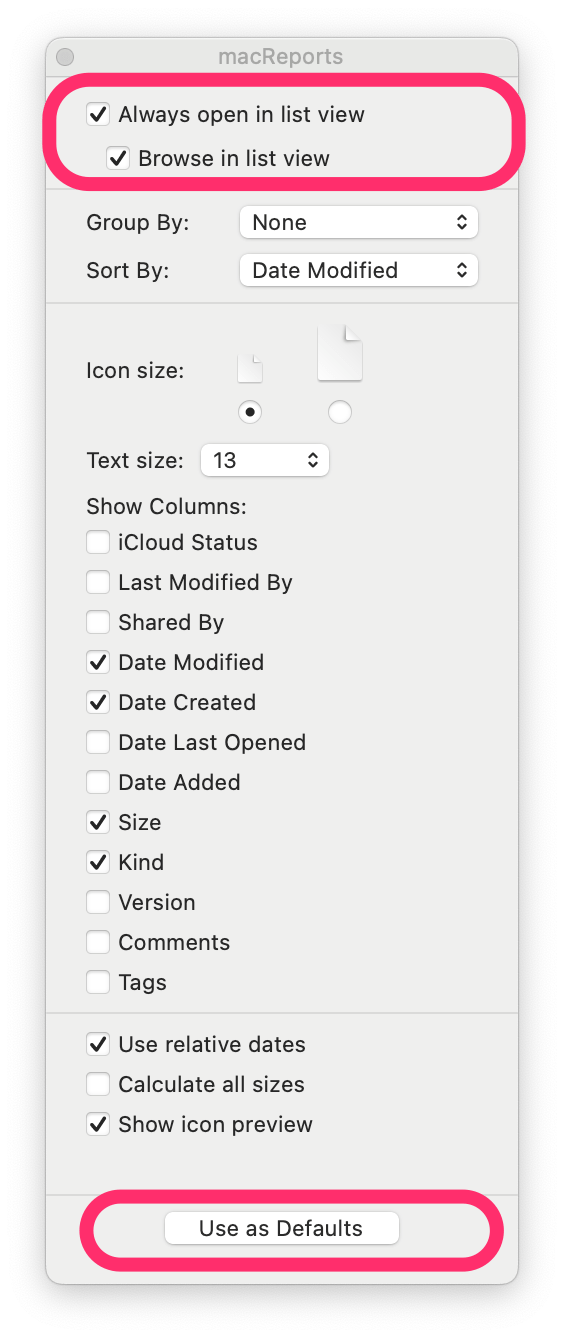
- With Finder open to the folder you have customized, go to the top menu bar and select View > Show View Options.
- There are three important settings here to look at:
- Always open in list view – This is the top checkbox item that, when checked, will cause Finder to always open the selected folder in this view.
- Browse in list view – When this box is checked, all subfolders of the folder will also open in this view.
- Use as Defaults – If you click on this button, all folders that use the list view will use these same settings.
- If you want a subfolder to use the same settings as the enclosing folder, do not customize it separately.
There are a couple of things to note:
- Selecting all three of the options above, Always open in list view, Browse in list view and Use as Defaults, will not always set your customized view for all of your folders.
- If a folder didn’t accept your view preferences:
- If the enclosing folder has the correct preferences, using the view options panel (View > Show View Options), make sure the enclosing folder has Always open in list view and Browse in list view checked. Also, make sure the subfolder (that doesn’t open with the preferred view) has Always open in list view and Browse in list view unchecked.
- Also, if necessary, open a folder that has the correct settings and then in the view options panel (View > Show View Options), click on Use as Defaults. Open the folder that does not have the preferred view, and from the view options panel, hold down the Alt/Opt key. The Use as Defaults button should change to Restore to Defaults. Click on it.
Related articles


