How to use Automator on Mac to Rename Files

Automator for Mac is a built-in feature that you can use to automate big tasks that might otherwise take you a lot of time to complete, or small tasks that you do everyday . You don’t need to know any programming or scripting languages in order to use Automator; The Automator Library has hundreds of actions available – you can just choose the ones you want to use. These actions can be applied to many different apps and features of macOS. In this article, we will go over the basics of creating a workflow in Automator, and then give an example workflow that you can create and use to rename files.
How to Create a Workflow in Automator
You can find Automator in Launchpad, or you can go to the Applications folder in Finder and double-click on Automator.
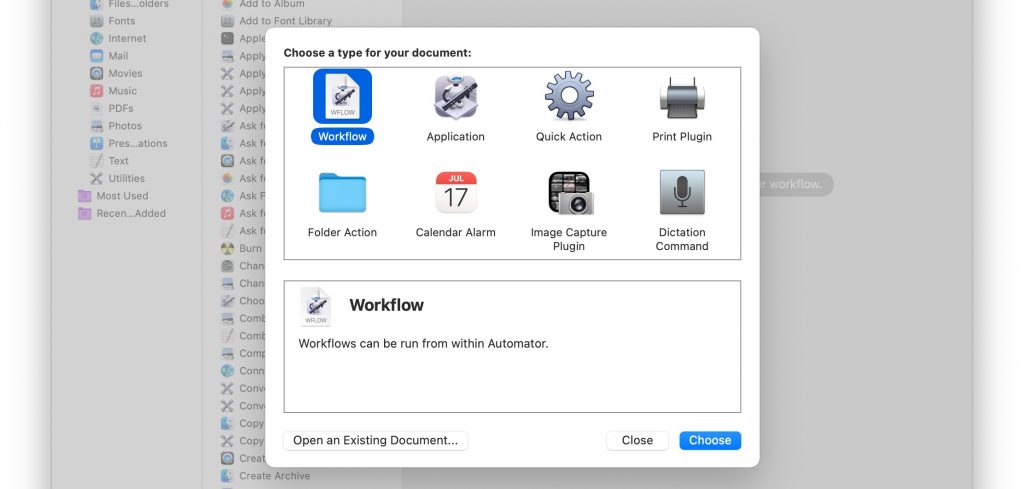
To create a workflow, you first need to choose the type of workflow.
Choose Workflow Type
- With Automator open, either click the New Document button, or go to the menu bar at the top and select File > New.
- There are several types of workflows to choose from:
- Workflow – This one runs while you are in Automator, so its good for tasks you want to complete just once.
- Application – This will be a standalone app that runs outside of Automator. The application will perform its actions when you click on it, or drop files on it.
- Quick Action – These are something you can add to Finder windows, and to the Services menu.
- Print Plugin – Just like you would think, this is specific to printing. These workflows are available from the Print dialog.
- Folder Action – This workflow will run on a folder that you specify. When you add files to that folder, the workflow runs on the folder’s files.
- Calendar Alarm – This workflow is triggered by a calendar event.
- Image Capture Plugin – These workflows are used in the image capture app on your Mac.
- Dictation Command – A workflow that will run when you use dictation.
- Click on your desired workflow type, then click Choose.
After you have decided on a type of workflow, you need to add actions to your new workflow.
Add Actions to your Workflow
You will see actions in the Automator Library on the left side of the Automator window. Click on the categories to see actions for that specific category. For example, clicking on Contacts will show you actions such as: Find People with Birthdays, Get Contact Information and Group Mailer.
- Double-click an action to add it to your workflow.
- Continue to add more actions that you need for your workflow.
- When you have completed your workflow, go to the menu at the top and select File > Save to save your workflow.
Example Workflow: Renaming Files in Finder
Automator makes it easy to rename a group of files. Through many different means, files get created with names that are completely meaningless – the name gives you no idea what the file is. The alternative to automating this task is to rename all of the files individually, but with Automator, you can give all the files in the group a name that is more meaningful, and identifies them in some way. In this example, I will rename a group of screenshot image files.
Create the Workflow and Add Files
- Open Automator and click on the New Document button.
- Select Workflow and click on Choose.
- Now get your files. Go to Finder and select the files whose names you wish to change. Drag them onto the Automator window workspace.

Add Actions to your Workflow
- Click on Files and Folders under Library on the left. Go to the search field on the left side near the top and type in “name.”
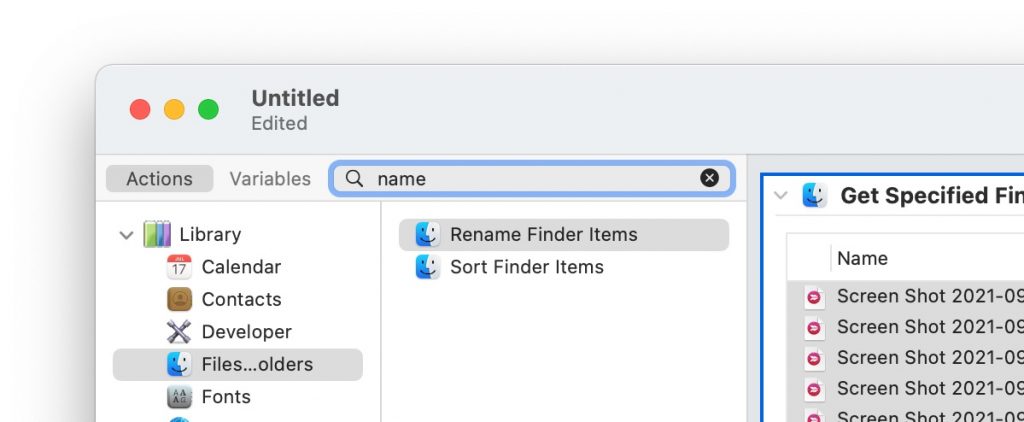
- You should see the action called Rename Finder Items. Add it to your workflow by double-clicking it, or selecting it and then pressing return, or by dragging it into your workflow, underneath your files.
- You will see a pop-up dialog warning you about changing the names of files. You can make a copy of the files whose names you are changing, if you would like; Just select Add, otherwise select Don’t Add.
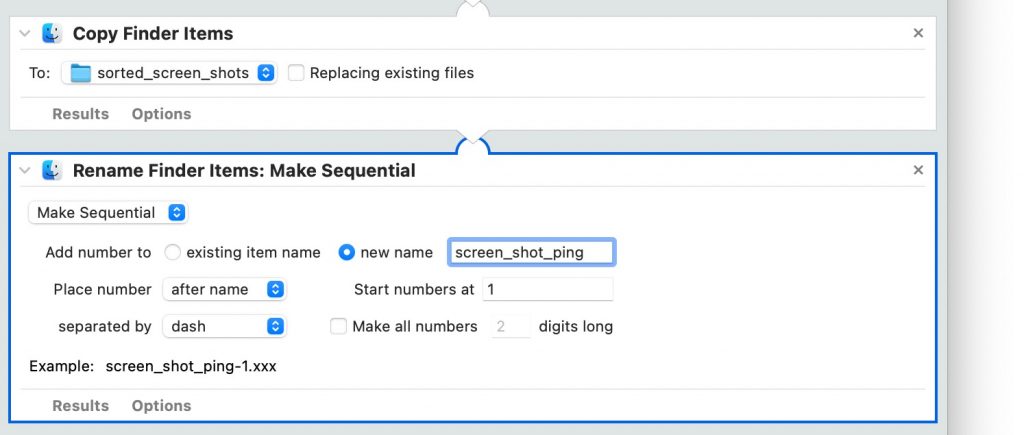
- I selected to add a copy of the files. You can save the copy to wherever you would like – it is the copies that will have their names changed.
- Click on the file listed to the right of “To:” in the Copy Finder Items action box.
- Scroll down and click on Other.
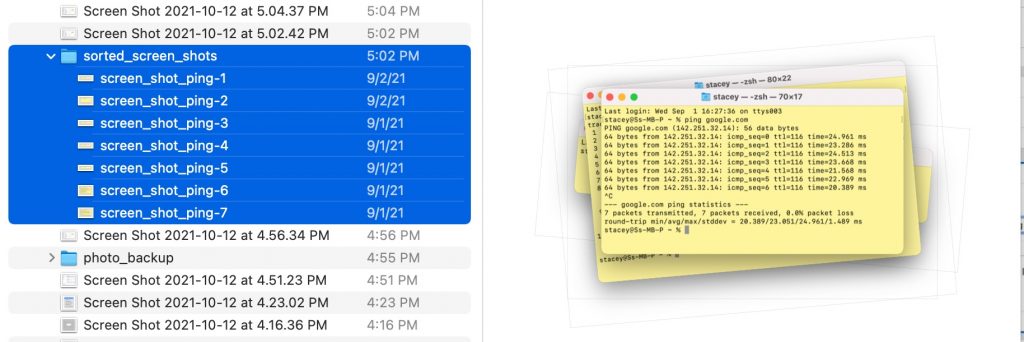
- Choose your folder and/or create a new folder. My files were originally in a folder called original_screenshots, so I created a new folder and called it sorted_screen_shots.
- In the Rename Finder Items action box, there is an options menu that reads “Add Date or Time.” Click on this menu to see the other renaming options.
- I chose Make Sequential. I gave my files a new base name, screen_shot_ping, that describes what they are – screen shots from an article on Ping.
Run your Workflow
- After you finish setting up your renaming scheme, it’s time to run your workflow. Go to the top of the window and click on the Run button. A bunch of green check marks will appear to indicate parts of the workflow have been completed. You can see a list of completed actions under the Log section.
- Now in my original_screenshots folder, I have another folder called sorted_screen_shots with my renamed files.
Related Articles:

