How to Convert PDF to JPG on Mac
This short article teaches how you can convert a PDF document to a JPG file using Automator on your Mac. You will find this article especially useful if you want frequently to convert PDF files to JPGs. On your Mac, Automator offers fast and efficient PDF to image conversion. By following the steps below, you will be able to change a PDF file into a series of JPG images. Automator is a built-in macOS app. This means that you do not need to download and use a third-party app or an Internet connection. Here is how:
See also: How To Set Default Application For PDFs In macOS
PDF to JPG on Mac
1. Open the Automator app on your Mac (Applications folder). You can also use Spotlight to open it.
See also: PDF Won’t Open: “Please Wait…” Message, How To Open
2. This will open a new Finder window. Click “New Document”.

3. Select Application and click Choose.

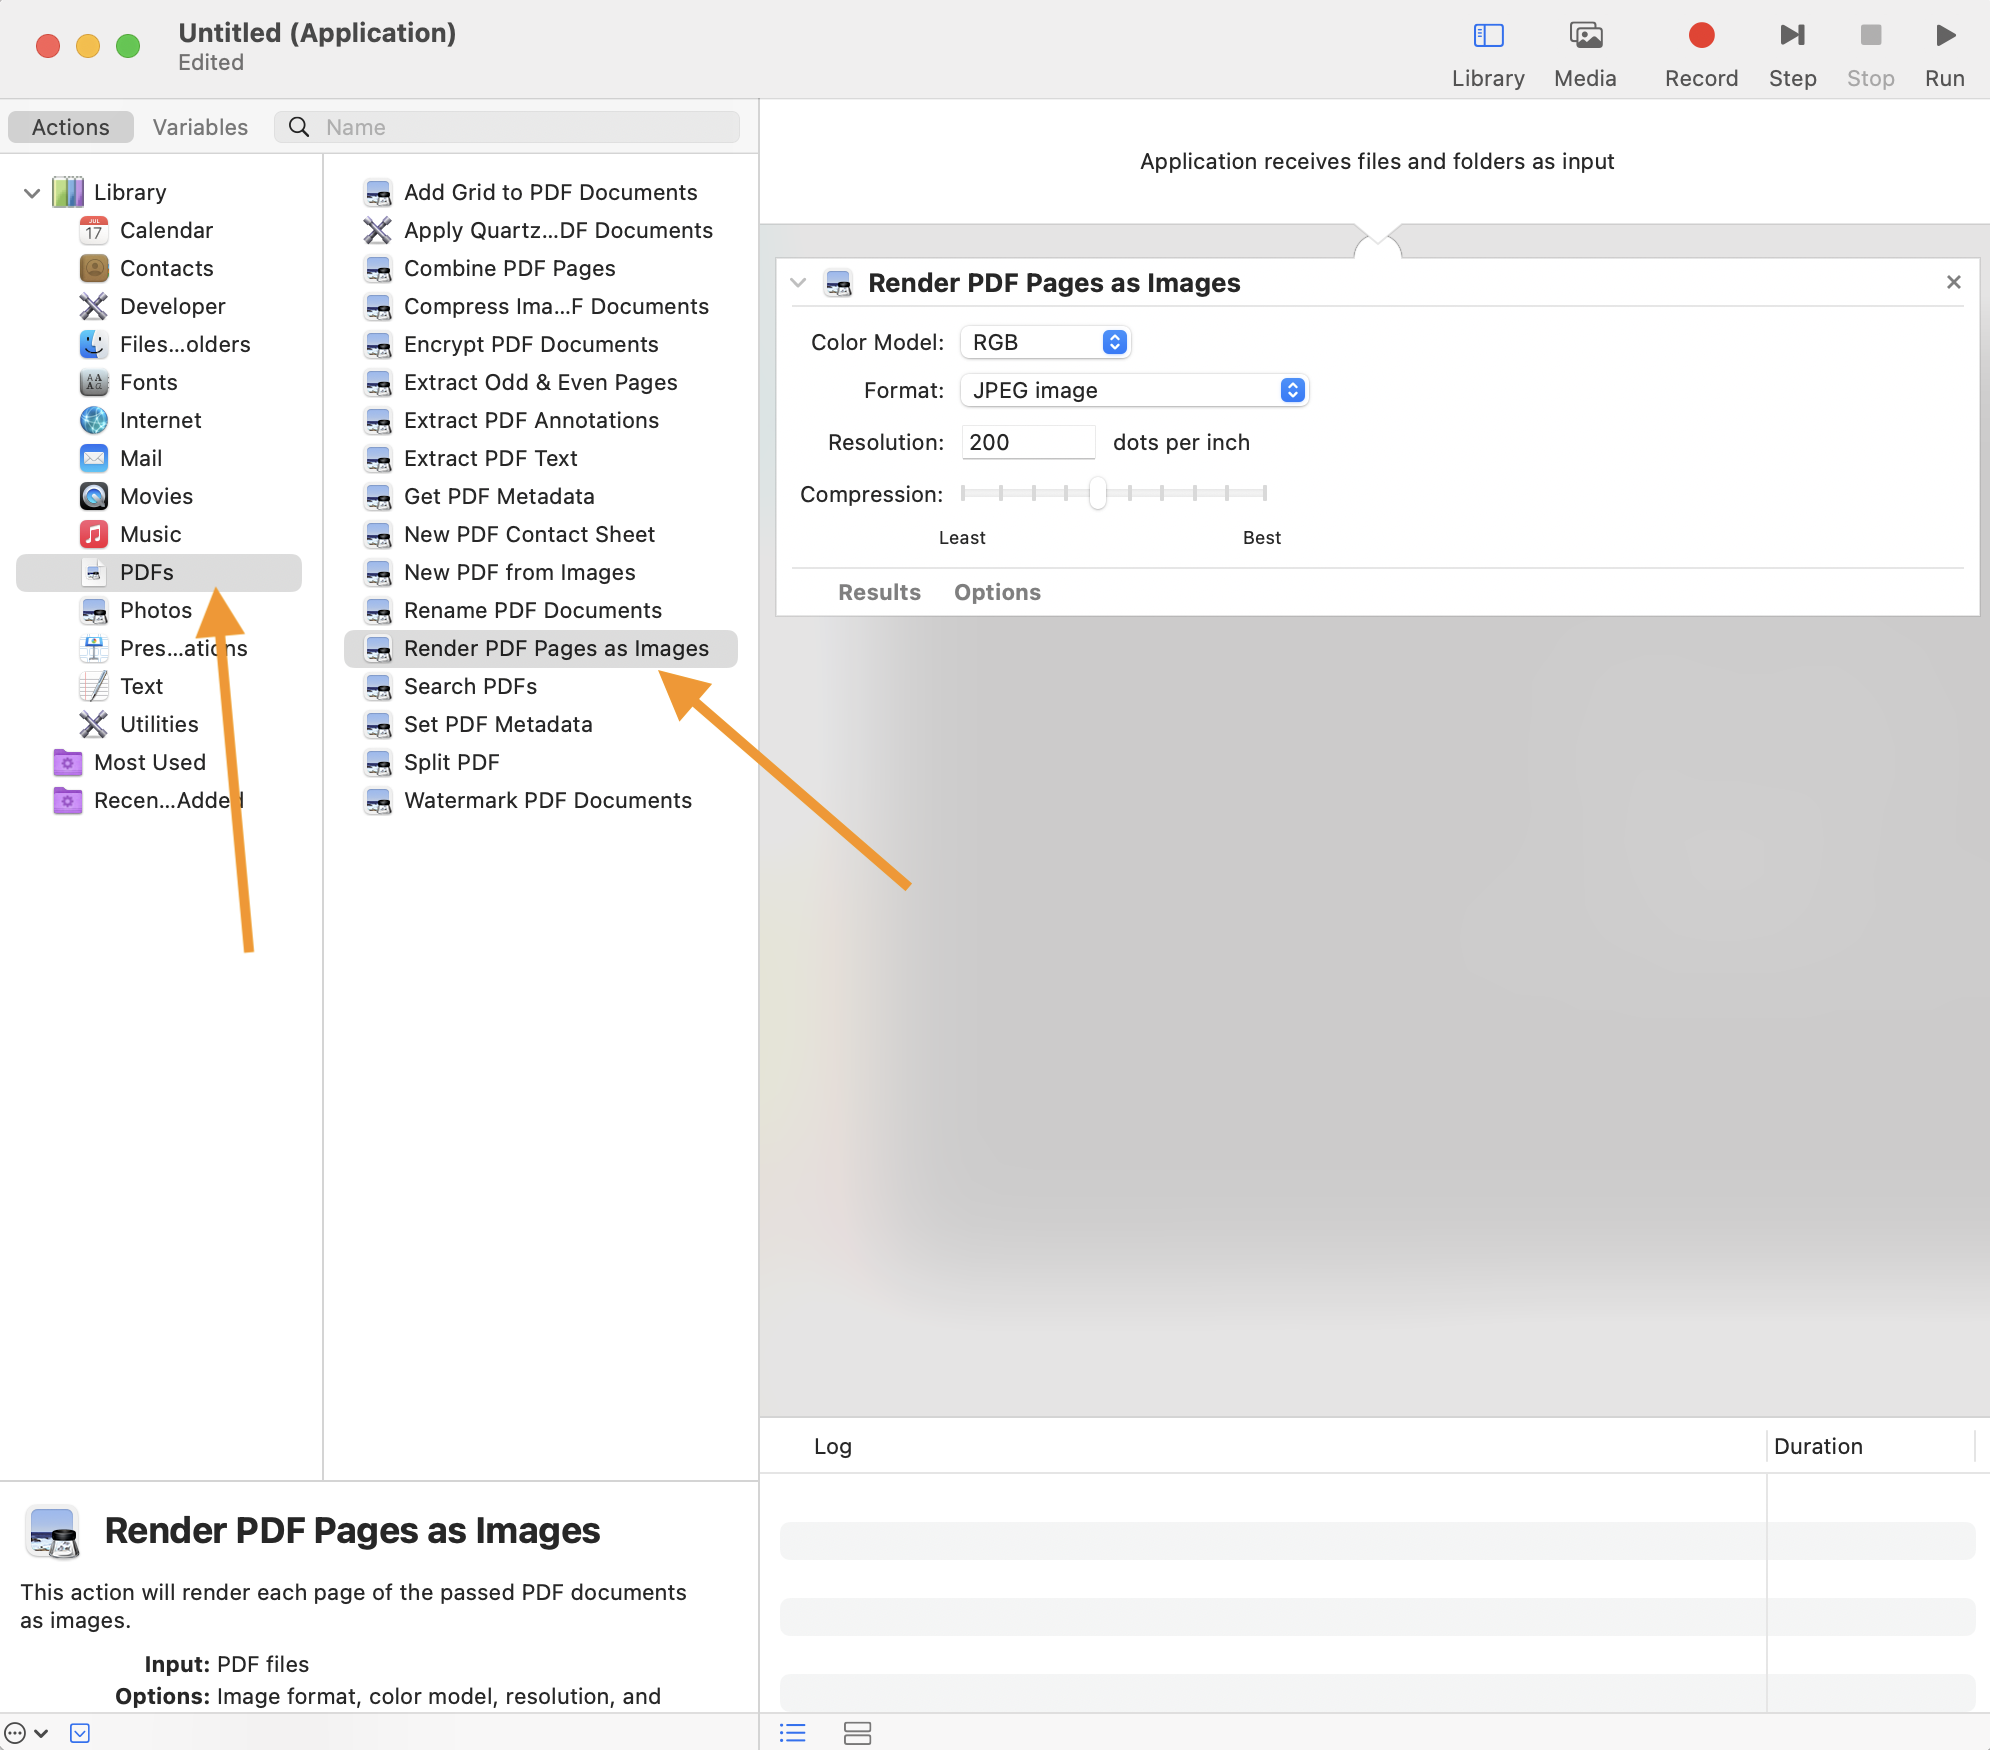
4. In the Library list (left sidebar), select PDFs and double click the “Render PDF Pages as Images”.
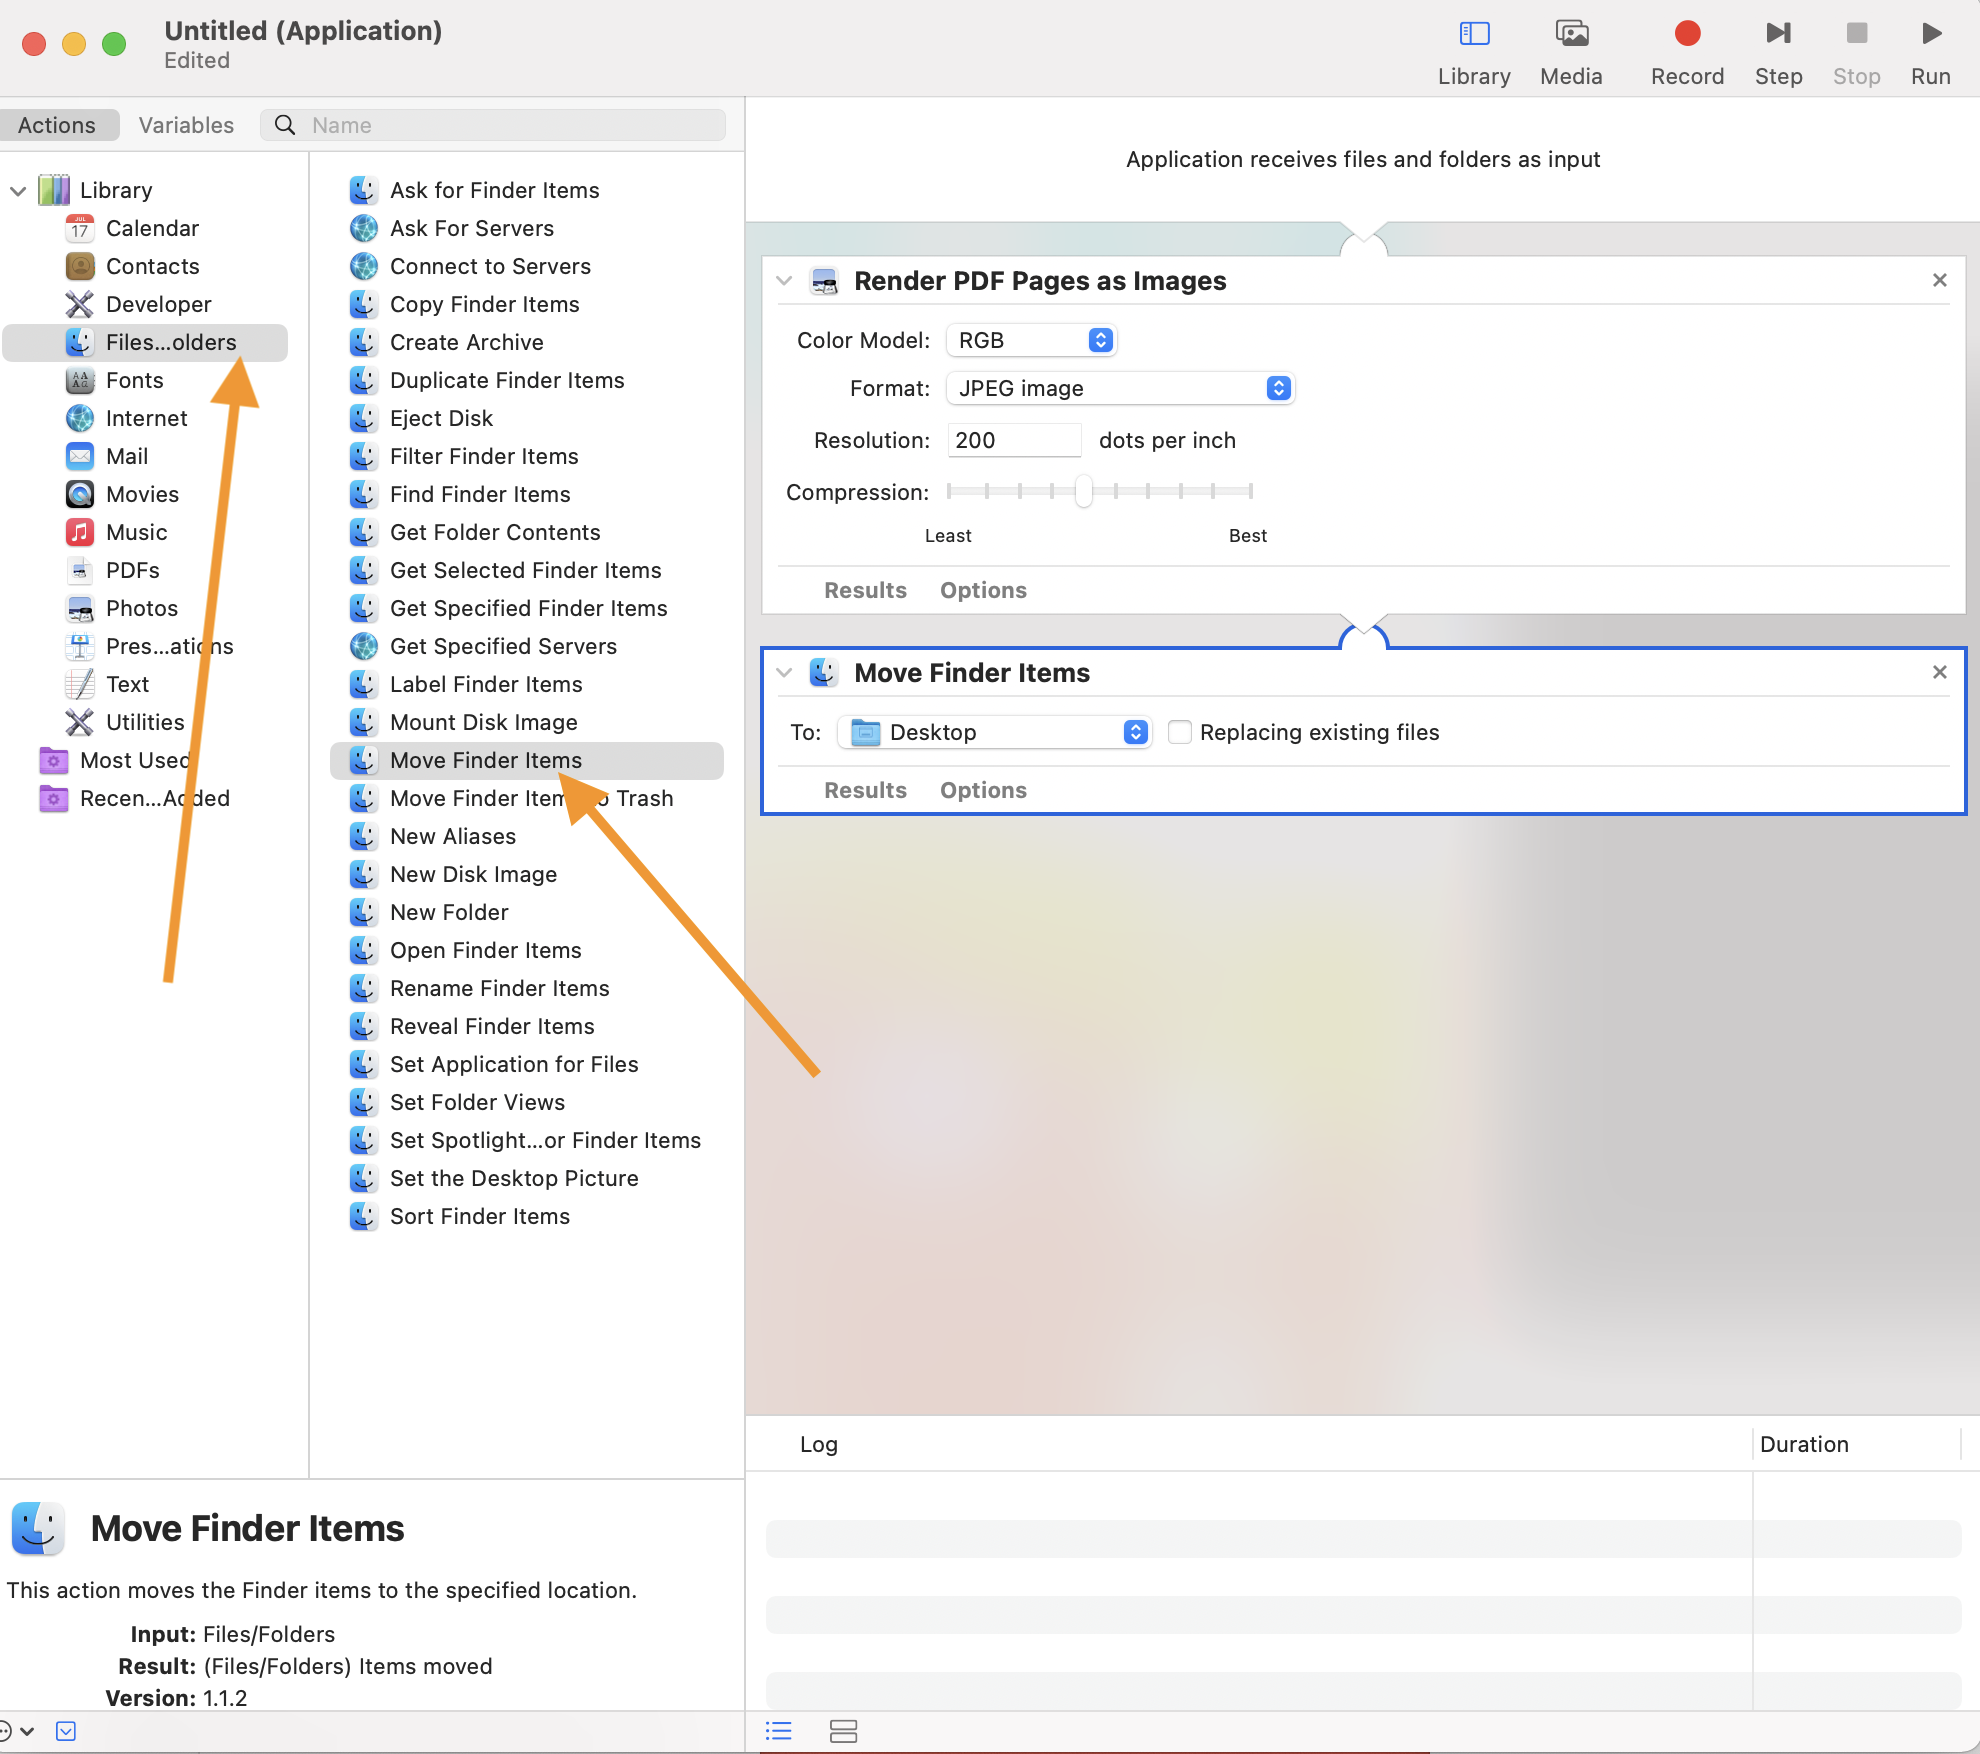
5. Again, go back to the Library list, and select Files and Folders and double click the “Move Finder Items” option. This is where your JPG files will be saved. It can be Desktop or any other folder you choose.
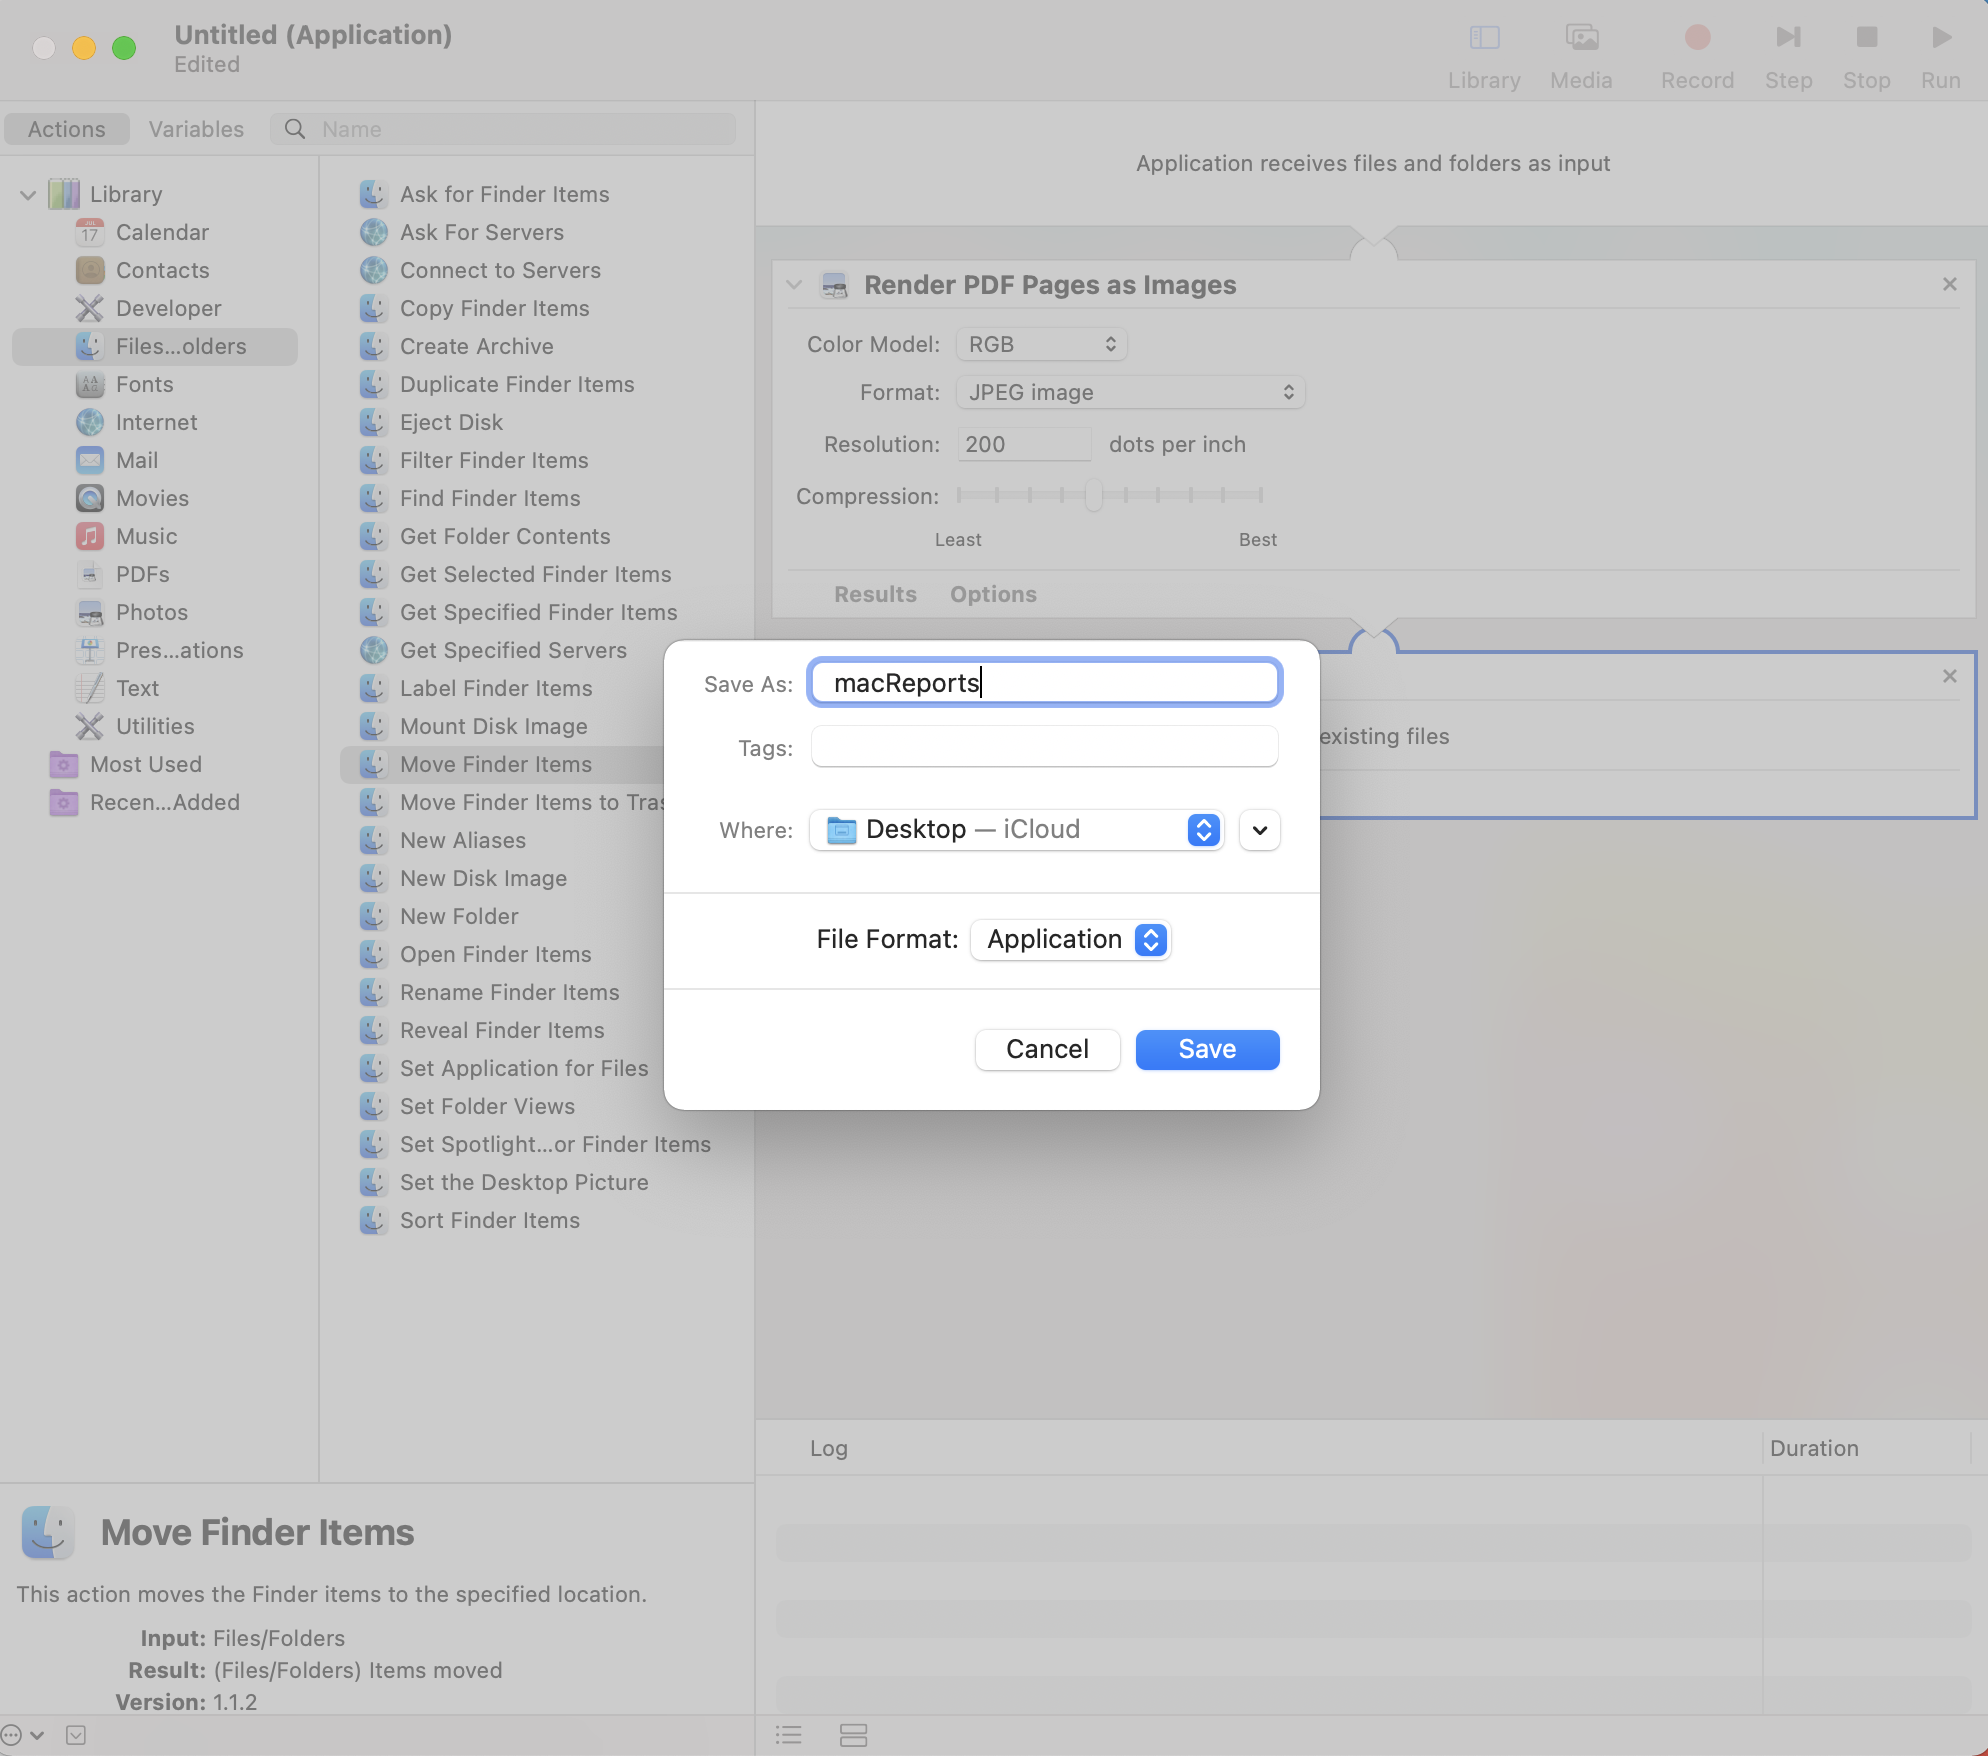
6. Now our workflow is ready. Let’s save this as an Application on your Desktop. You can save as PDF-to-JPG or something like this so that you can easily recognize this in the future. I will save it as macReports. In Automator, select File > Save from the menu bar. And then click Save. You can then quit the Automator app.
See also: How to AirDrop JPG Instead of HEIC Images
7. Our PDF to JPG app is now on Desktop as you can see below.

8. Now you can drag and drop a PDF onto it, and your JPG files will be created and saved on your Desktop.
See also: How to Export Notes From The Notes App As PDF On iPhone & iPad