How to Add or Remove Locations in Weather App on iPhone and iPad
The native Weather app on iPhone and iPad is a simple but useful app. The app was only available for the iPhone exclusively until recently. However, with the introduction of iPadOS 16, the Weather app came to the iPad, too, for the first time. The app includes a lot of features, and thus, Apple uses a lot of data sources to gather and present the most accurate weather information in a pleasant manner. The data sources include The Weather Channel, BreezoMeter, QWeather and a lot more.
The Weather app can sometimes be an essential app for you. For example, it can help you plan your trip according to weather conditions. The good news is that the Weather app does more than just check the outside temperature. For example, it lets you see the weather forecast (probability of precipitation, wind speed and more), air quality, and many other things. Unfortunately, some people do not find it as intuitive as they would like. I, for example, find it confusing even if it is not a big and complex app.
A common confusion is how to add, delete and organize weather locations or cities. You can add your locality in the Weather app. Under the Weather page, you can add locations, cities or towns. The app will automatically add your current location as long as Location Services is enabled for the Weather app (Settings > Privacy & Security > Location Services). In this article, I explain how you can add more locations to the weather list. If you are running an older version of iOS/iPadOS, we wrote a similar article before explaining how you can manage cities that is still valid for you.
If you own an iPad and iPhone using the same Apple ID, the added or removed cities will sync between both devices. For example, if you add a city on iPhone, you will see it on your iPad too.
How to add cities in the Weather app
- Open the Weather app on your iPhone or iPad.
- The app will show your current location’s weather details.
- If this is an iPhone, tap the List button at the bottom. If this is an iPad, tap the Sidebar button located at the top-left side of the screen, as you can see in the screenshots below.


- In the search field, type the city or location you want to add. As you type, you will see the results. When your desired location appears, tap on it.
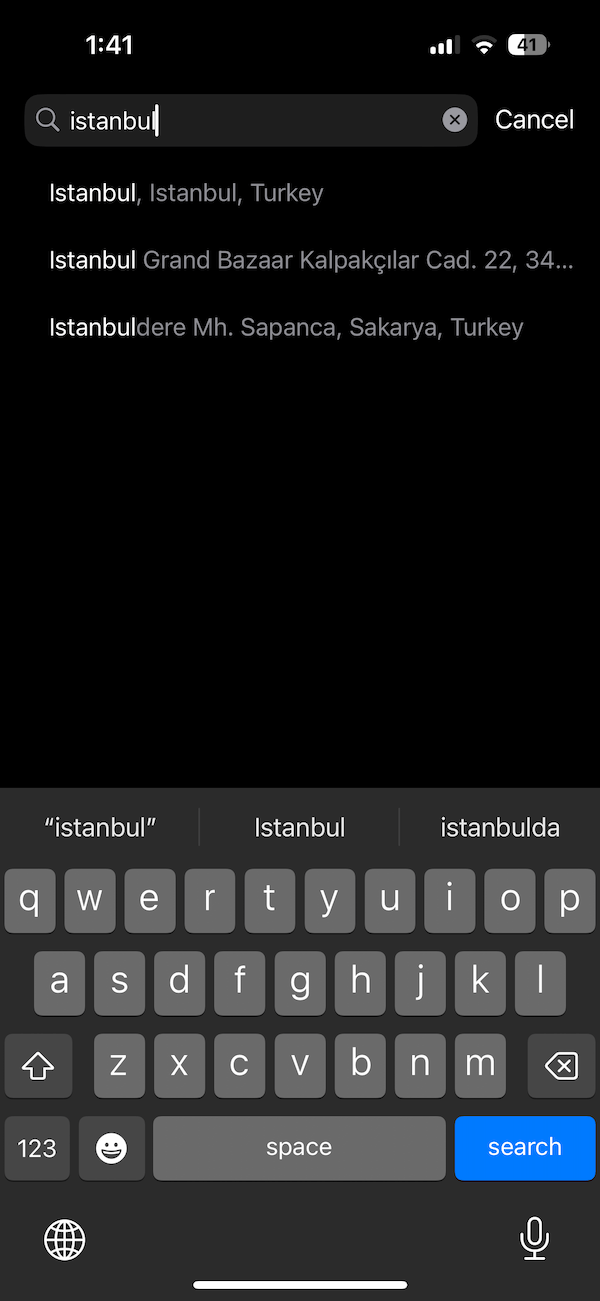
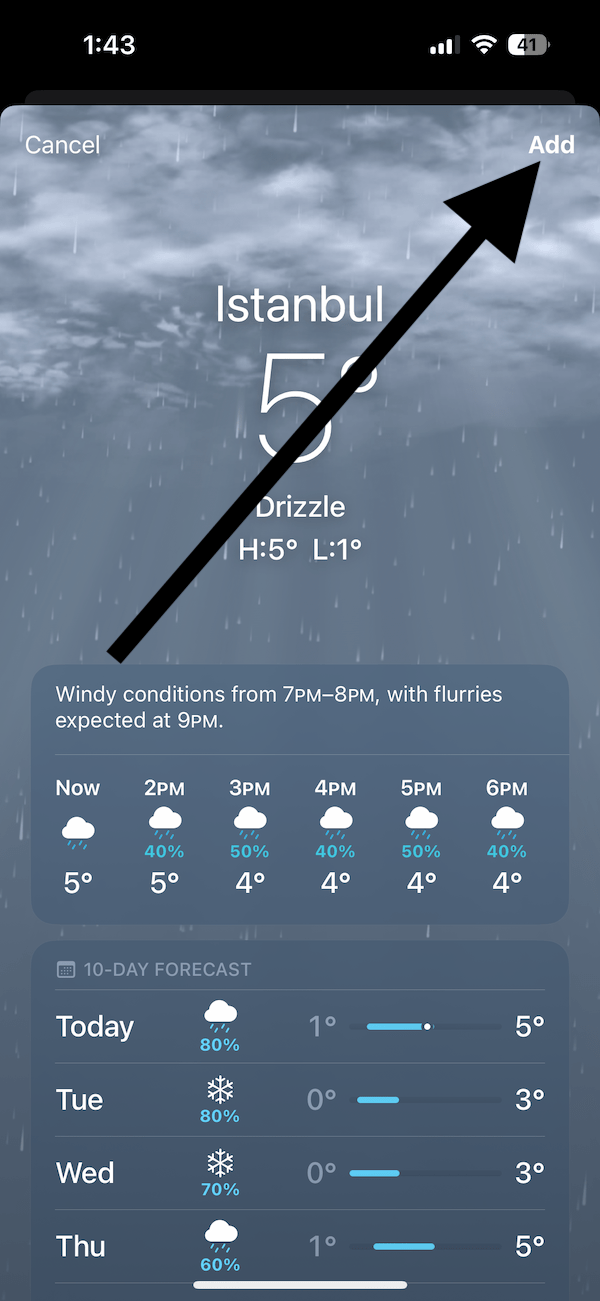
- The weather details will appear for this location. If you want to add this, tap the Add button, and it will be added to your weather list. If you do not see the Add button, this means that the location was already added previously. If you do not want to add it, tap Cancel. When you tap Cancel, you will be taken back to the search results. Tap Cancel again to cancel the search.
How to remove locations in the Weather app
There are two ways to do this. You can pick either of them.
Method 1
- Open the Weather list page.
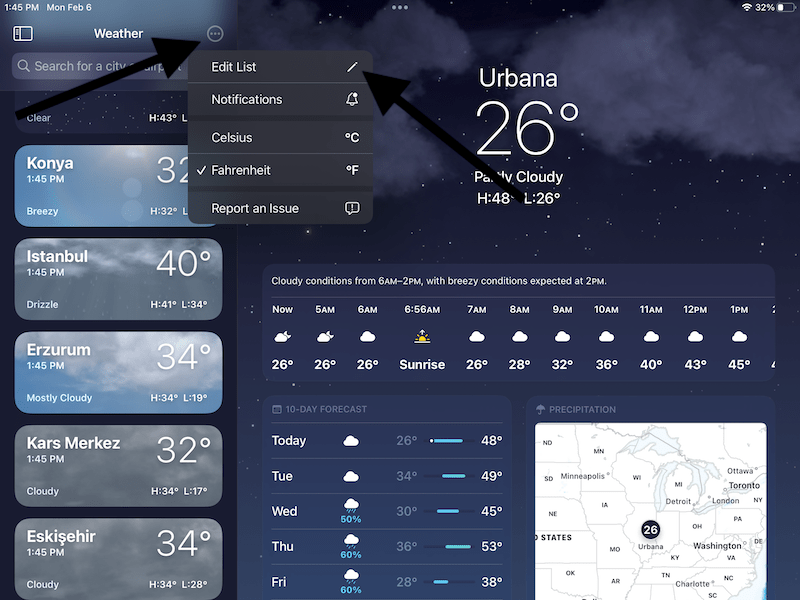
- Tap the more (…) button at the top.
- Select Edit List.
- Then tap the red minus (-) button and then tap the Trash button to remove it.
Method 2
The second method is a little quicker than the first one:
- Open the list page.
- Swipe left on the location you want to remove.
- Tap the Trash button to delete that location.

How to change the order of the locations in the Weather app
By default, the order of the locations is based on the time it was added. The most recent locations you have added will be at the bottom, while the locations added first (the oldest ones) will be at the top. However, you may want to see the cities you visit more often above other cities. The good news is that you can change this order easily. Here is how:
- Open the Weather list page in Weather on your iPhone or iPad.
- Then find the location you want to move.
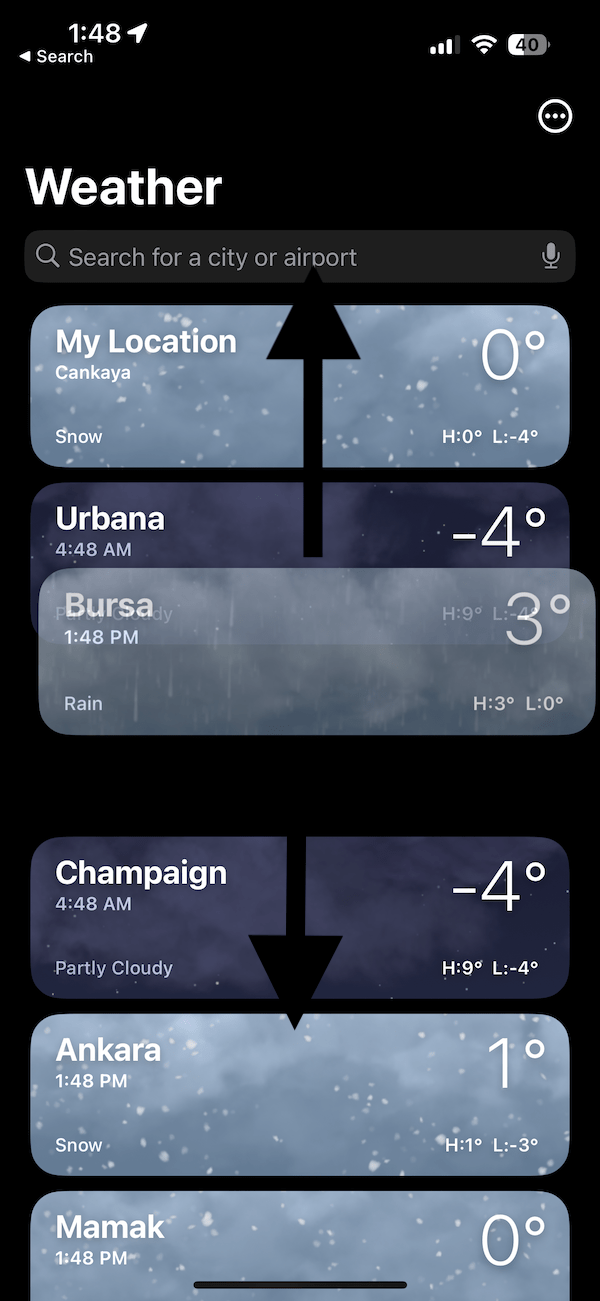
- Tap and hold the location.
- Do not remove your finger; the location will get a litter bigger, indicating that you can now move it up or down.
- Using your finger, drag the location to your desired spot in the list, up or down.
Related articles

