How To Fix Slow Wi-Fi Problems On Your Macbook
The focus of this article is on the slow wireless network (Wi-Fi) problems of MacBook computers (MacBook Air and MacBook Pro). Slow Wi-Fi is one of the common Wi-Fi issues.
Are you using your MacBook frequently? Sometimes your Wi-Fi connection may appear slow:
- Your video (YouTube, Netflix, etc) is lagging, the streaming video keeps buffering
- Websites are taking a long time to load
- Downloads are too slow
Your Wi-Fi speed may be poor and this can be caused by three main factors. For example, it could be a problem with:
- Your MacBook
- Your Internet and Wi-Fi equipment (modem, router)
- Your Internet service provider
In this article, we will mainly show how you can troubleshoot slow Wi-Fi issues on your Macbook. Before we start:
- Check your router setup. Make sure that cables are properly plugged in. Make sure that they are working properly.
- Restart your router and modem by unplugging the power cable and wait about 30 seconds and then plug it back in again. Also, review Apple’s recommendations for Wi-Fi routers and access points. Lastly, make sure that your router firmware is up to date. Check the manufacturer’s website for details.
- If you are using a VPN service, disconnect from it.
- Contact your internet provider to see if they are having any issues. It is also possible that you may have exceeded the monthly data limit.
- Avoid interference. Place your router away from other Wi-Fi devices such as baby monitors, microwave ovens, cordless phones, etc.
MacBook slow Wi-Fi
Follow the steps below to speed up your Wi-Fi. Please try each step until you fix your problem.
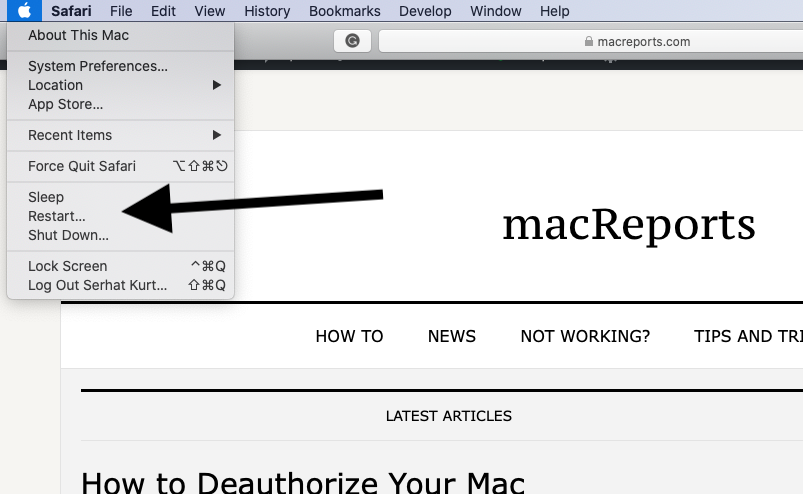
1. Restart your MacBook. You can restart your computer by going to the Apple menu > Restart.
2. Update the macOS software on your MacBook. To do that:
- If your computer running macOS Mojave or later (e.g., Catalina), go to System Preferences > Software Update. And if there are updates available, then click Update.
- If your computer running an older version of the macOS software, then open App Store and click Updates.
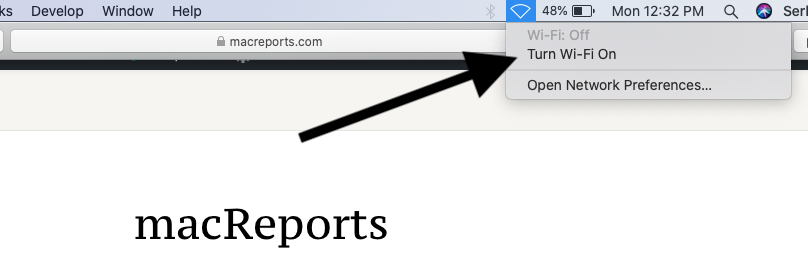
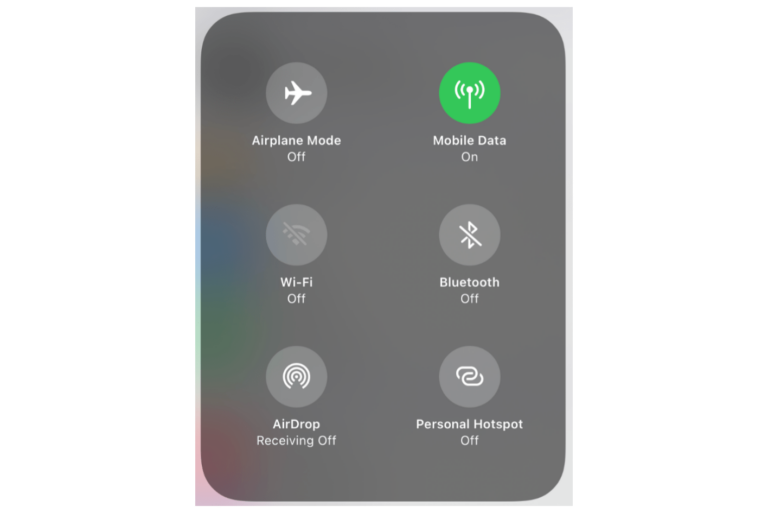
3. Disable and then re-enable Wi-Fi. To do that, click the Wi-Fi icon in the menu bar, and click Turn Wi-Fi Off. And then wait about a minute and then click the Wi-Fi icon and then Turn Wi-Fi On.
4. Use Wireless Diagnostics. Here is how:
- Close all apps that are open
- Press and hold the Option key
- While pressing the Option key, click the Wi-Fi icon in the menu bar
- And from the drop-down menu, click Open Wireless Diagnostics
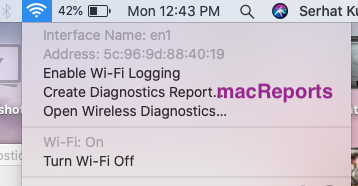
- You may have to enter your admin password
- A window will appear saying “analyzing your wireless environment”
- Click Continue and follow the onscreen instructions.
- If the result says “Your Wi-Fi connection appears to be working as expected” chose the “Monitor my Wi-Fi connection” option.
5. Reset your network settings on your Mac.
6. Remove existing Wi-Fi preferences. Here is how:
- Quit all apps that are open
- Turn Wi-Fi off
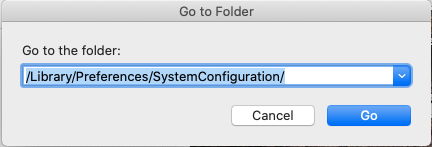
- Now, from Finder, click Go and Go to Folder. Enter the following and click Go.
/Library/Preferences/SystemConfiguration/
- This will open a new window. Find and select the following files:
- com.apple.airport.preferences.plist
- com.apple.network.eapolclient.configuration.plist
- com.apple.wifi.message-tracer.plist
- NetworkInterfaces.plist
- preferences.plist
- Drag these files to your desktop.
- Now restart your Mac
- Turn on your Wi-Fi
- If you are happy with the results, you can not delete the files that you placed on your desktop. If you are not happy with the results, you can place them back in the SystemConfiguration folder.
7. Reset PRAM. Here is how:
- Turn off your Mac
- Turn on your Mac and immediately press the Option, Command, P, and R keys together for about 20 seconds.
- Your Mac will restart.
8. Reset SMC. Here is how:
- Turn off your Mac
- Now press Shift-Control-Option keys and the power button together. Hold the keys for about 10 seconds. Then release them.
- Now turn on your Mac by pressing the power button.
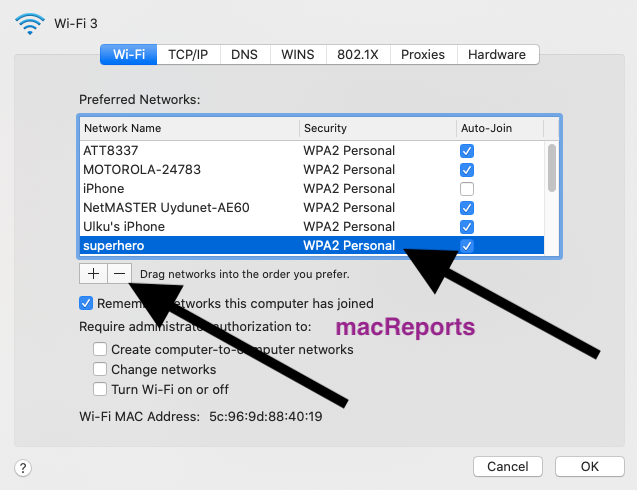
9. Forget the Wi-Fi network and reconnect. Here is how:
- On your computer, open System Preferences and click Network, then Advanced
- Select your Wi-Fi network that you want to forget (hint: the slow one)
- Click the minus (-) icon
- Click Remove
See also: How To Disable Wi-Fi Auto-Join in macOS


My first Apple computer, I was somewhat disappointed with the internet speed. Your #6 suggestion rectified the issue. Thanks. Is it required that I now leave those file on the desktop?
#6 worked!! Thank you
“If you are happy with the results, you can not delete the files that you placed on your desktop. If you are not happy with the results, you can place them back in the SystemConfiguration folder.” This is a typo, correct?
Just did #6
Life…. saver
Had to manually delete files and type in administer password, then restart
I don’t understand how or why but following #6 resolved my slow internet on my Mac. I of course checked through steps 1- 5 first.
Disabling Location Services usually helped with my Macbook slow wifi, however not today. Thanks for your article, running the wireless diagnostics has solved my issue.
You the man. Why the hell does location services need to be hogging my bandwidth lol. Now I get better wifi.
You, I love you. That thing with the systemconfig files worked.Thank you.