How to Send Email from Fake (Burner) Email Address on iPhone, iPad, or Mac
In this article, I will show you how you can send an email from a fake, or burner, email address that you can create using Hide My Email. This will let you send your emails without giving out your real email address. This has several advantages, for example:
- The recipient won’t know your real email address.
- If the recipient responds, this email will be forwared to your real email.
- This will let you know if the recipient sells your email. You will find out about this if the fake email gets a lot of spam.
- You can delete or deactivate this fake email if you want to, for example, if it starts getting too many spam messages.
I should state that although Hide My Email helps to protect your privacy and anonymity, this is not a 100% secure or anonymous way to send emails. Still, if your privacy is important to you, you may want to use Hide My Email because it offers an easy, built in way to protect your real email address.
Hide My Email is Apple’s fake email service. It is an iCloud feature available on iPhone, iPad, and Mac. This will create a nameless email address; This email will not have an obvious connection to you. You will need to be an iCloud+ subscriber to use Hide My Email.
Send emails from burner accounts using Hide My Email
- Open the Mail app on your device.
- Tap the Compose Email button.
- The Compose window will appear.
- Just add one or more recipients to the “To:” field. Type a subject if you want to. And enter your email message. Do not send it yet.
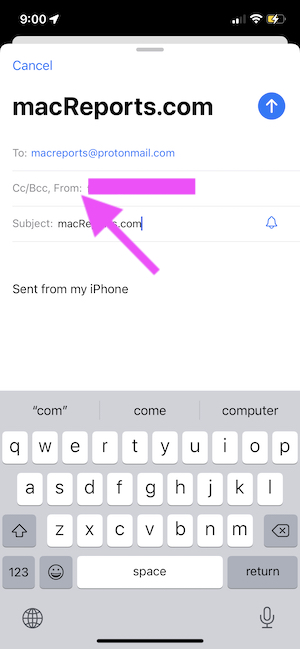
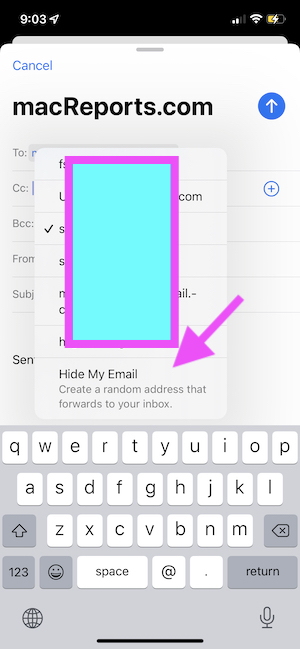
- If this is an iPhone or iPad, tap the “From:” field. This will open all of your email accounts. At the bottom you will see the Hide My Email option saying “Create a random address that forwards to your inbox.” Tap this.
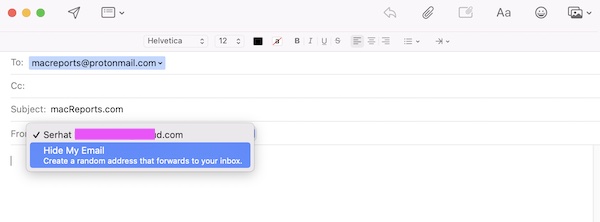
- If this is your Mac, click the “From” drop down menu to open it, and select Hide My Email.
- A random email account will be created automatically. When you are ready to send, tap the Send icon to send this email.
The recipient will receive this email from a randomly created @iCloud.com address. Any email sent to this Hide My Email address will be forwarded to your real email address.
‘Update Your “Forward To” Email Address’ error
Are you getting an error message saying ‘Update Your “Forward To” Email Address’ when you want to select the Hide My Email option in Mail? If you are getting this, you will not be able to send this email until you change your “Forward To” email. This error message occurs because your Hide My Email forwarding setting does not match with the email account you are using to send the email. You can update this on your iPhone, iPad, Mac, or on the iCloud.com website.
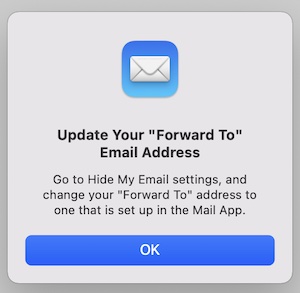
- On your iPhone or iPad, go to Settings > Your Name > iCloud > Hide My Email > scroll down and find the Forward To section. Tap that and select the correct email account.
- On your Mac, go to System Preferences > Apple ID > iCloud > Hide My Email Options > click the Options button next to “Forward To” and select the correct address.
- To do this on iCloud.com, open a browser, and go to icloud.com. Sign in with your Apple ID username and password. Click Account Settings, then click the Manage button under Hide My Email. Select the correct “Forward To” email account.
Conclusion
In this article, I have explained how you can use the Hide My Email feature to send emails from a burner, or fake, email account. This burner account is randomly created to protect your privacy. If you are using the free iCloud plan, you cannot use this service. You will need to upgrade to iCloud+. iCLoud+ plans start at $0.99/month. It does not matter which iCloud+ plan you have, they all include this feature – only the free plan doesn’t.
Related articles:

