How to View, Deactivate or Delete your Hide My Email Accounts
Hide My Email lets you stay private by allowing you to create multiple, random email addresses whenever you need. This way you won’t have to use your real email address, and you can prevent potential spammers from getting your real address. If you receive an email message at this randomly generated email, it will be forwarded to your real email account. To use this feature, you will need to be an iCloud+ subscriber.
I recently realized that I have been creating a lot of these email accounts. Then this question became a valid question for me: How can I view these email accounts, and what should I do when I want to stop using them? I would like to see how many emails I have created, and maybe I would like to copy some of the emails. In this article, I explain how you can view, deactivate and delete an email address with Hide My Email.
How to view your Hide My Email emails
If you want to see what emails you have created, follow the steps below. You can do this on your iPhone, iPad, Mac, or on the web via the iCloud.com website:
On an iPhone or iPad
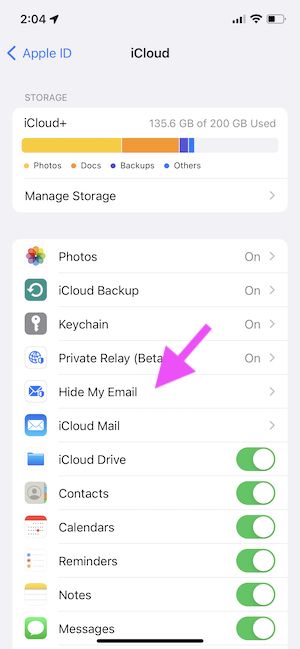
- On your iPhone or iPad, go to Settings > Your Name > iCloud > Hide My Email.
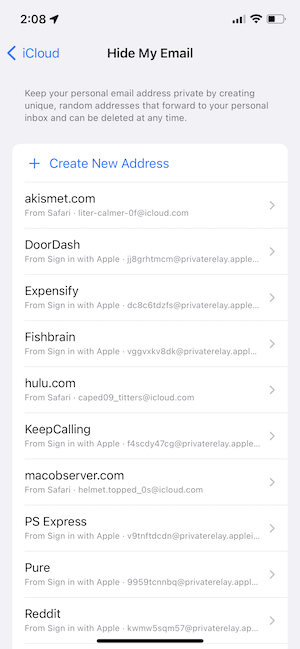
- This screen will show all of the emails you have created:
On a Mac
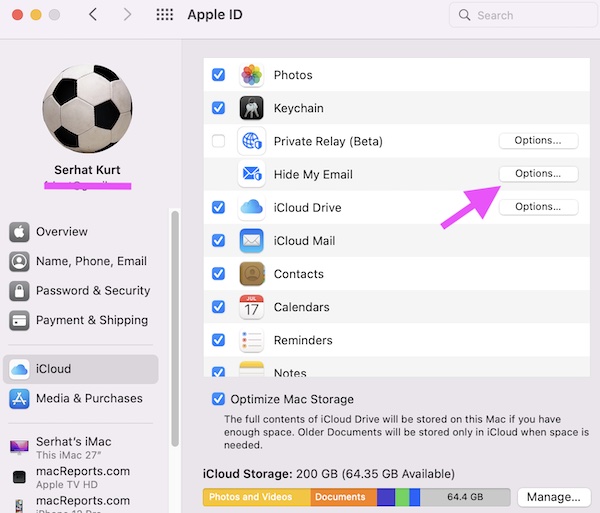
- Open System Preferences and click Apple ID, and select iCloud in the left side menu. Then click the Options button next to Hide My Email.
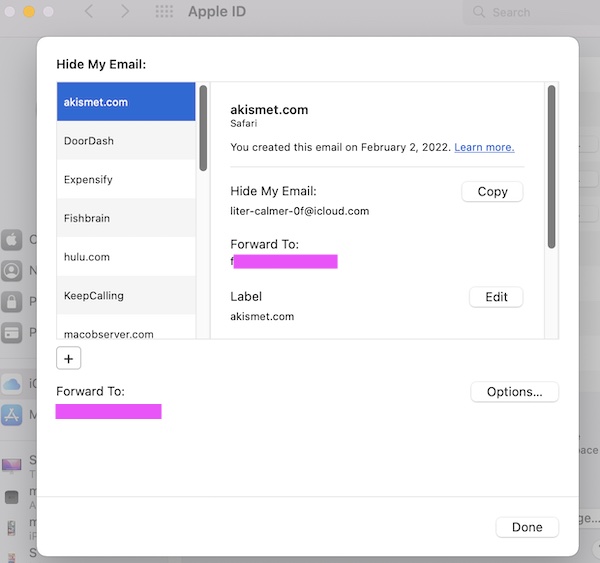
- The next screen will show all of your Hide My Email accounts you created.
On the web
- On your computer, PC or Mac, open a browser and go to icloud.com
- Click Account Settings.
- Find the Hide My Email section and click the Manage button.
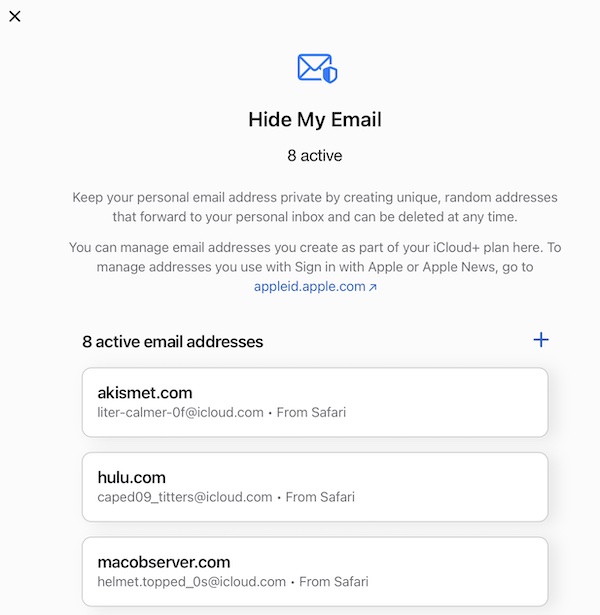
- A new popup will appear listing all of your email accounts.
How to deactivate and delete Hide My Email accounts
After reviewing your email accounts, you may want to deactivate or delete one or more of them. Deactivating will temporarily suspend the email, and you can re-activate it in the future if you want. Deleting will delete the email account permanently. Deleting or deactivating will stop emails sent to this account from being forwarded. To delete, you will need to deactivate first. Here is how:
On iPhone or iPad
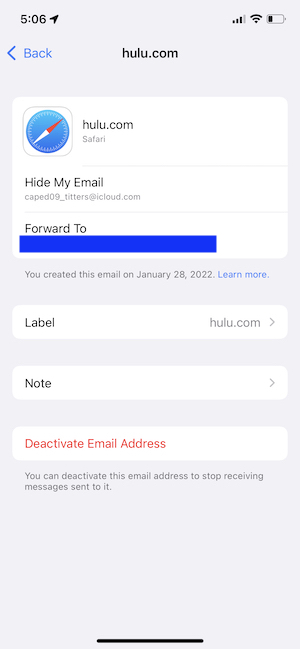
- Tap Settings > Your Name > iCloud > Hide My Email > and select the email address.
- Tap the red Deactivate Email Address. A popup will appear to confirm your decision. Tap Deactivate again.
- If you want to reactivate, go to Settings > Your Name > iCloud > Hide My Email and scroll down and find Inactive Addresses. Find the email you deactivated and activate it.
- If you want to delete, you will need to deactivate first. After deactivating, you will see the Delete Address button when you go to Settings > Your Name > iCloud > Hide My Email > Inactive Addresses.
On Mac
- Click System Preferences > Apple ID > iCloud > Hide My Email Options.
- Find the email you want to deactivate. Scroll down the screen and then click the “Deactivate Email Address” button.
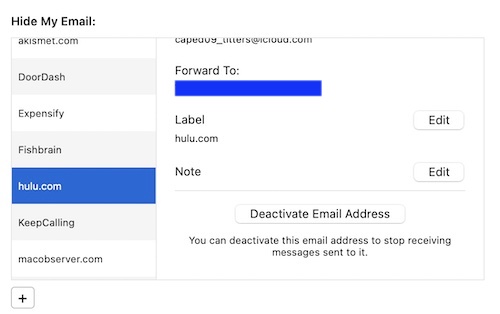
- If you want to reactivate or delete, go to System Preferences > Apple ID > iCloud > Hide My Email Options and you will see a new button saying “Inactive Addresses.” Click that, and then click Reactivate Address, or Delete Address, depending on what you want.
On the web
- In a browser, visit iCloud.com
- Click Account Settings and click the Manage button under Hide My Email.
- Click the email address that you want to deactivate.
- Scroll down and click Deactivate Address. Then click Deactivate again to confirm.
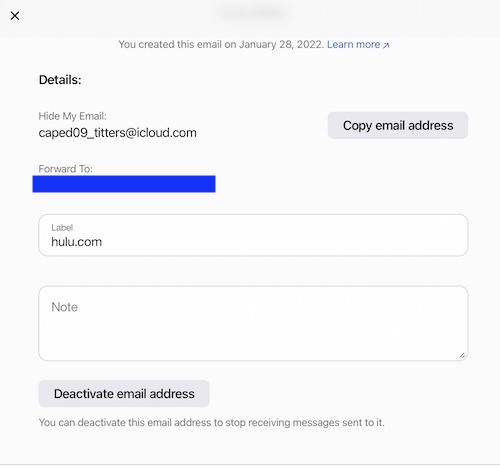
- If you want to delete or reactivate, again go to iCloud.com > Account Settings > Hide My Email > Manage. Scroll down and find the Inactive Addresses section. Then you can click Reactivate Address, or Delete Address.
Conclusion
In this article, I tried to provide an overview of what is Hide My Email. Hide My Email is Apple’s fake email address service. It is part of iCloud. I also explained how you can view your Hide My Email list. If you want to deactivate or delete an email, you can also easily do that. If your privacy is important to you, then this is a great feature. It will certainly reduce your spam email.
Related articles:

