How to Unlock a Disabled iPhone without a Passcode
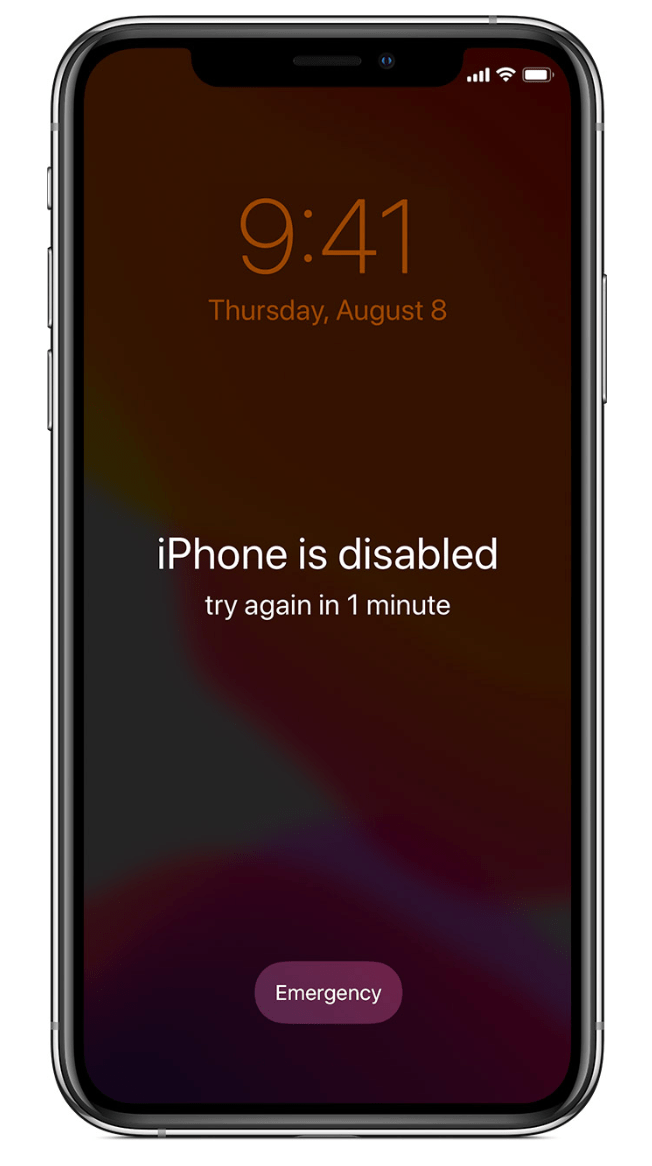
If you have tried your iPhone passcode too many times (more than 5), you will see the “iPhone is disabled” message. If you don’t know your passcode, you will have to take steps to unlock your phone. There are a few ways you can do this, but let me tell you upfront — unfortunately, they all involve erasing (factory resetting) your iPhone.
The good news is that if you use iCloud, you may have a full backup waiting that you can use to restore the phone. You can also restore your phone if you have backed up your iPhone using Finder or iTunes.
There are also options for unlocking your iPhone if you don’t have access to iTunes or Finder. In this article, we will tell you about the options for unlocking your disabled iPhone.
If you have forgotten your iPad passcode, see Forgot your iPad Passcode? How to Reset to Factory Settings.
How to decide which method to use
- If you use Find My and iCloud with your iPhone, you should use iCloud to erase, then restore your iPhone.
- If you don’t use iCloud but regularly back up your iPhone using Finder or iTunes, you should use that to restore your iPhone using a backup.
- If the first two won’t work for you, you can use recovery mode to factory reset your disabled iPhone.
If you don’t use or can’t access iCloud and you don’t have access to a computer, you can take your disabled iPhone to an Apple Store or Apple Authorized Service Provider. You can make a reservation for the Apple Store’s Genius Bar.
Unlock iPhone using iCloud
You can access iCloud using most any browser, from a computer or a mobile device.
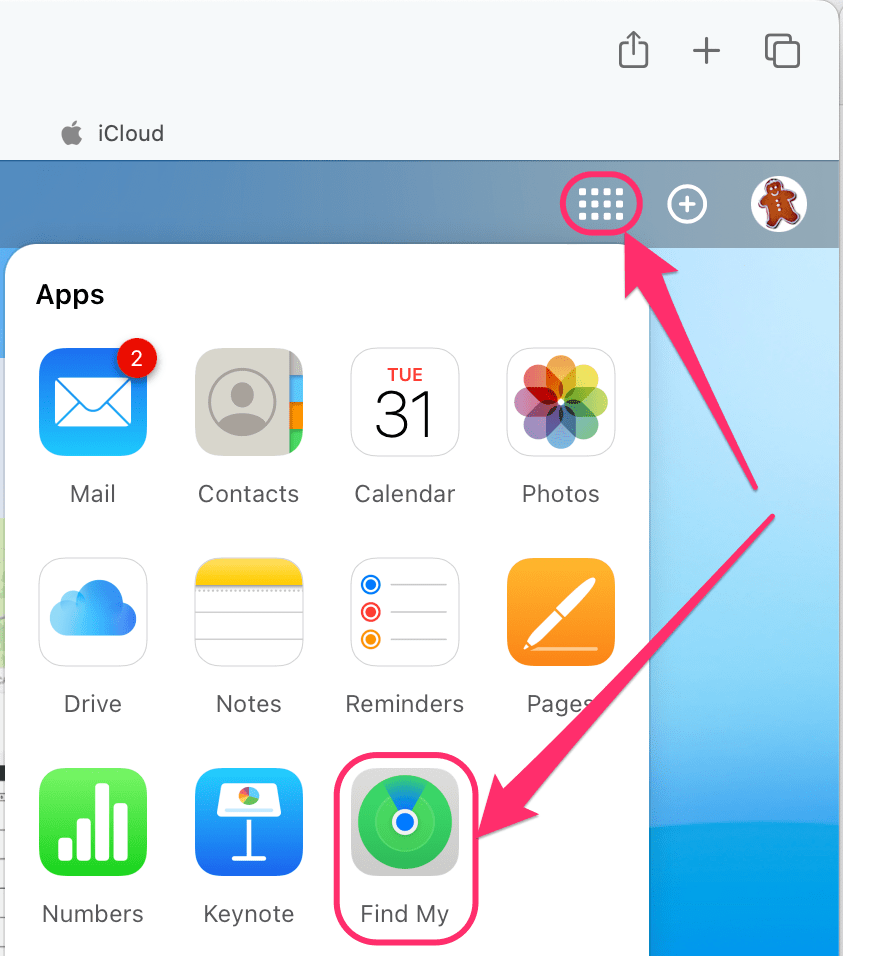
- Using a browser like Safari, Chrome, Edge, etc., go to iCloud.com and open Find My from the apps there. You will need to enter your Apple ID and password.
- Select All Devices near the top of the page, then select your iPhone.
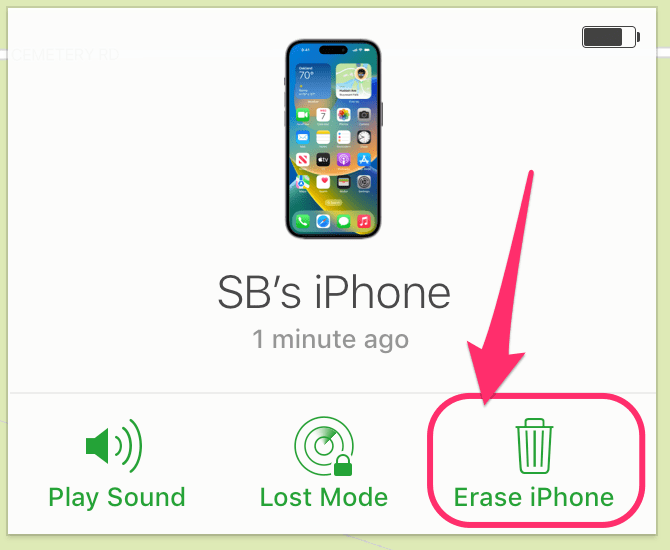
- Select Erase iPhone, then enter your Apple ID password. This will factory reset your iPhone.
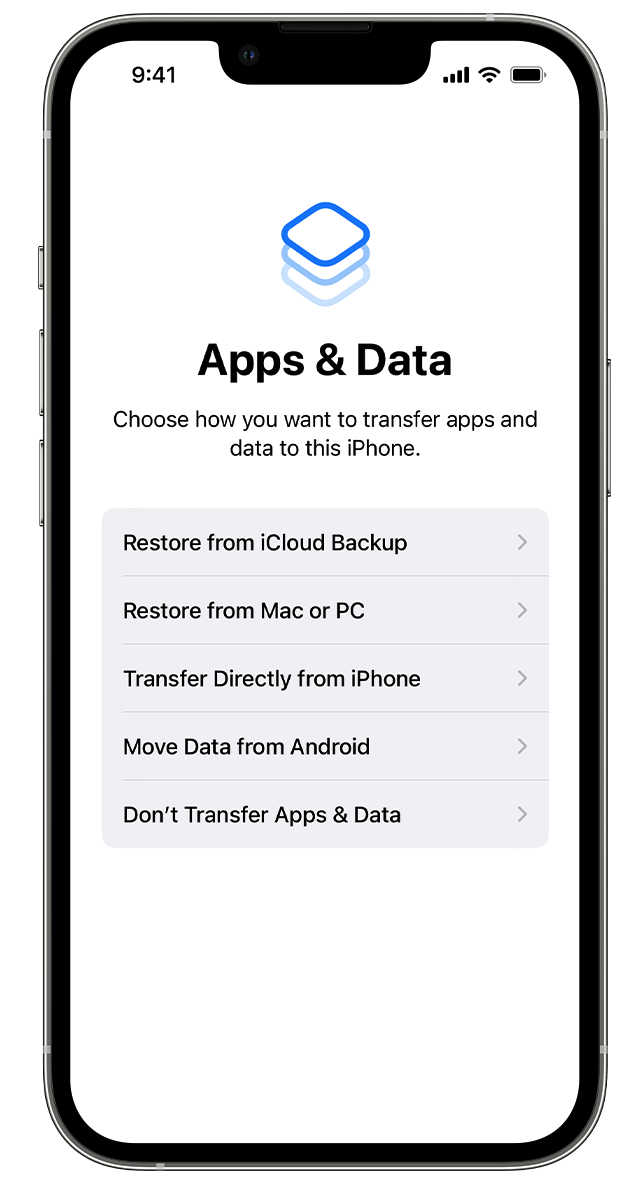
- After your iPhone restarts, you can set it up as new or restore from an iCloud backup or a backup on your computer using Finder or iTunes.
Unlock iPhone using Finder/iTunes
If you have a Mac running Catalina or later, you can use Finder to unlock your iPhone. If you are using a Mac running Mohave or earlier or you are using a PC, you can use iTunes to unlock your disabled phone.
Unlock your disabled iPhone using Finder
- Connect your iPhone to your Mac using the appropriate USB cable.
- If necessary, trust the computer.
- Open Finder.
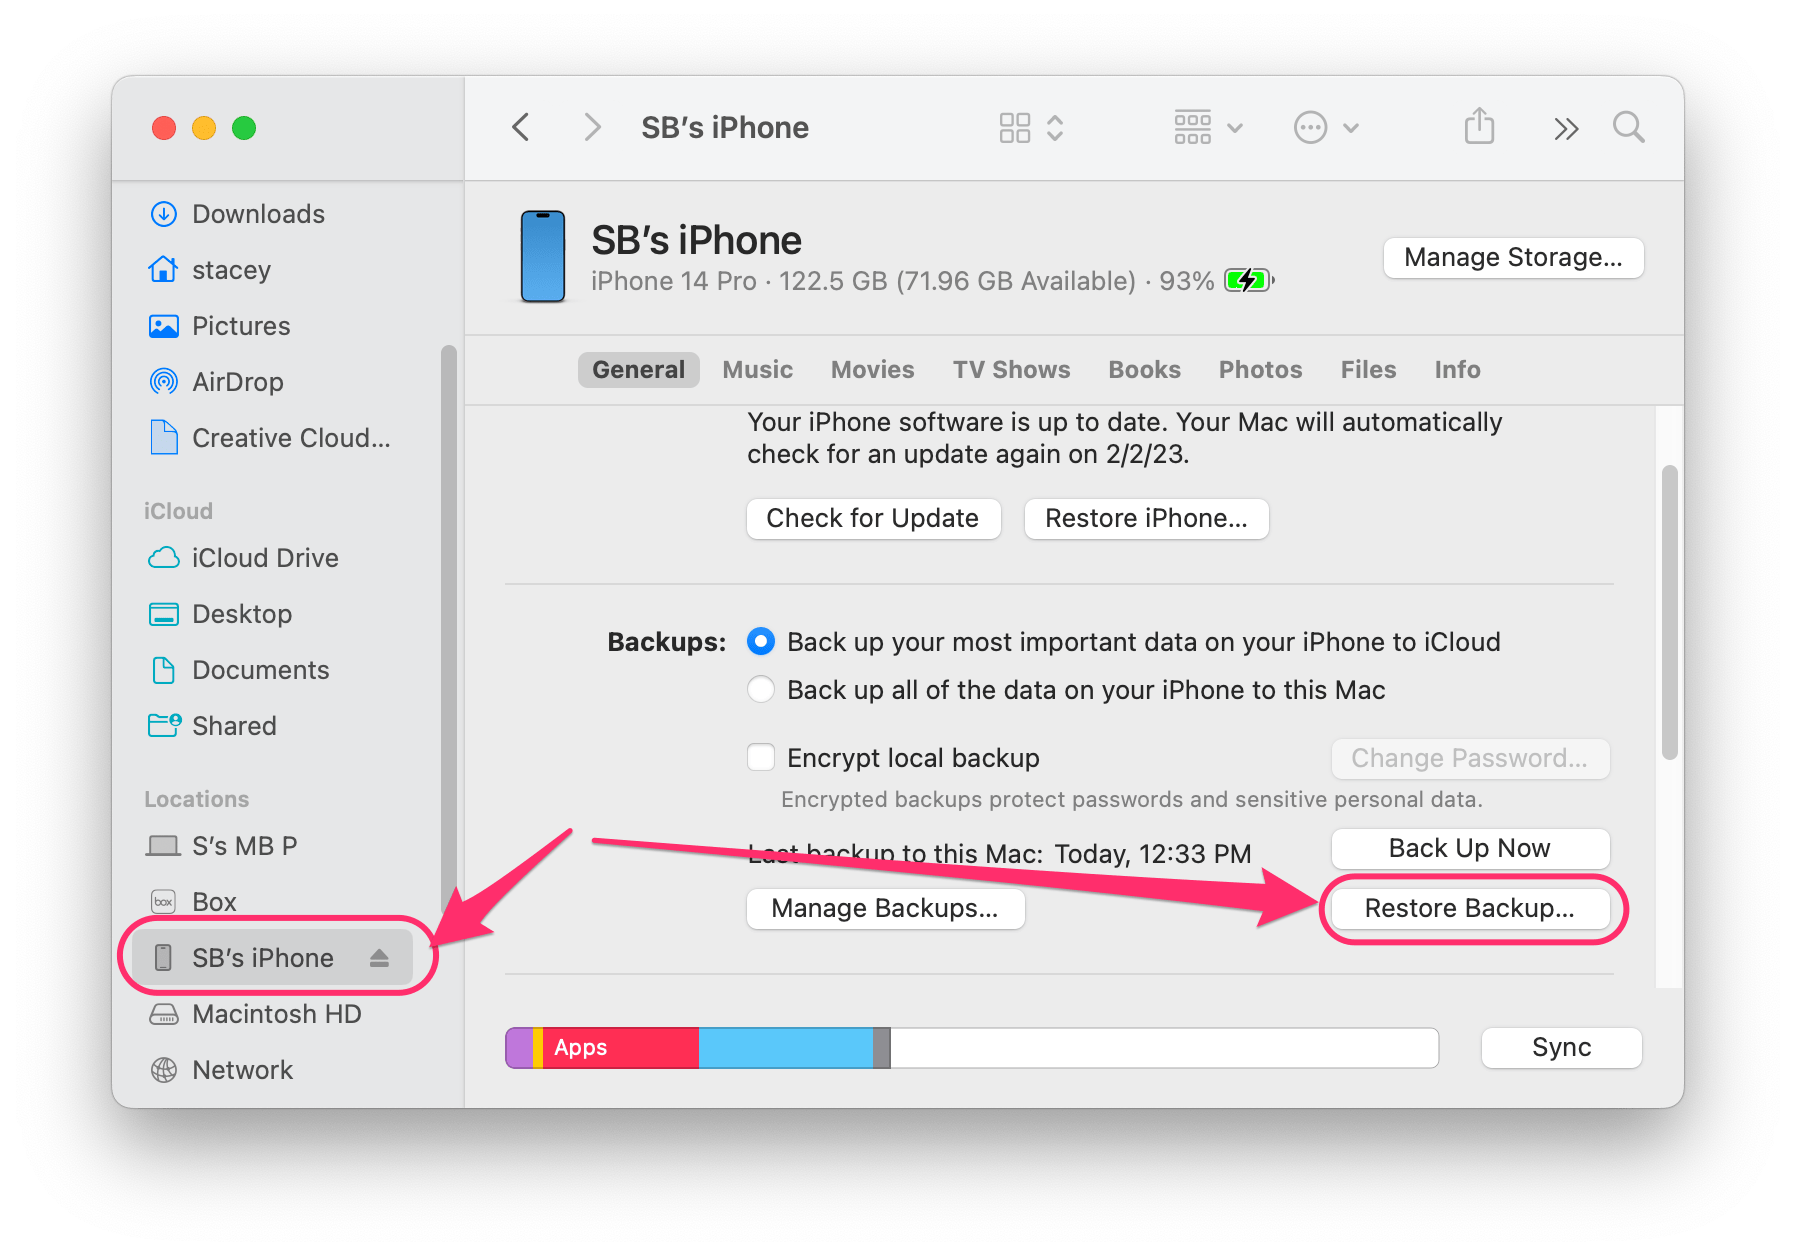
- Find your iPhone in the left sidebar and click on it.
- Click on Restore Backup, then choose your most recent backup.
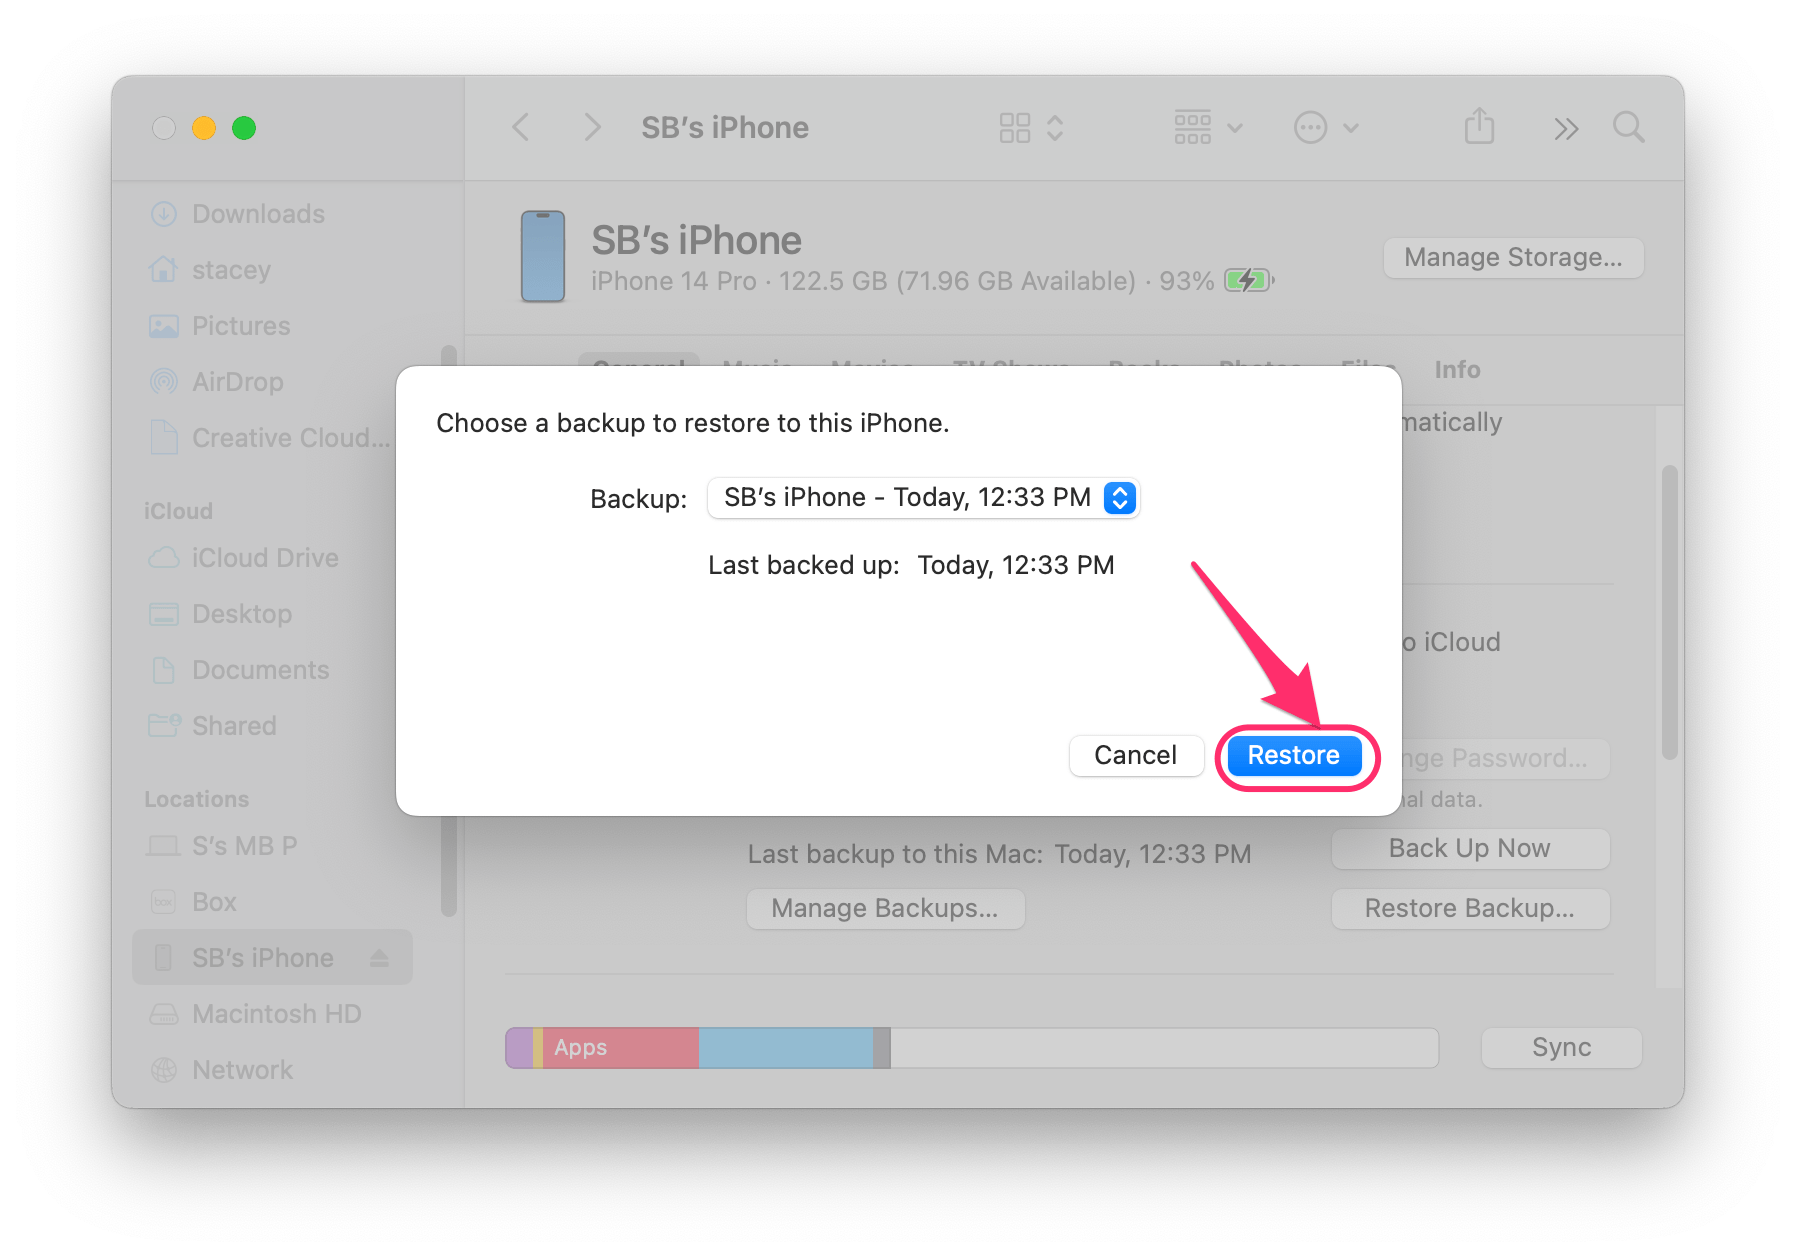
- Click on Restore.
- Wait for the process to finish before disconnecting your iPhone.
Unlock your disabled iPhone using iTunes
- Connect your iPhone to the computer using the appropriate USB cable.
- If iTunes doesn’t launch, open it.
- Find a button that looks like your iPhone and click it.
- Click on Summary, then click on Restore iPhone. Restore erases your iPhone.
- Follow onscreen instructions. After your iPhone has been restored (factory reset), you can restore from an iTunes or iCloud backup.
Unlock disabled iPhone using Recovery Mode
Recovery Mode uses a computer to restore your disabled iPhone.
Turn off your iPhone
- If you are using a PC, make sure that iTunes is installed on the computer.
- With your iPhone not yet connected to the computer, turn off your iPhone:
- iPhone 8 and later and iPhone SE (2nd, 3rd gen): Press and hold both the side and volume down buttons. When you see the power off slider, slide it to the right to power off.
- iPhone 6 and 7 models: Press and hold the side button until the power off slider appears. Slide the power off slider to turn off.
- iPhone SE (1st gen), iPhone 5s and earlier: Press and hold the top button until the power off slider appears. Slide the slider to power off.
Connect your iPhone to the computer
- After your iPhone has powered off, you are going to press and hold one of the buttons while you connect your iPhone to the computer. So have the cable already connected to the computer, ready to connect to your phone.
- The button you will use depends on your iPhone model:
- iPhone 8 and later and iPhone SE (2nd, 3rd gen): You will use the side button.
- iPhone 7 models: You will use the volume down button.
- iPhone SE (1st gen), iPhone 6 and earlier: You will use the Home button.
- Now, press and hold the appropriate button while quickly connecting your iPhone to the computer. Don’t let go of the button until the recovery mode screen appears on your phone.
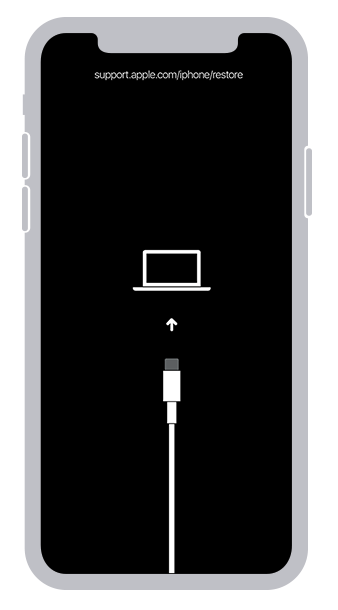
Restore your iPhone in Finder or iTunes
- On the computer, open iTunes (PC or Mac running Mohave or earlier) or Finder. Click on your iPhone:
- In Finder: Your iPhone should be listed in the left sidebar.
- In iTunes: Your iPhone should appear as a button near the top.
- You should see a popup with the options Update, Restore or Cancel. Choose Restore.
- The process should take a few minutes to complete. If it fails — it takes too long, and your iPhone exits the recovery screen — start over from the beginning.
- Once the process finishes, you can disconnect your iPhone and set it up as new.
For more on Recovery Mode, see How to Use Recovery Mode with your iPhone or iPad.
Related articles
- How To Know If An iPhone Is Unlocked or Locked
- Your Account Has Been Disabled in the App Store and iTunes, Fix
- Face ID Disabled? How To Fix
- Too Many Passcode Attempts Reset Apple Watch and Pair Again
- Boot Camp Error “The Startup Disk Cannot Be Partitioned Or Restored To A Single Partition”
- Mac White Screen: How To Fix Your Mac That Won’t Turn On

