Mac Camera Stopped Working; No Video Capture Devices Were Found, Fix
Some Mac users, especially MacBook users, have said that their built-in camera suddenly stopped working for no reason. Affected users get a “there is no connected camera” message when they want to use an app that uses the camera, such as FaceTime. Additionally, when they open System Information, the Camera option says, “No video capture devices were found,” as you can see in the screenshot below. This problem prevents you from using the camera in apps. For example, you won’t be able to use FaceTime or participate in Zoom meetings. In this article, I explain how to fix this error so that you can get your camera working again.
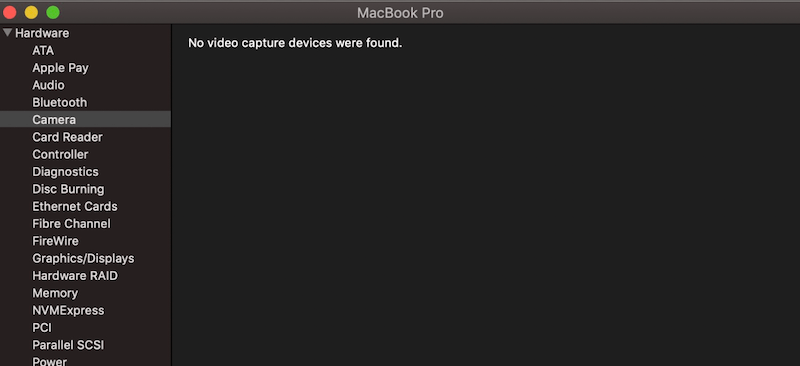
Why is your camera not working? The causes of this problem may vary. This article will go over steps you can take to try to address this camera issue. Try the following steps in order.
Update your Mac
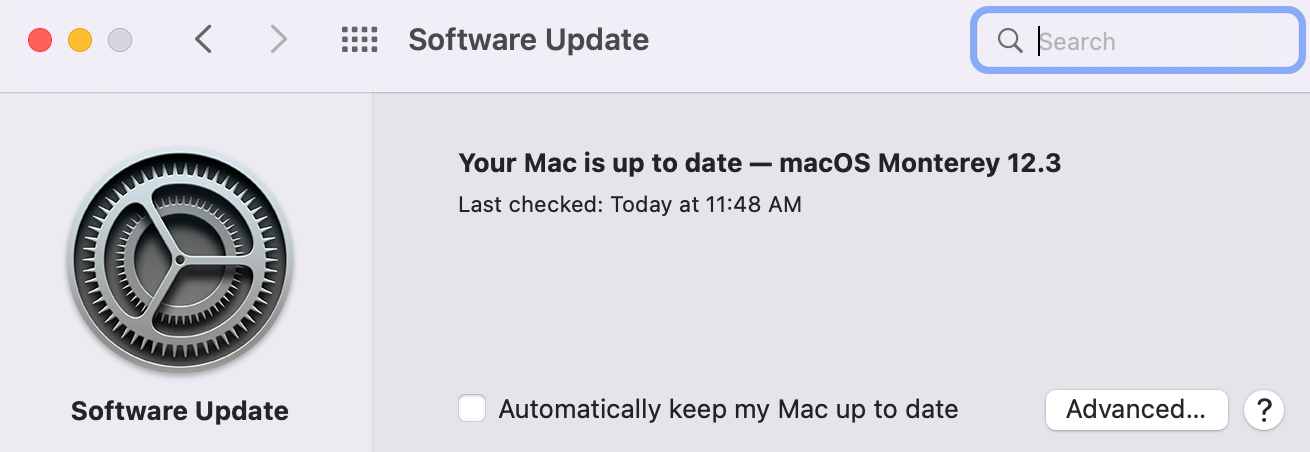
There may be a bug causing the camera problem. Updating your Mac may fix this permanently. This is easy; simply go to System Preferences > Software Update. If there is an update, you will see a Download button. Click that and then follow the instructions you see on your screen and update your Mac. After updating, test your camera. If your Mac is up to date, then go on to the next step.
Safe Mode
Start your Mac in Safe Mode. Safe Mode is a troubleshooting mode that clears cache, repairs directories and does other useful housekeeping stuff. How you start your Mac in Safe Mode differs based on the Mac type you have: Intel or Apple silicon. We have previously written about how to start up in Safe Mode. Follow the steps in the linked article to start your Mac in Safe Mode. In Safe Mode, your Mac will be slower. Test your camera in Safe Mode. Now exit Safe Mode. Simply restart your Mac, then test your camera again.
Check your privacy settings
You may see this problem in some apps because the app may not be allowed to use the built-in camera. Ensure that your apps can access and use the camera. Here is how you can check this:
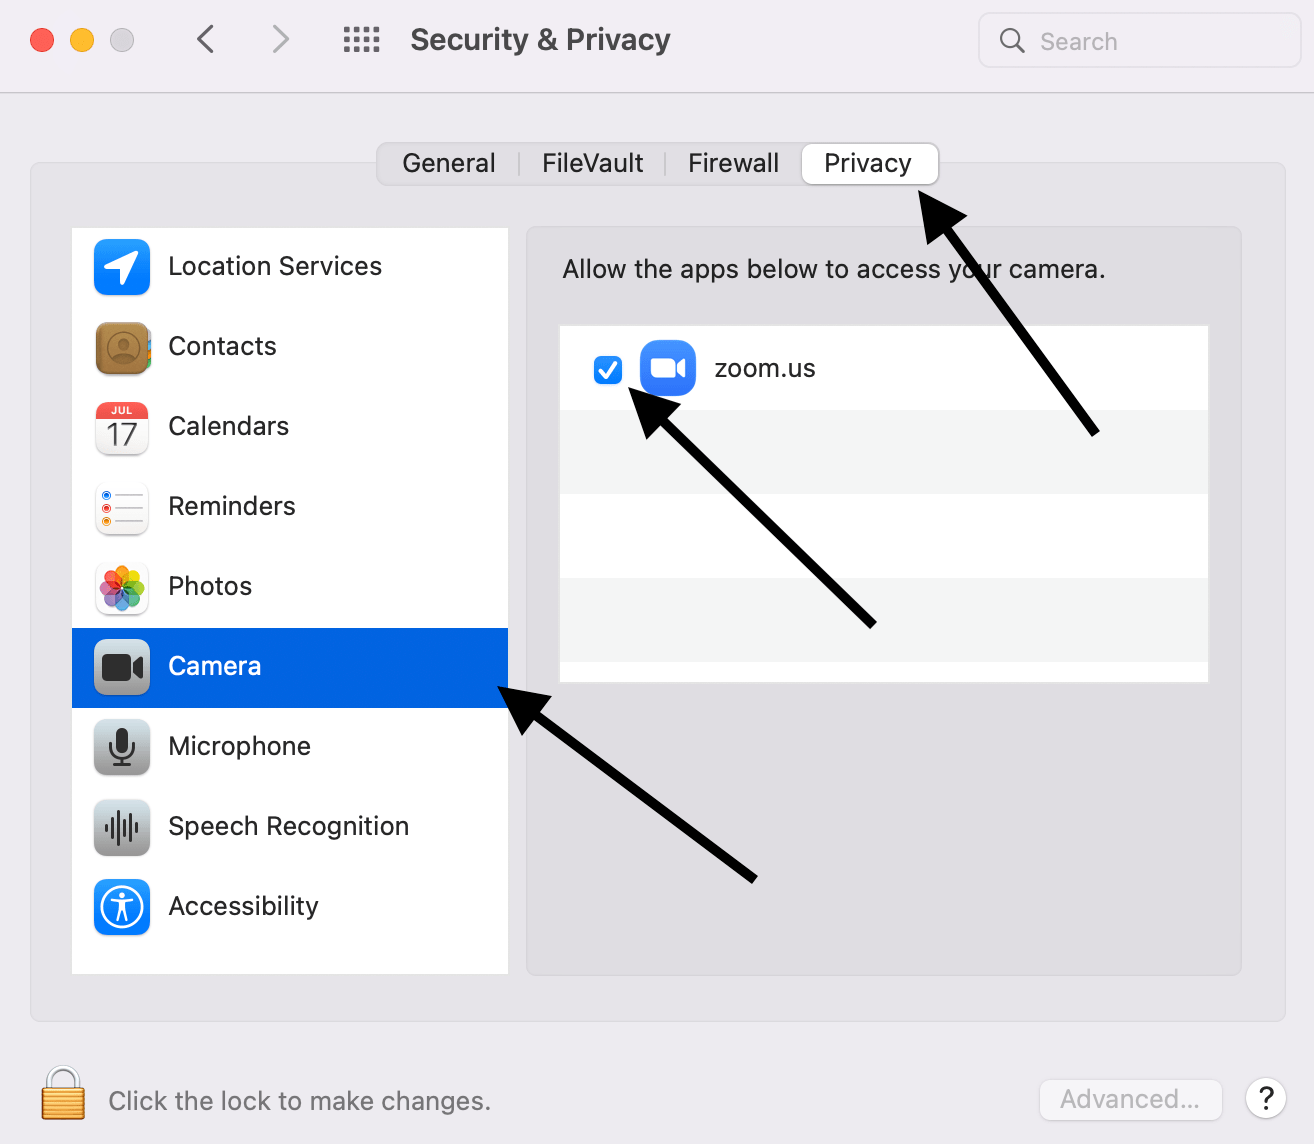
- On your Mac, go to the Apple menu > System Preferences, then click Security & Privacy.
- Click on the Privacy tab.
- From the left sidebar, select Camera.
- Ensure that the apps you want to use your camera in are selected. For example, if you are having this issue in Zoom, you want to ensure that zoom.us is selected (see screenshot below). If this section is locked, click the Lock icon and enter your (admin) user password to unlock the section.
Accessibility settings
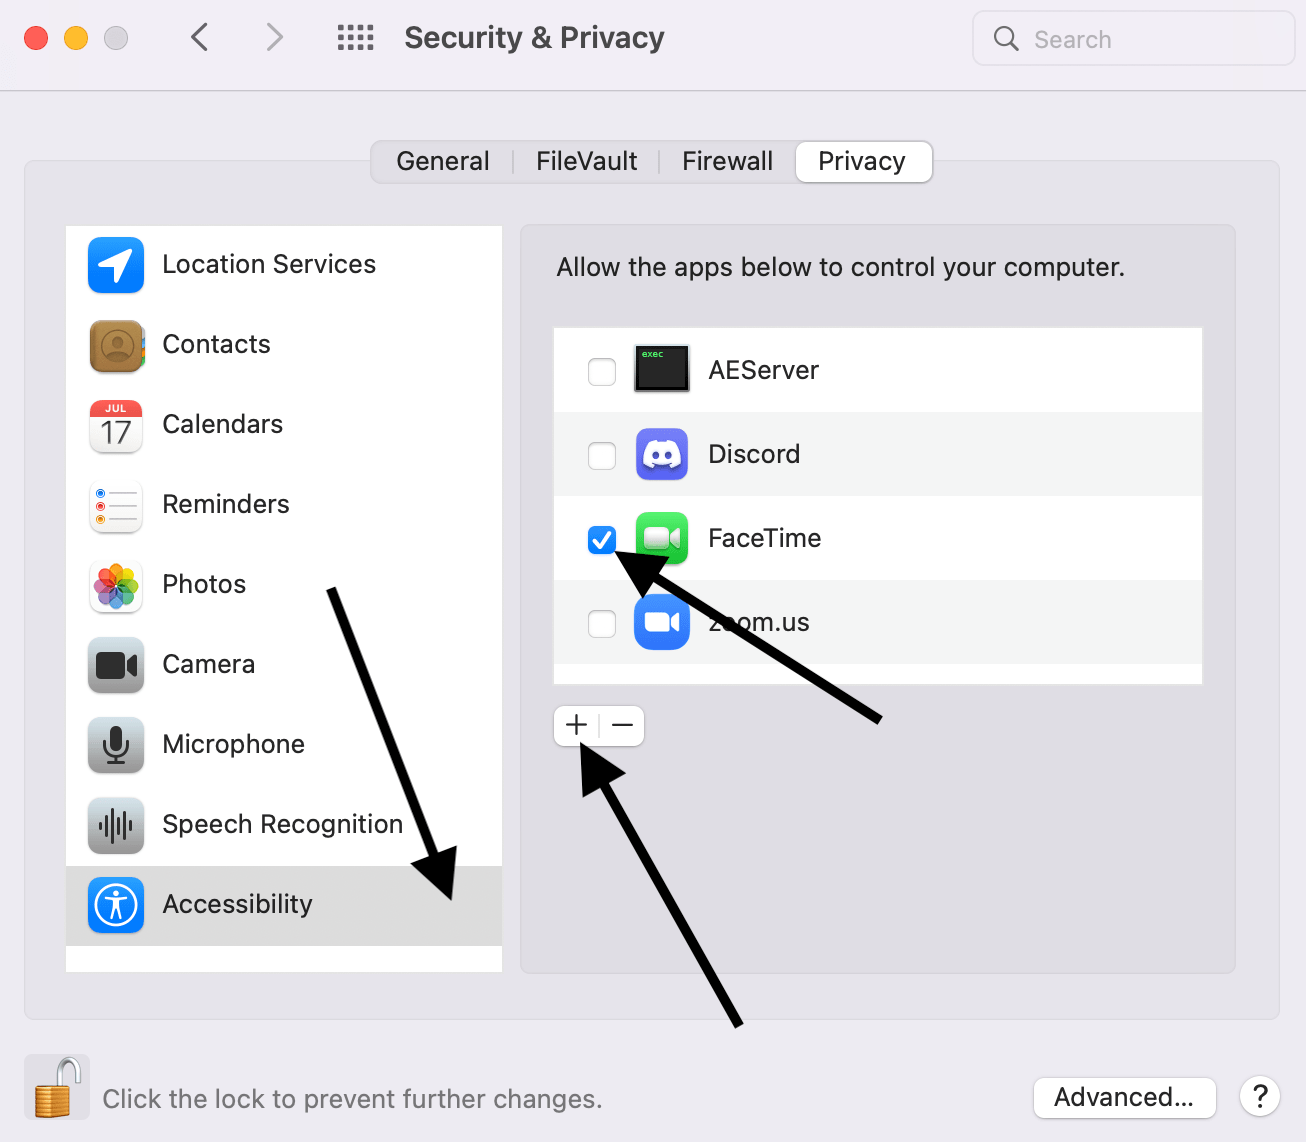
Some of our readers have told us the camera started working after letting the apps where they are unable to use the camera control the Mac. You may want to try this too. Here is how:
- On your Mac, go to the Apple menu > System Preferences, then click Security & Privacy.
- Click on the Privacy tab.
- Select Accessibility in the sidebar. If this section is locked, unlock it by clicking the Lock icon located at the lower-left corner of the window.
- Ensure that the app is selected. If you do not see the app in the list, such as FaceTime, click the plus (+) and add the app.
- After this, restart your Mac and try to use your camera.
Are you using older macOS software?
If your Mac is old and you can only run older versions of macOS, such as High Sierra, you may want to restart the VDCAssistant and AppleCameraAssistant processes. This may fix your issue. Again, if you are running a newer version of macOS, these are not available to you. Here is how:
- Open the Terminal app on your Mac (Open Finder, then go to Applications > Utilities).
- Enter the following command and hit enter:
sudo killall VDCAssistant
- Then enter the following and hit enter:
sudo killall AppleCameraAssistant
- Now open the app that attempts to use the camera and test again.
Check your hardware
If you are having this camera issue after trying the steps above, you may be having a hardware issue. And if you are having a hardware issue, you can reserve a Genius Bar appointment and let Apple fix the issue. Luckily, Apple has a built-in tool called Apple Diagnostics to determine if your Mac is having hardware problems. This tool may help you identify the problem. Here is how you can start this tool:
For Apple silicon Macs:
- Turn off your Mac.
- Press and hold the power button until you see the startup options window (you will see a gear icon).
- Then using your keyboard, press Command–D.
For Intel Macs:
- Turn off your Mac.
- Turn on your Mac and quickly press and hold the D key on your keyboard.
- Release the D key when you see a progress bar.
Now Apple Diagnostics will run. Let the test run and see if it finds a problem with your hardware.
Related articles

