What is Self-Assigned IP and How to Fix it
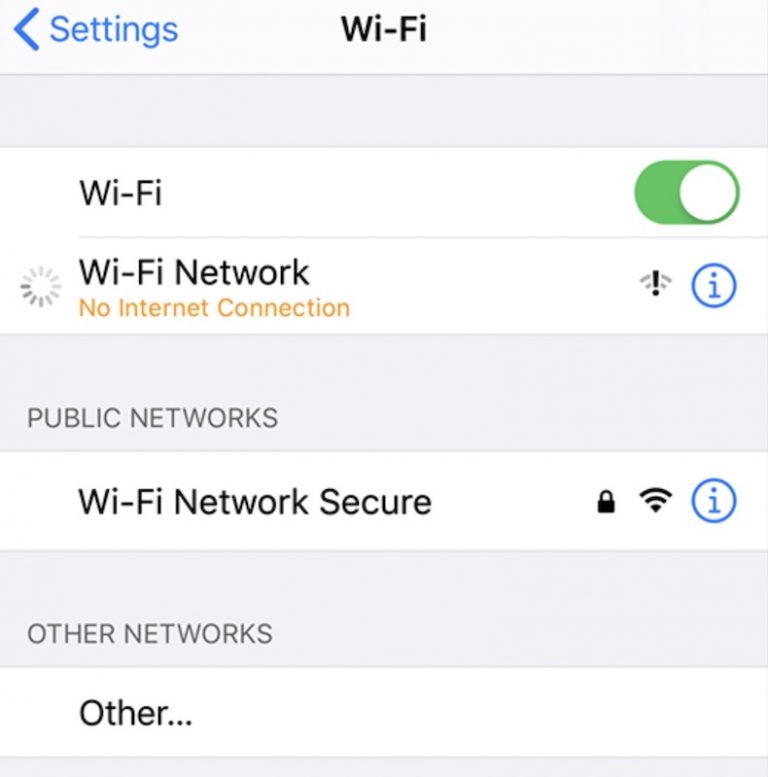
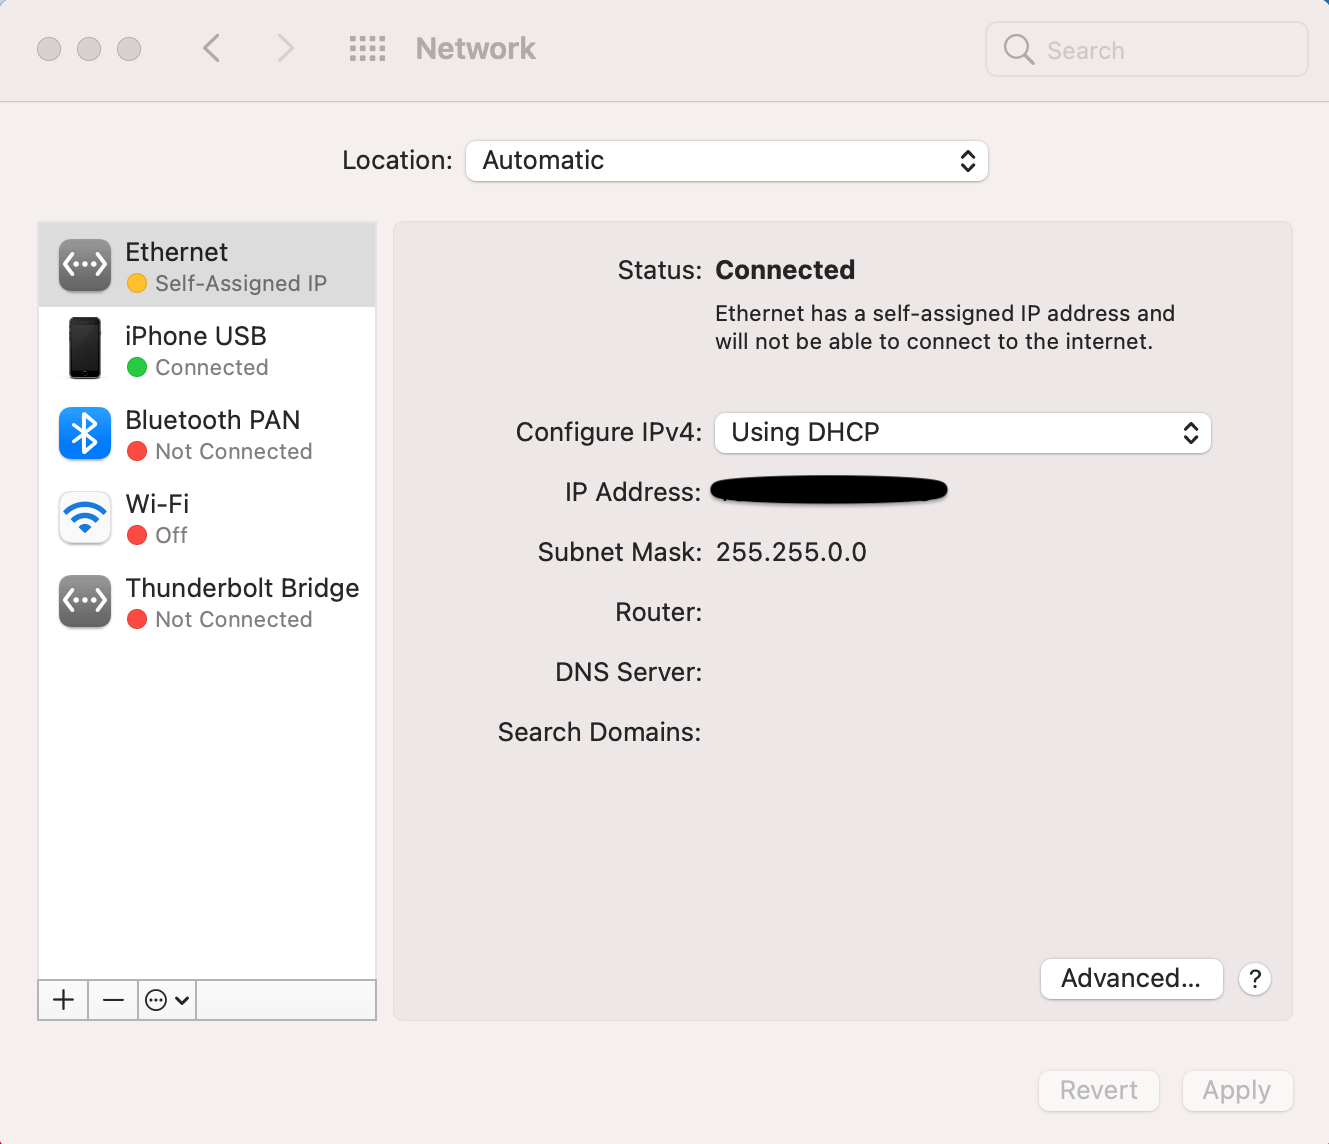
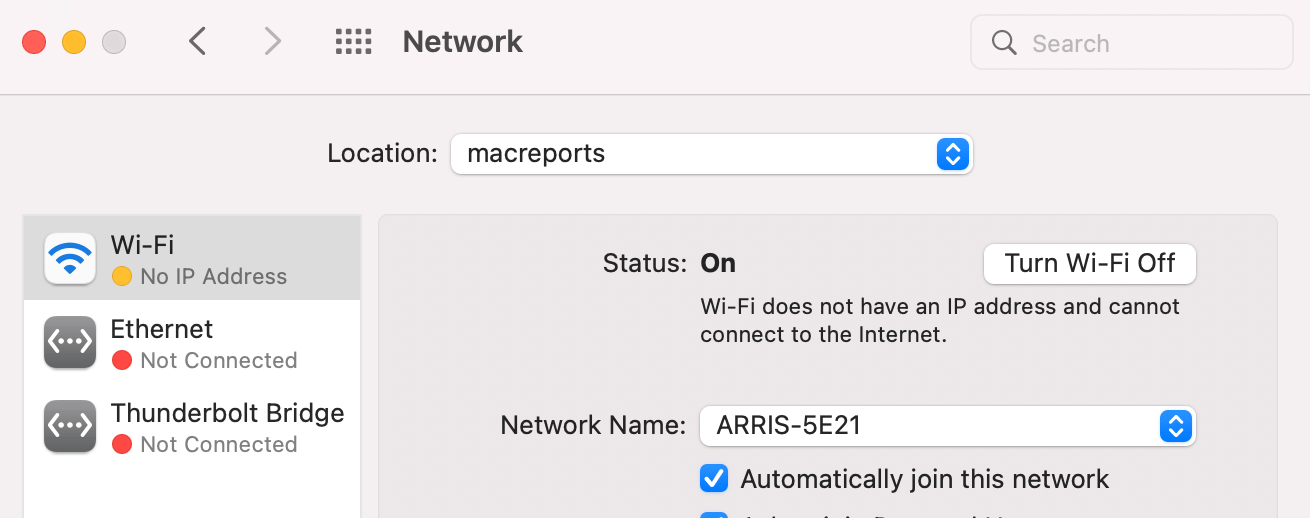
The self-assigned IP error may prevent your Mac from connecting to the Internet. You may get an Internet connection error messages such as “Wi-Fi has the self-assigned IP address and will not be able to connect to the Internet.” If you investigate this issue further, you will see that the Network pane in System Preferences will also show a notification message saying “Self-Assigned IP” with a yellow dot instead of the regular “Connected” message under the network service, as you can see in the screenshot below. This problem may occur when Mac is connected to a wired, wireless (Wi-Fi), or hotspot connection.
This problem occurs when a self-assigned IP address is issued to network interfaces. When this issue happens, not all computers connected to the same network may be affected. For example, in the same home, one Mac may have this problem while other similarly configured Macs may have no problem at all, even though they all are using the same Wi-Fi connection. This may mean that the root of the problem is how the problem Mac is configured. Several factors may cause this issue, such as:
- Bad cable connections.
- Not getting an IP from the router or modem.
- Failure of the DHCP server.
Follow the steps below to address this problem. Please try the steps in this order. After trying each step, check to see if your problem is fixed. If it is not fixed and if you still see the Self-Assigned IP error, move to the next step.
Self-Assigned error troubleshooting steps
Check your router/modem: If you are connected over Wi-Fi, ensure that your Mac is not too far away from the router/modem.
Restart your router/modem and your Mac: You can do this easily. Simply disconnect the power cable to your router/modem. Wait 30 seconds. Then reconnect. Then restart your Mac. Click the Apple menu and select Restart.
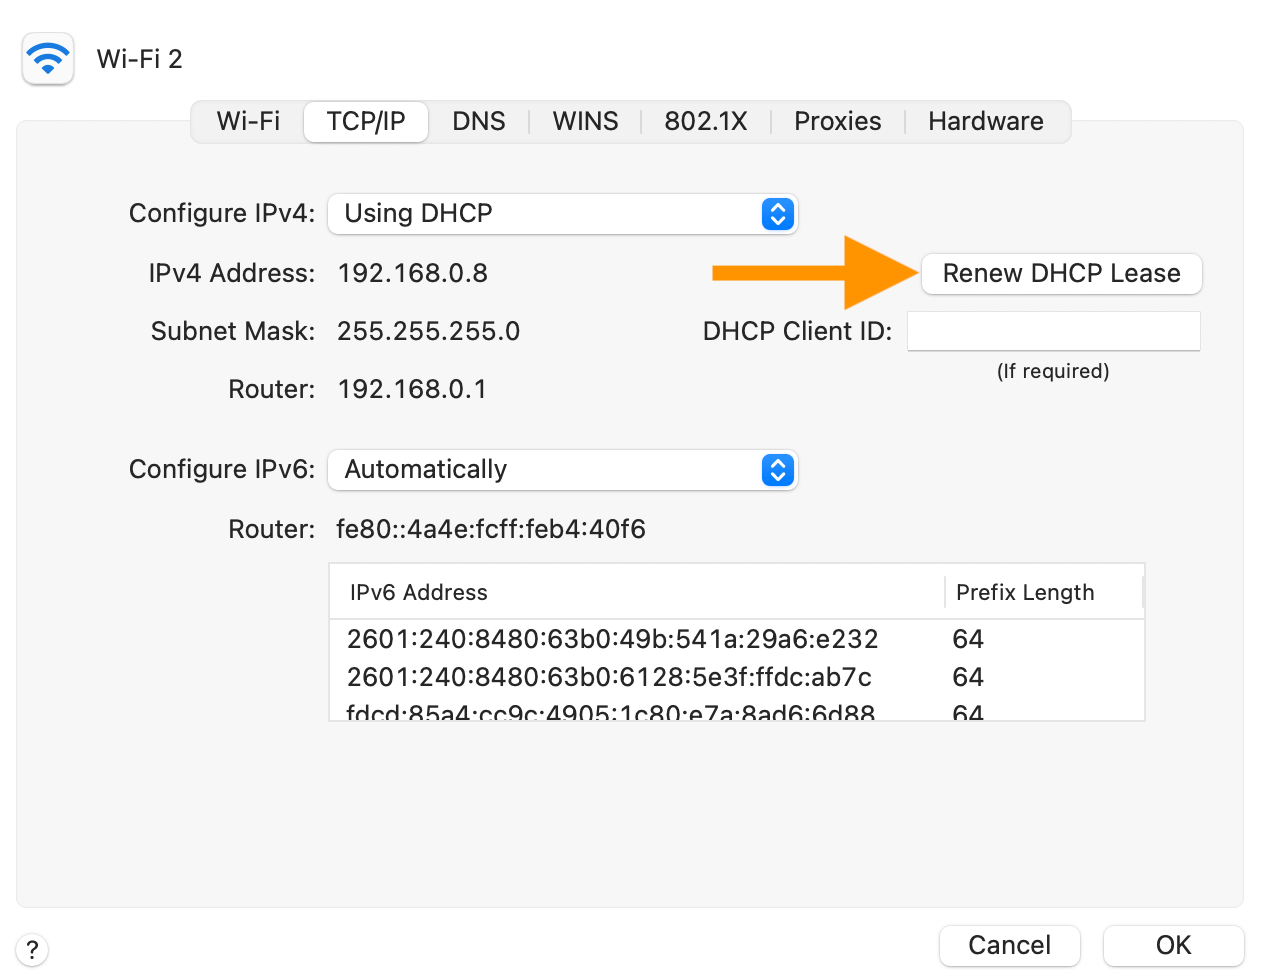
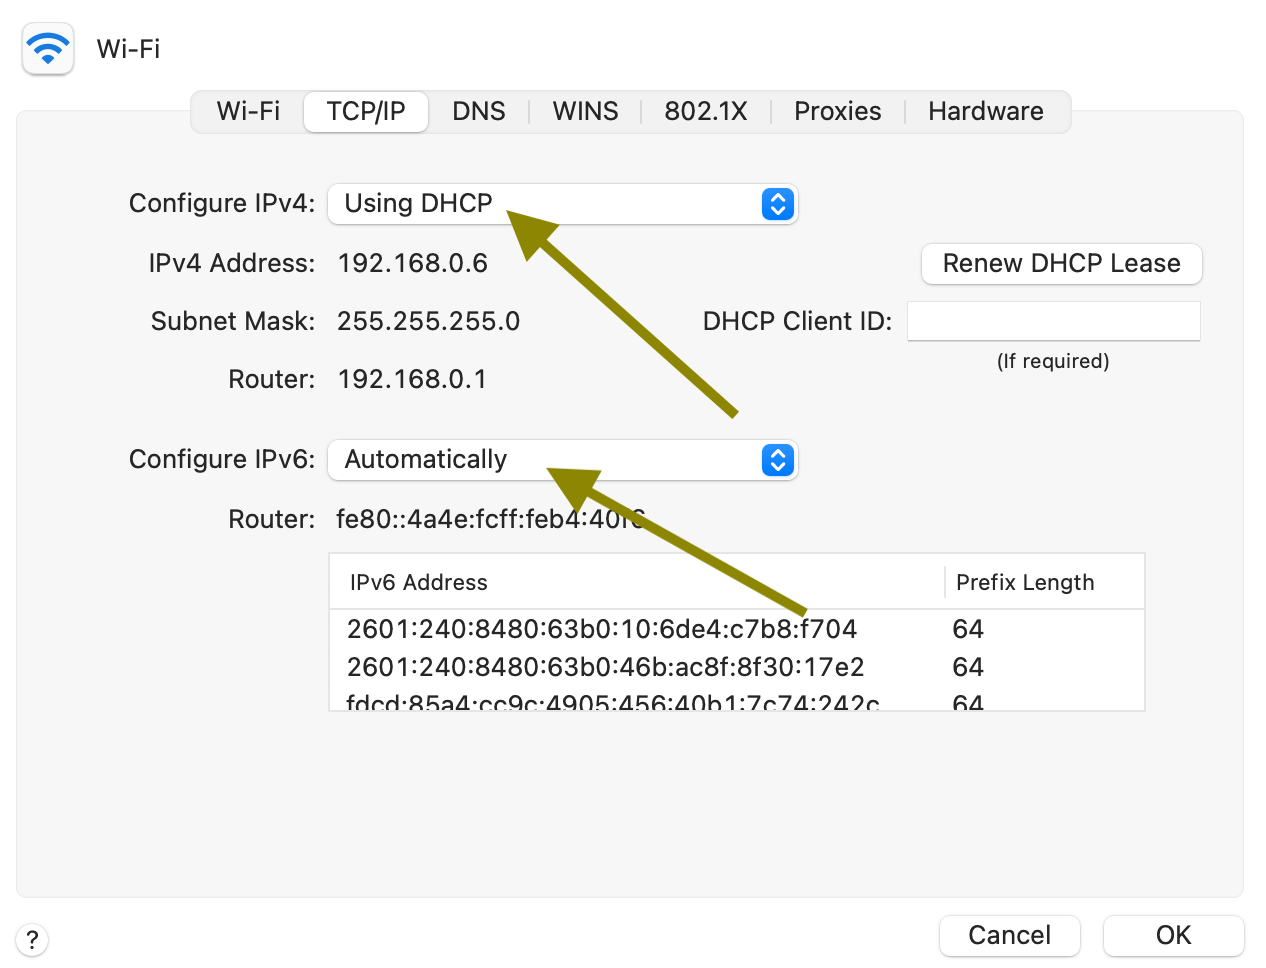
Renew DHCP Lease: On your Mac, open System Preferences and click on Network. Select the network service you want to connect to (e.g., Wi-Fi or Ethernet) and click on Advanced. This will open a new window. Select the TCP/IP tab and click the Renew DHCP Lease. Then click OK.
Check your connection settings: On your Mac, go to System Preferences > Network. Then select the network that shows this error and click Advanced. Select the TCP/IP tab and then make sure that “Configure IPv4” and “Configure IPv6” are set to Using DHCP and Automatically, respectively.
Then click on the DNS tab, and delete any DNS servers that are listed there. Select them one by one and click on the minus button to remove them. Do not forget to click OK and Apply when you are done.
Create a new network location: On your Mac, open System Preferences and Network. Open the Location drop-down menu and select Edit Locations. Click the plus (+) button and add a new location, give it a name and click Done. Now you have two locations: Automatic and your new location. Select this new location and then click Apply.
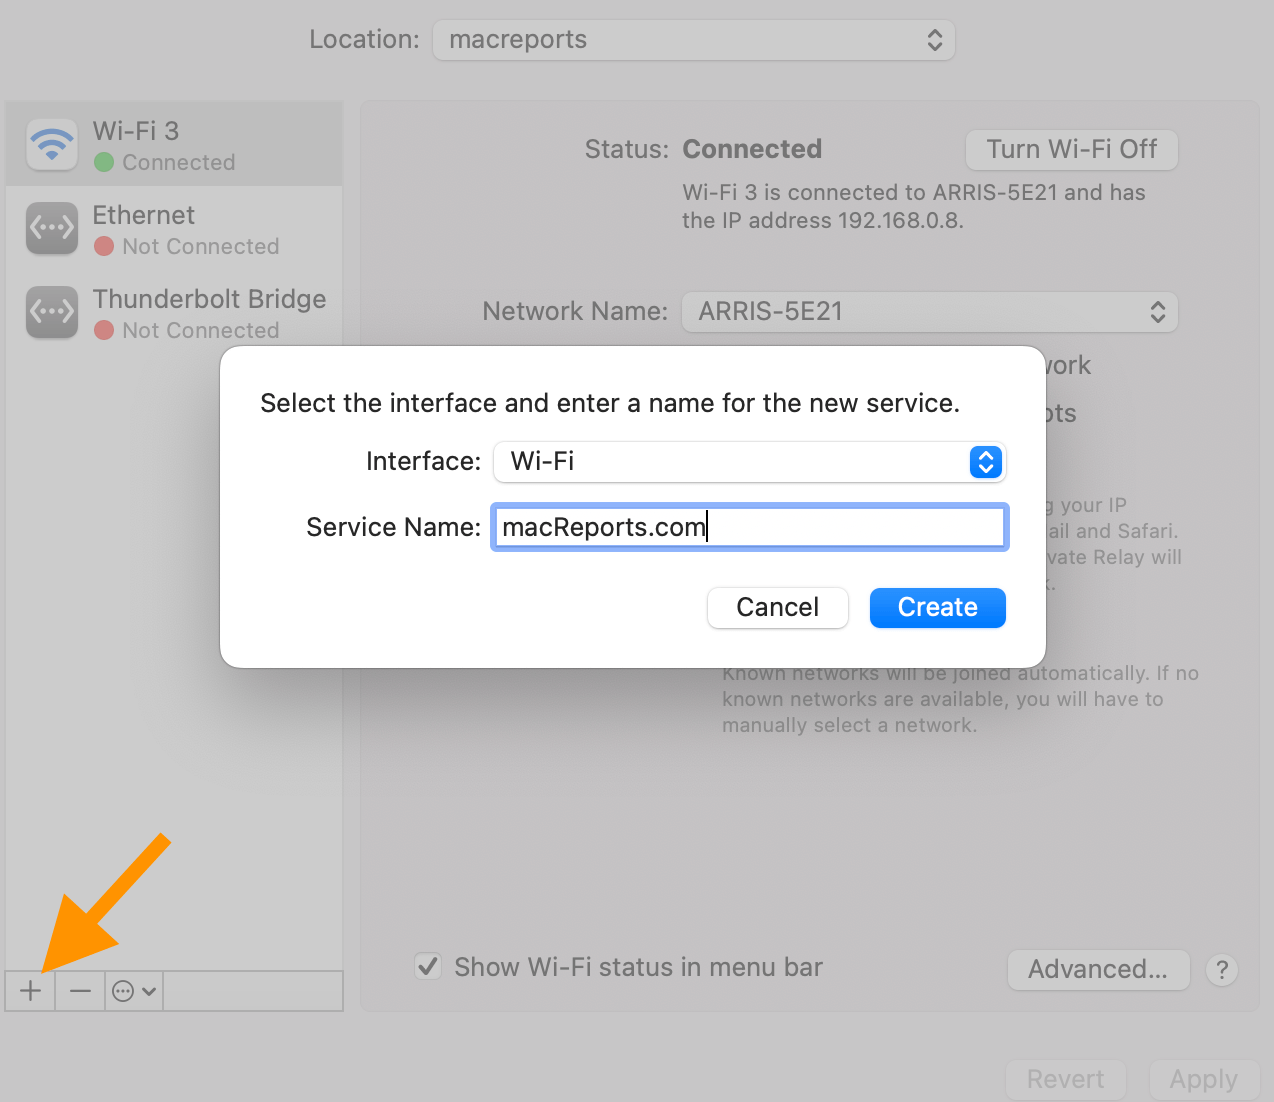
Now, we will add a new Wi-Fi or Ethernet service, whichever you are using. Click the plus (+) sign under the network services on the left, select the Interface (Wi-Fi, Ethernet, etc.) and name it, then click Create. Then click Apply.
Now select the Self-Assigned IP network and then click the minus (-) button to delete it. Then click Apply. Does this newly created service connect?
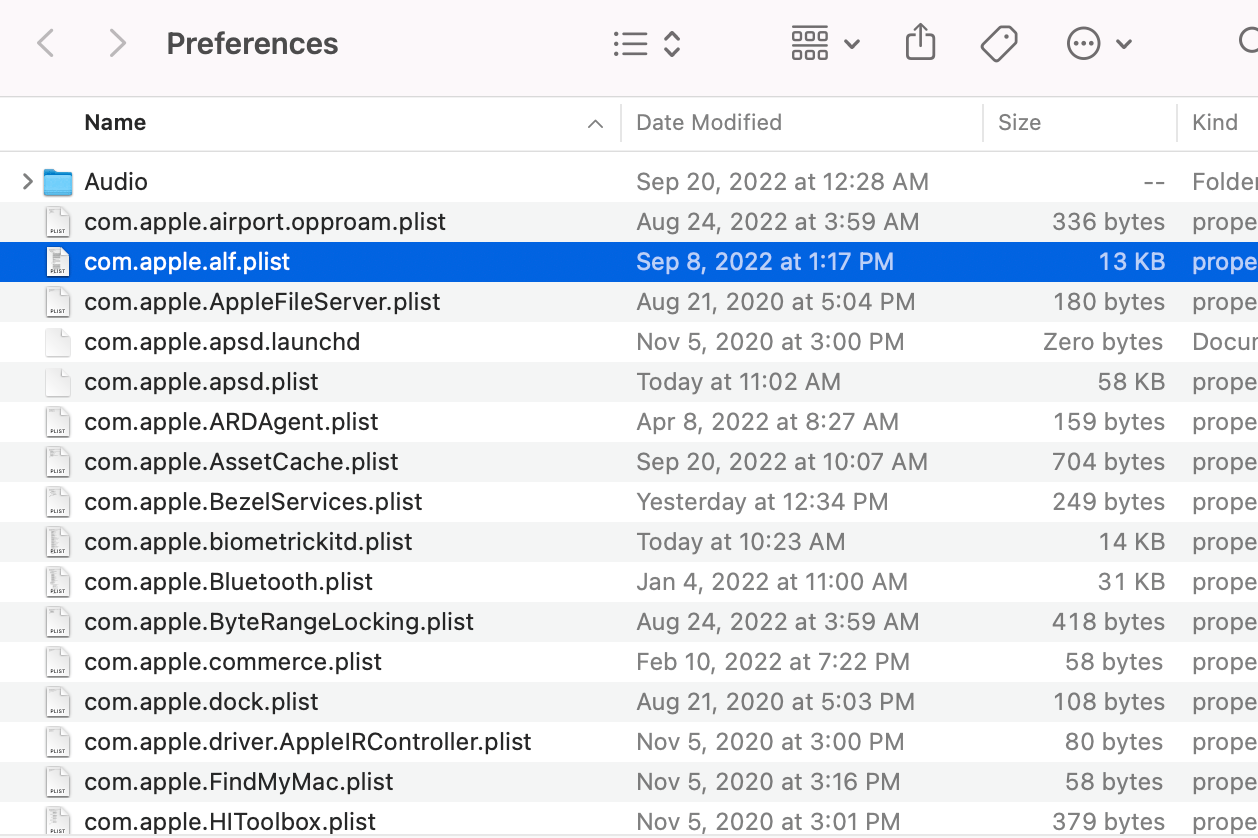
Reset the system firewall: We can do that by deleting its preference file. Open a Finder window and then click Go and Go to Folder from the top menu bar. Enter /Library/Preferences/ and click Go.
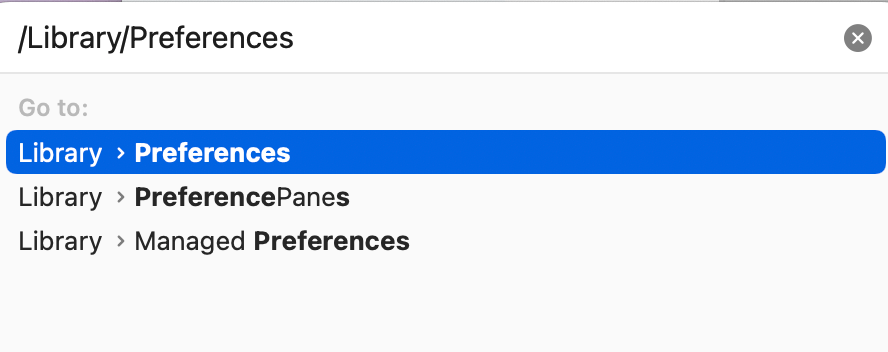
Once the Preferences folder is open, find the com.apple.alf.plist file. Delete this file (or place it on your Desktop; if you are not happy with what happens, you can put it back). Then restart your Mac.
Related articles