How Long Can You Screen Record on iPhone and iPad
You may want to know how long you can record your iPhone or iPad screen before starting to record. Is there a time limit to how long you can record? We will address that question in this article.
Screen recording is a video recording of what is going on on your screen. This may also include audio if you prefer. Capturing your screen on your iPhone or iPad can be used for personal or business purposes.
iPhone and iPad screen recording limit
There is no limit on screen recording. However, your recording may be interrupted or stopped by these two factors:
- How much available space you have on your iPhone.
- How much battery life is left on the iPhone if it is not connected to a charger.
The longer you record your screen, the larger file you will have. Screen recordings are video files, and video files tend to take up a lot of storage. You can make hours of screen recording if the resulting file can be saved and your iPhone can last on battery. If the recording cannot be saved due to lack of storage, or if your iPhone runs out of battery while recording and dies before you complete the recording, your recording will be stopped and not saved.
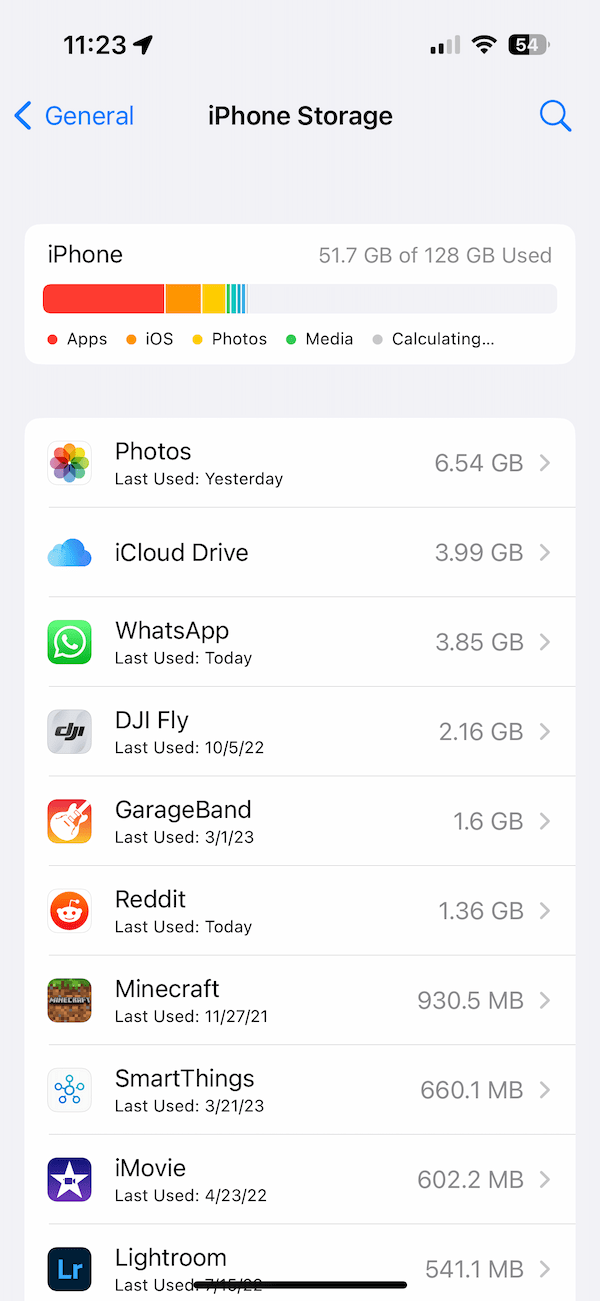
Thus it is a good idea to ensure that either you have enough charge in your phone or you plugged in your phone to a power source before starting to make a long screen recording. Furthermore, ensure that your iPhone has enough storage. You can check your current storage by going to Settings > General > iPhone or iPad Storage.
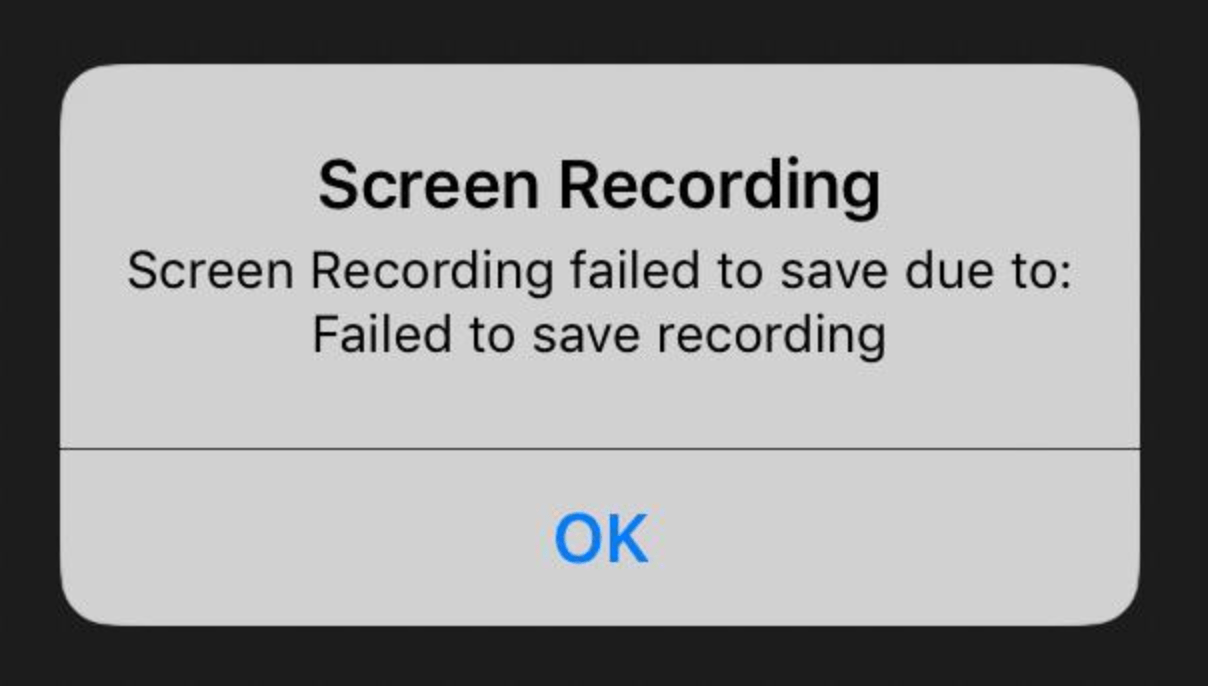
If your recording ends up bigger than the available storage, it won’t be saved, and you may get an error message like one of these:
- Screen Recording failed to save due to XXXX.
- Failed to save due to: the operation couldn’t be completed.
- Screen recording has stopped due to insufficient storage for recording.
If this is the case, you have two options:
- Free up storage on your iPhone: If you go to the Storage settings (Settings > General > iPhone Storage), you may see some recommendations that you can follow.
- Divide your projects into chunks: Create multiple screen recordings instead of one. This second option is probably better because large files can be difficult to manipulate too. For example, they may be difficult to edit, share or upload, say, to YouTube.
How to record the screen on iPhone
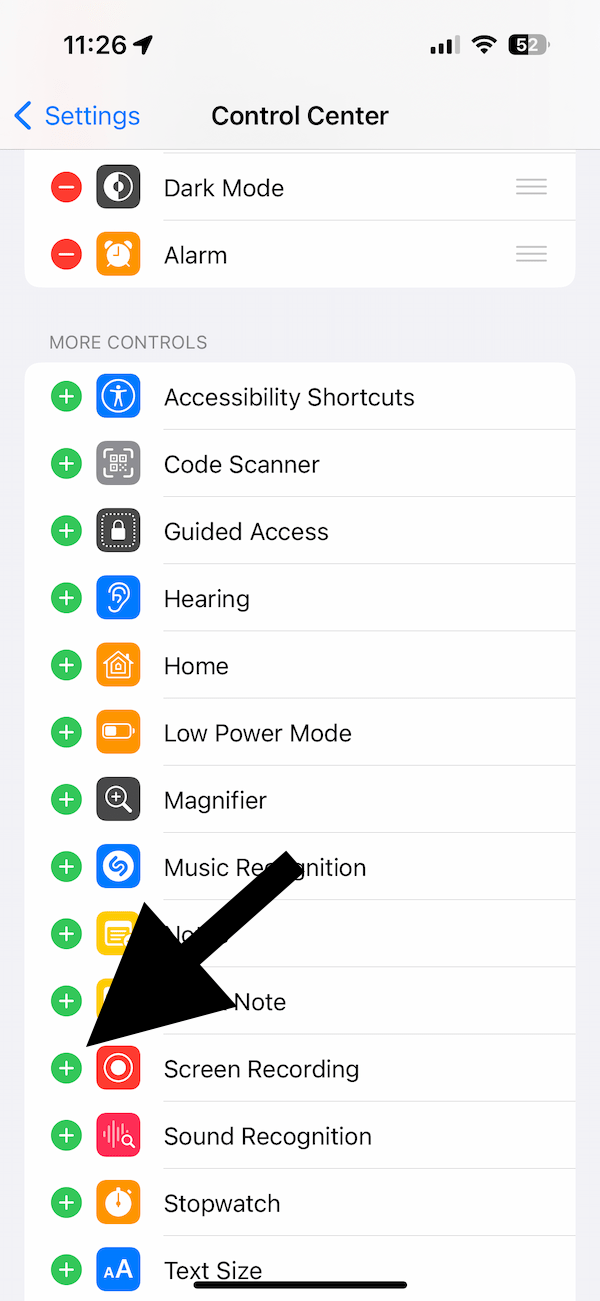
First, you will need to add the Screen Recording option to the Control Center:
- Go to Settings > Control Center.
- Tap the Add (+) button next to Screen Recording.
Now you have added the recording option. Here is how you can start your recording:
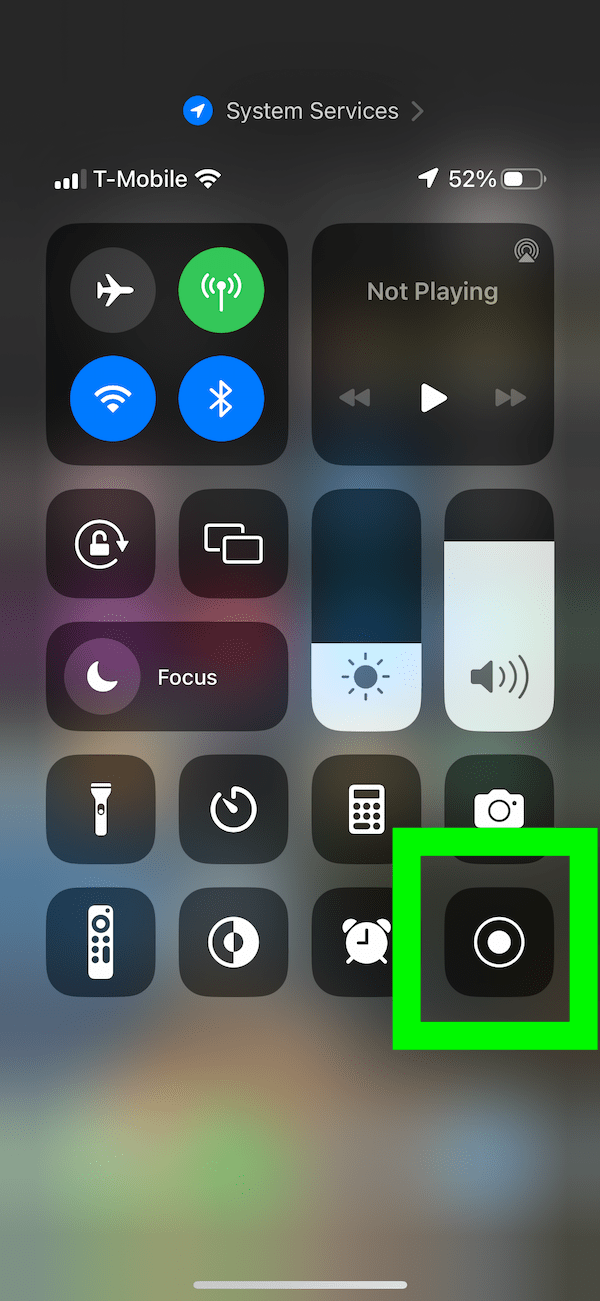
- Open Control Center. If your device is an iPhone X or later or an iPad, swipe down from the top-right corner of your screen. If you have an earlier iPhone model, swipe up from the bottom of the screen.
- Tap the Record button, which is a dot inside a circle. A countdown will start giving you enough time to exit Control Center and prepare for your recording. The countdown is just three seconds.
- To end the recording, tap the red Recording button located in Control Center. You can also tap the red status bar at the top of the screen to stop the recording.
If everything goes without an issue, your recording will be saved to Photos, and then you can view it or share it with friends.
Related articles