How to Add a New Email to FaceTime
You can have multiple FaceTime email addresses besides your Apple ID email address. You can select one or more of them so that people can use these emails to reach you via FaceTime. You can also pick one of them as your Caller ID. In this article, I explain how you can manage your FaceTime emails. You can add or remove emails on your iPhone, iPad or Mac. If you use the same Apple ID on all of your devices, your changes will sync across your other devices.
You can only choose one email address as your Caller ID. This email will be shown to the other party you are FaceTime calling. However, you can select multiple email addresses that people can use to call you. You would need to have access to the emails you want to add because a verification step will need to be completed.
You cannot add emails that are already in Apple’s database. For example, you cannot add current Apple ID emails. We are essentially updating your Apple ID. We are adding a new email to your Apple ID, and thus, you can start using the new email with FaceTime.
See your current emails
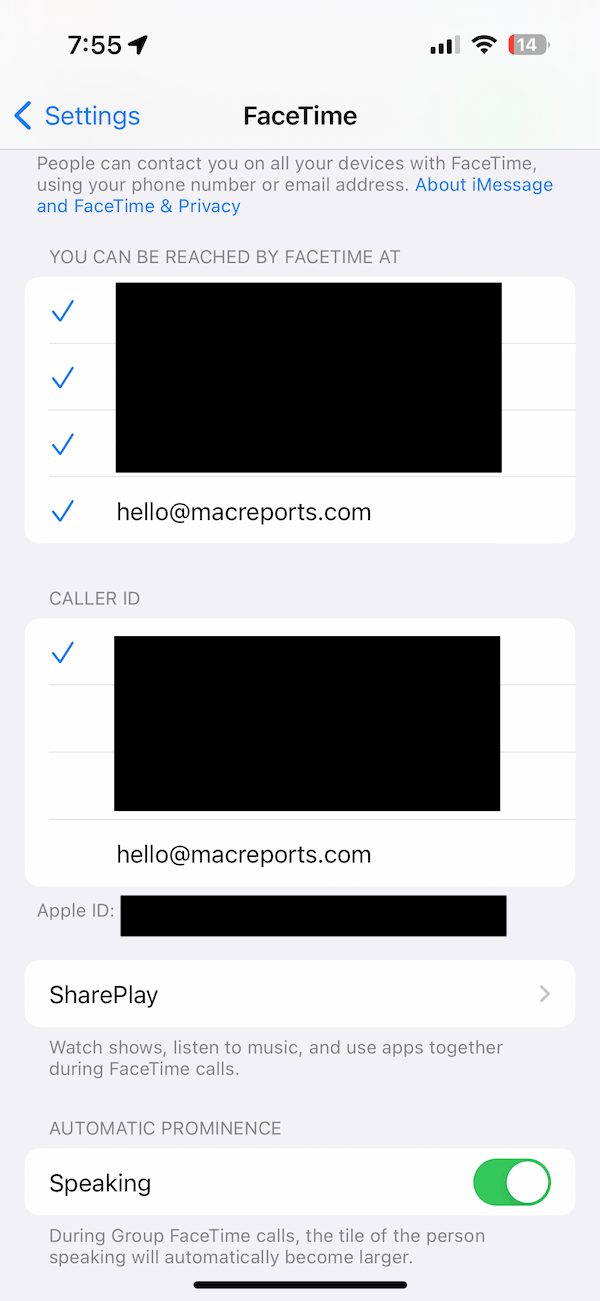
On your iPhone or iPad, go to Settings and then FaceTime. And you will see the emails under the “You can be reached by FaceTime at” and “Caller ID” sections. On your Mac, open the FaceTime app and then click FaceTime and Settings or Preferences, then click the General tab. You will see the email addresses there.
As you can see on iPhone, iPad or Mac, there is no button to add a new email address. And there is no option to remove one. So I explain in the next section how you can manage these.
Add a new email to FaceTime
Follow these steps:
Add a new email on iPhone or iPad
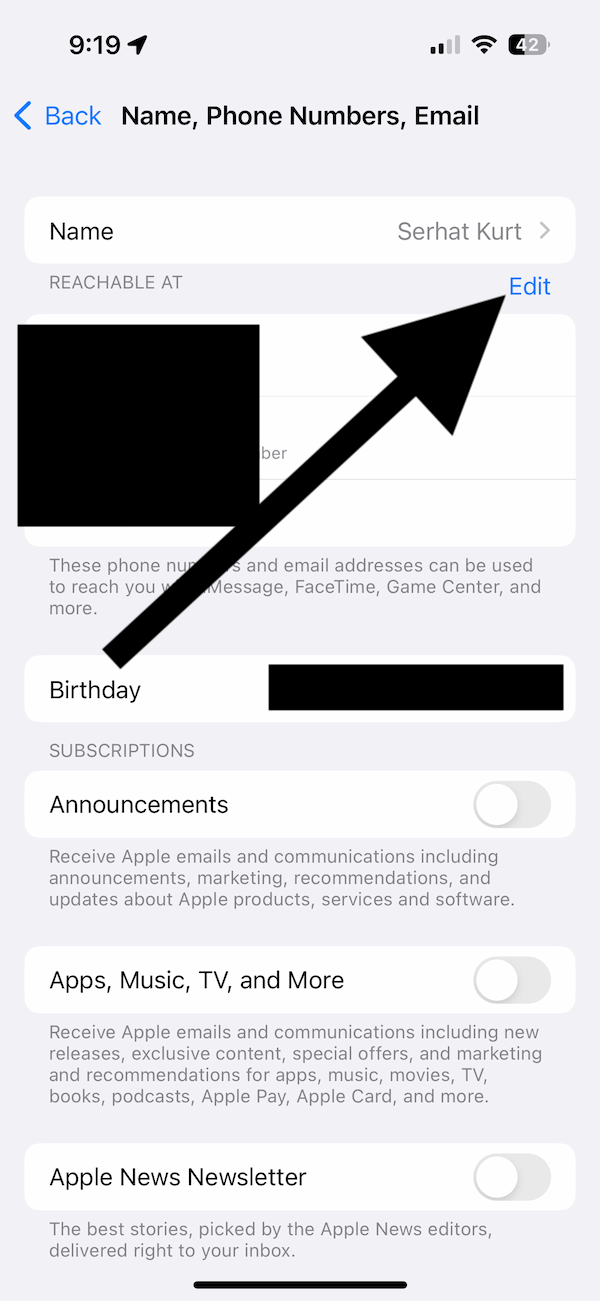
- On your iPhone or iPad, go to Settings > [your name] > Name, Phone Numbers, Email, and tap Edit.
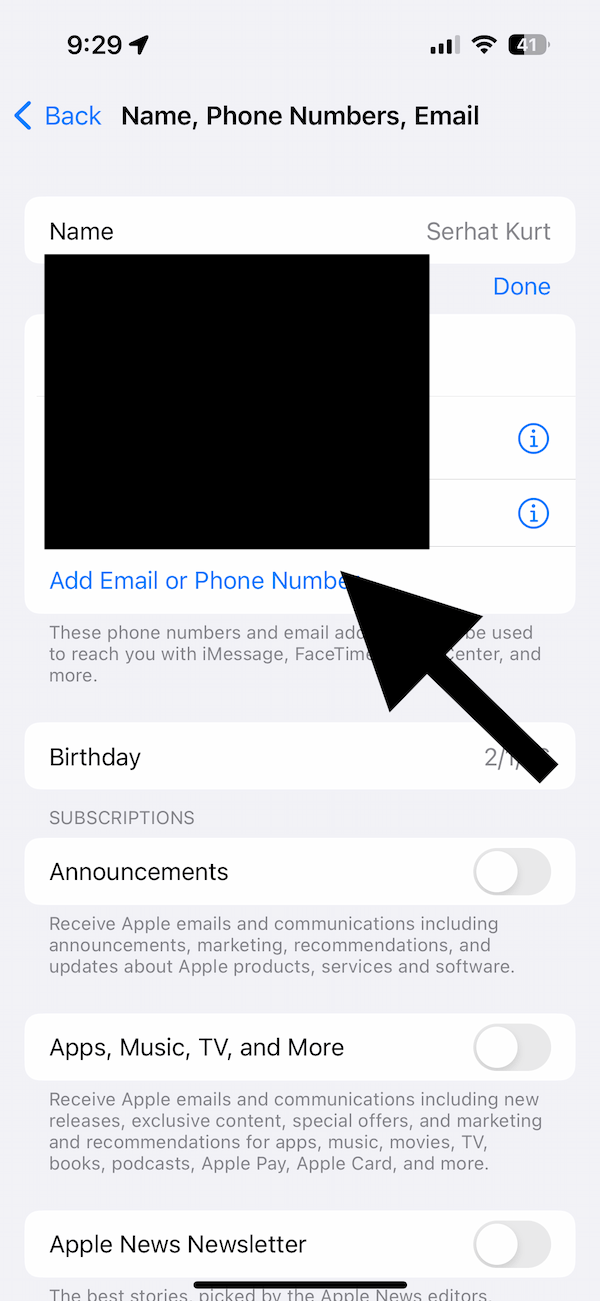
- Tap Add Email or Phone Number, then tap Add an Email Address.
- Enter the new email and tap Next.
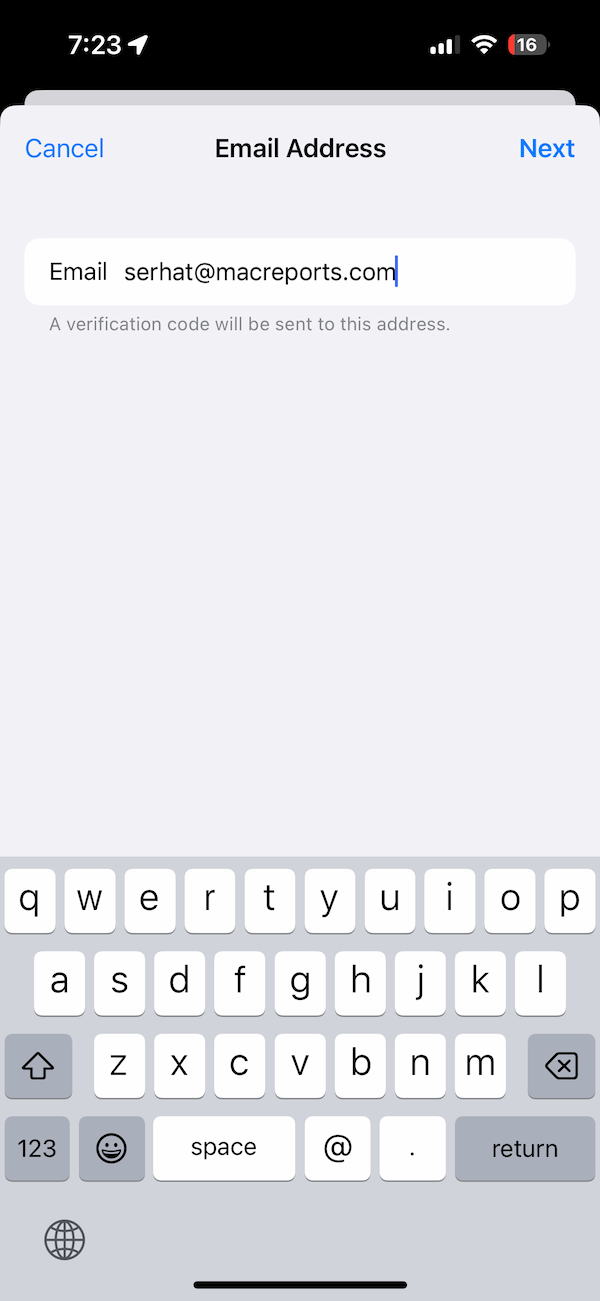
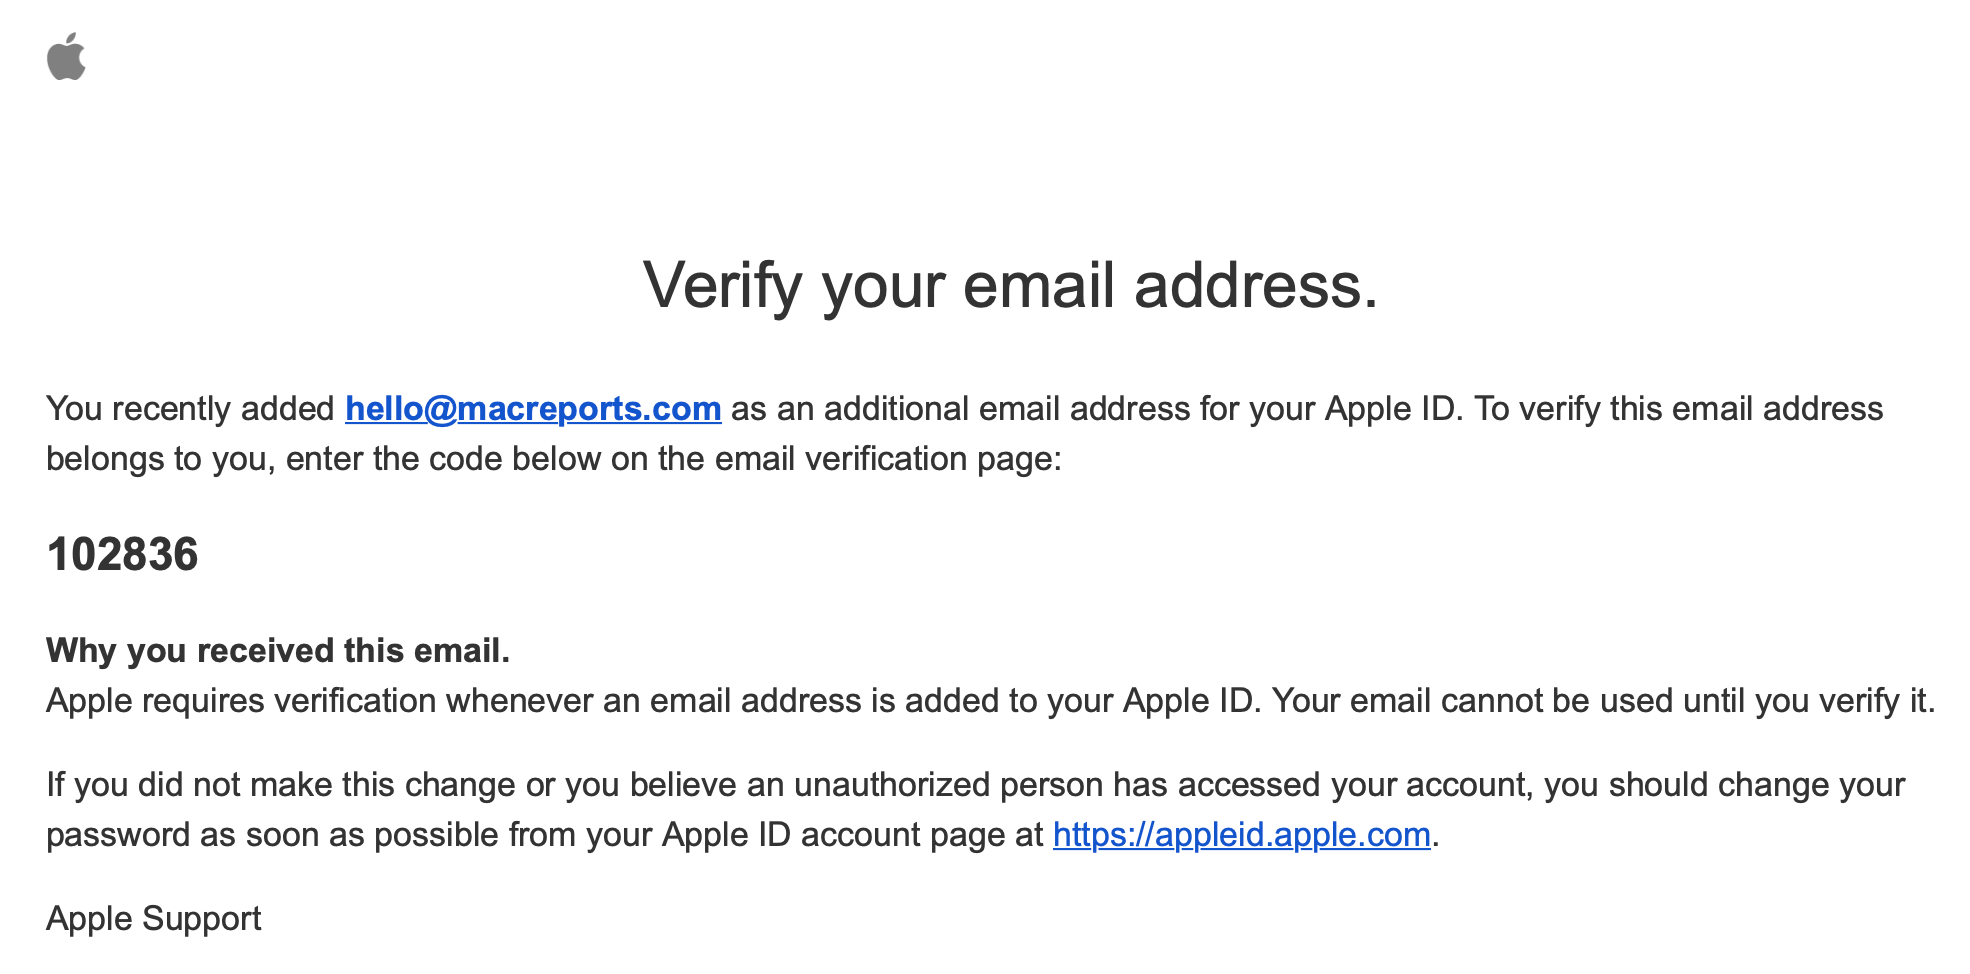
- A verification code will be sent to the email address you entered. Enter the code after checking the email.

After verification, this email will be added. Now you can go to Settings > FaceTime and manage your emails.
Add a new email on Mac
- On your Mac, click System Settings (or Preferences) > [your name] > Name, Phone, Email and click the (+) button.
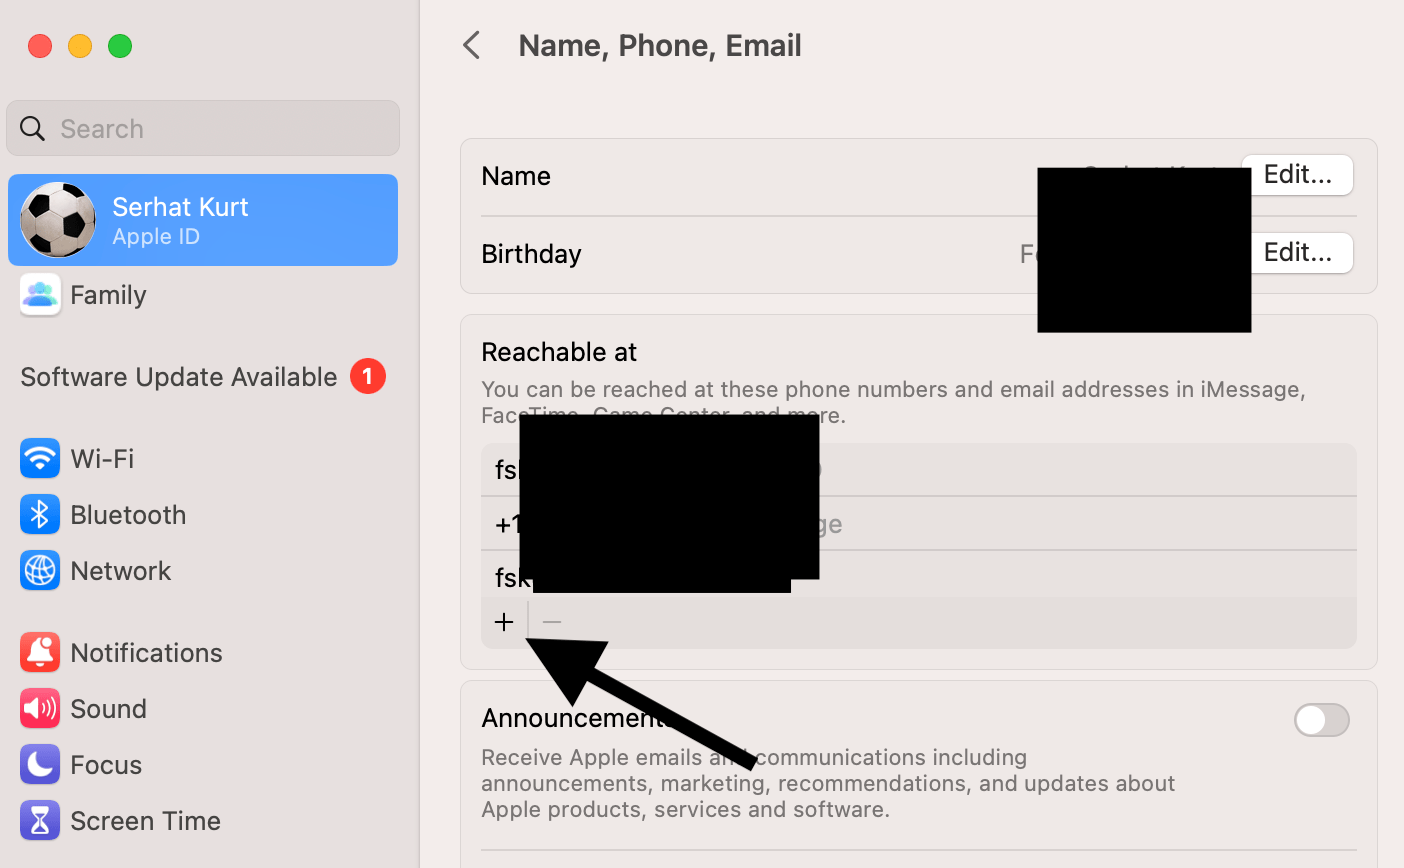
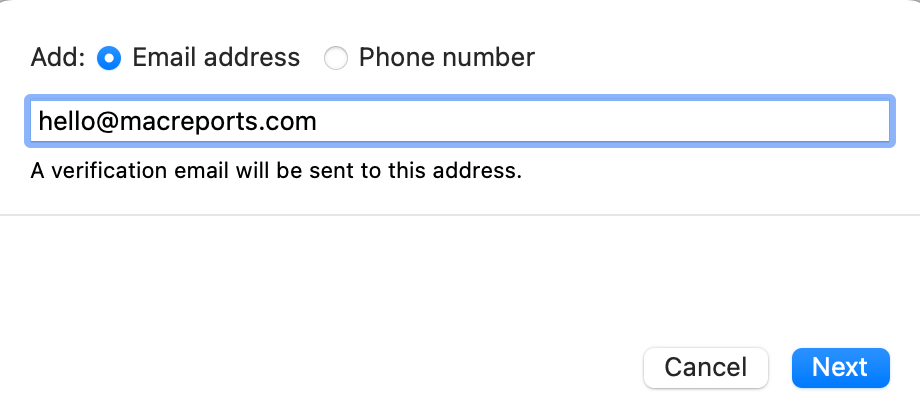
- Select the email radio box, enter a new email, then click Next.
- Again, check your email, and after entering the verification code, you can start using the new email.
Manage your FaceTime emails
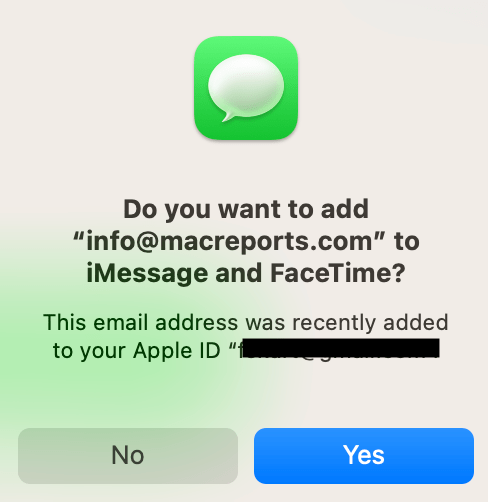
After adding the email, if you have multiple devices sharing the same Apple ID, you may see a popup message asking if you want to add this email to FaceTime and iMessage. You can select Yes to add it.
You can also go to Settings > FaceTime on your iPhone or iPad or click FaceTime > Settings or Preferences > General in FaceTime on your Mac to add this email to your FaceTime.
You can use this email as your FaceTime Caller ID, or you can add it as one of the emails that people can use to call you via FaceTime.
Related articles
- How to Change Apple ID Phone Number
- ‘This Apple ID has not yet been used with the App Store’ Error, How to Fix
- Verification Failed: There Was an Error Connecting to the Apple ID Server, Fix
- Troubleshoot FaceTime Audio Not Working
- Could Not Sign In To iMessage or FaceTime on Mac, Fix
- FaceTime Green Screen on iPad, iPhone or Mac; Fix