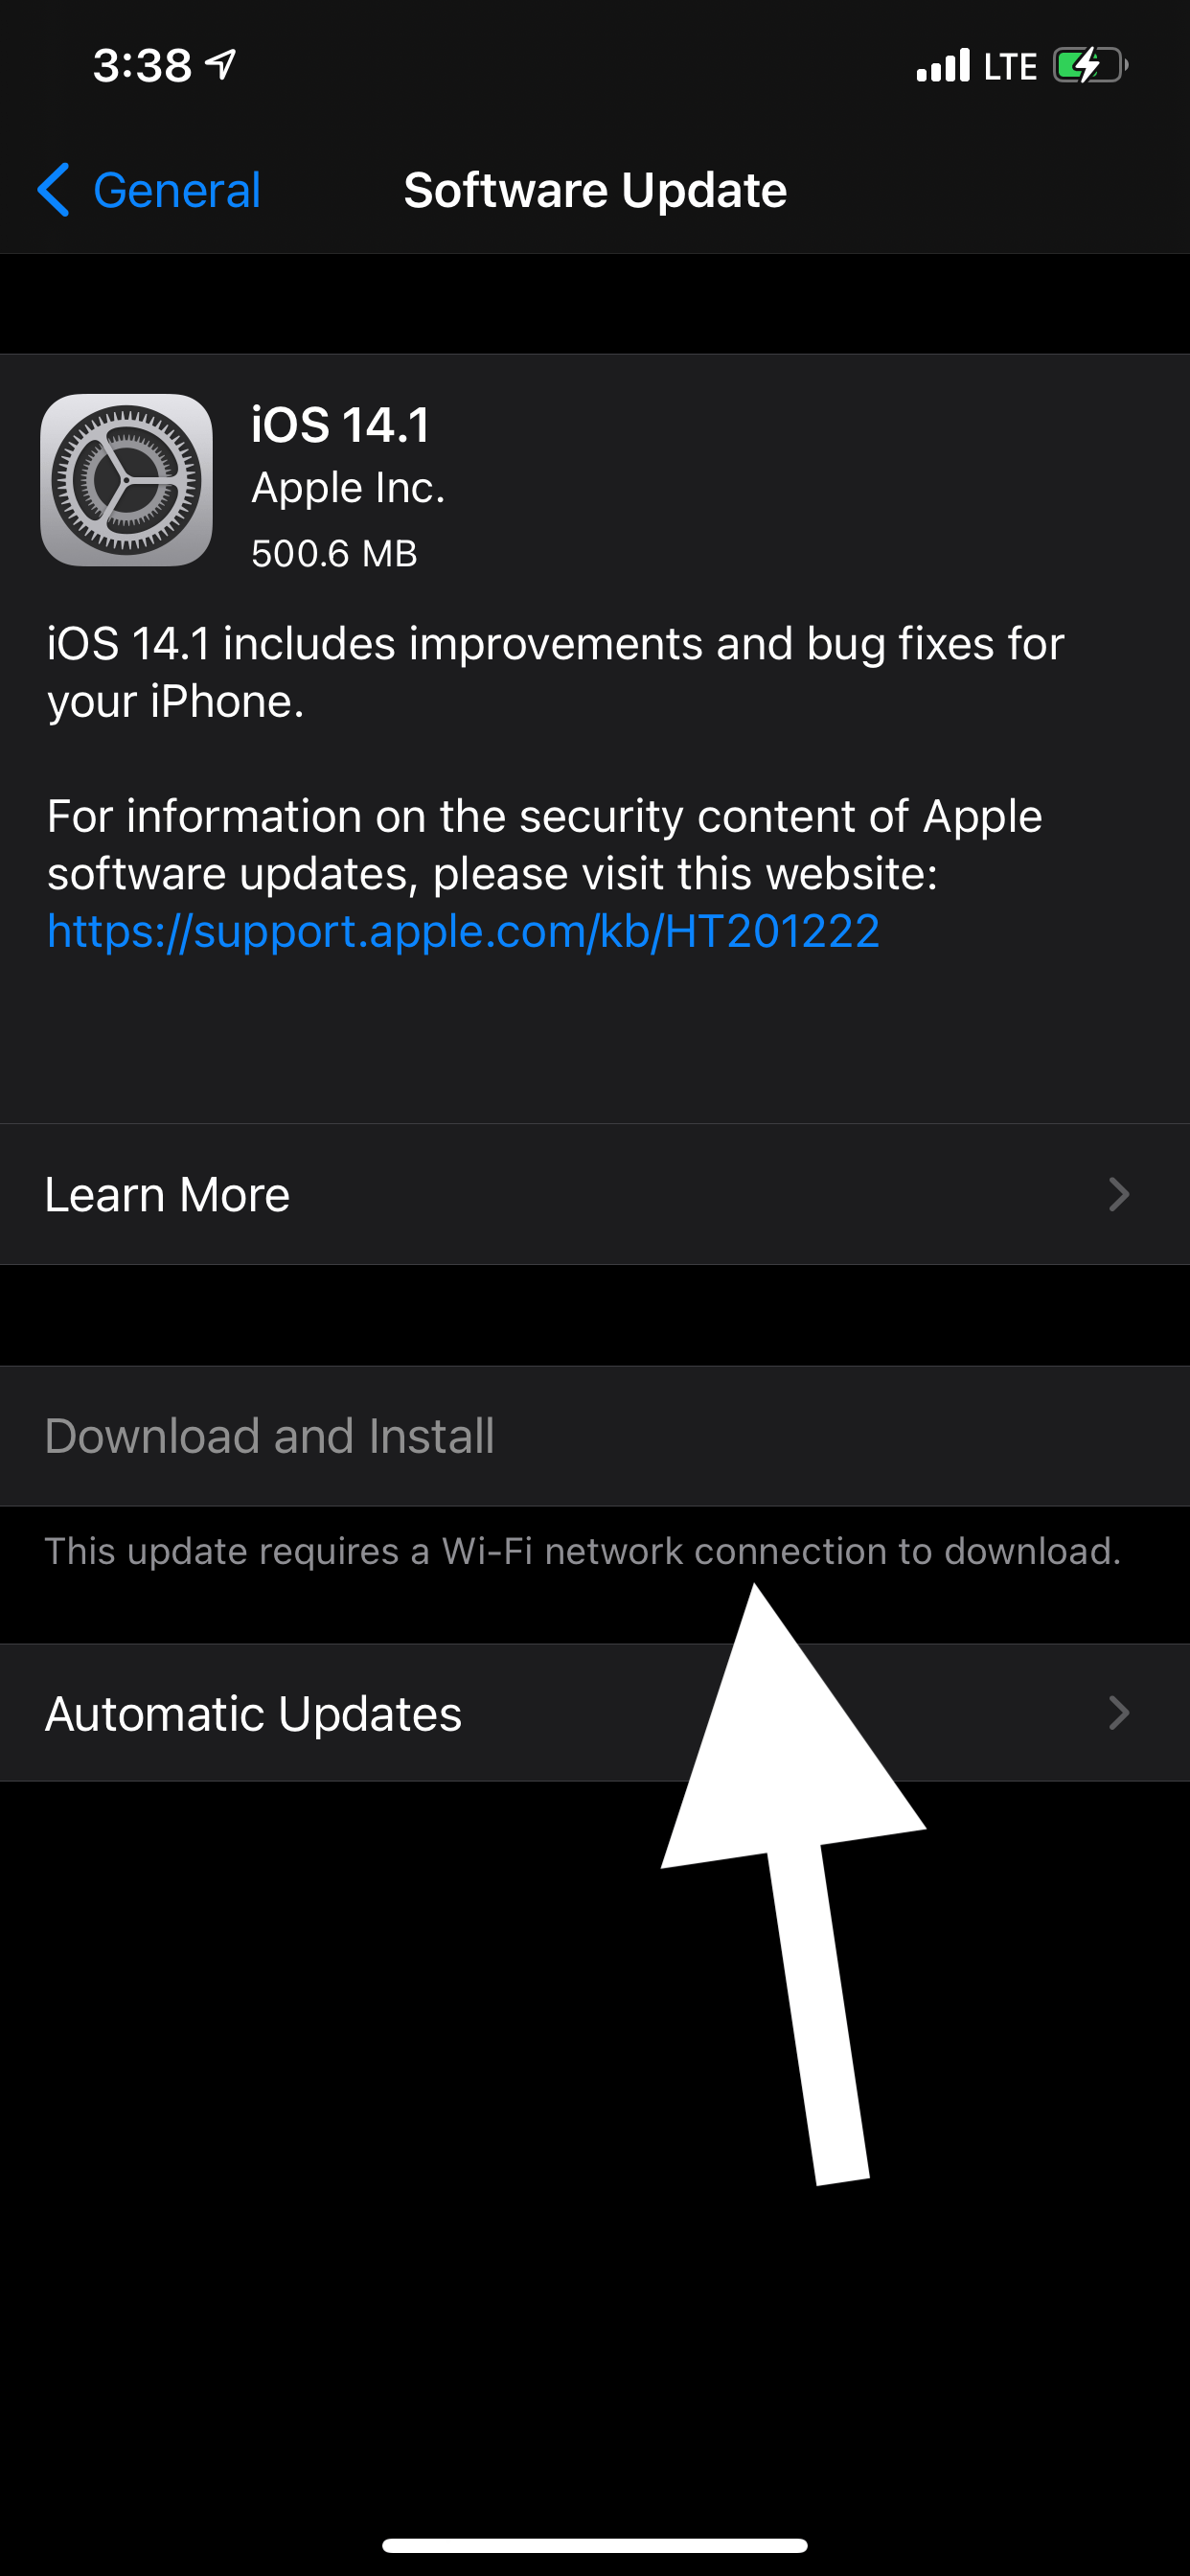
How to Fix ‘This Update Requires a Wi-Fi Network Connection to Download’ Error
Sometimes, you may see an error message saying, “This update requires a Wi-Fi network connection to download”. This error message appears on an iPhone’s or iPad’s Software Update screen, which can be accessed by going to Settings > General > Software Update. This error makes it impossible for your iPhone or iPad to be updated to the latest version of iOS or iPadOS because the Download and Install button is grayed out. In this article, I will explain what you can do.
Apple periodically releases updates and upgrades to its software. They may include new features and security patches to address vulnerabilities and enhance the overall security of their devices. Apple may also release a special update called known as Rapid Security Update. This type of update is released to quickly provide security updates to address potential vulnerabilities and protect user data.
It seems that a lot of users are complaining about this “Wi-Fi network connection” issue. If you are one of them, please try the following steps. After trying each step, check to see if you can update. If you cannot, move to the next step.
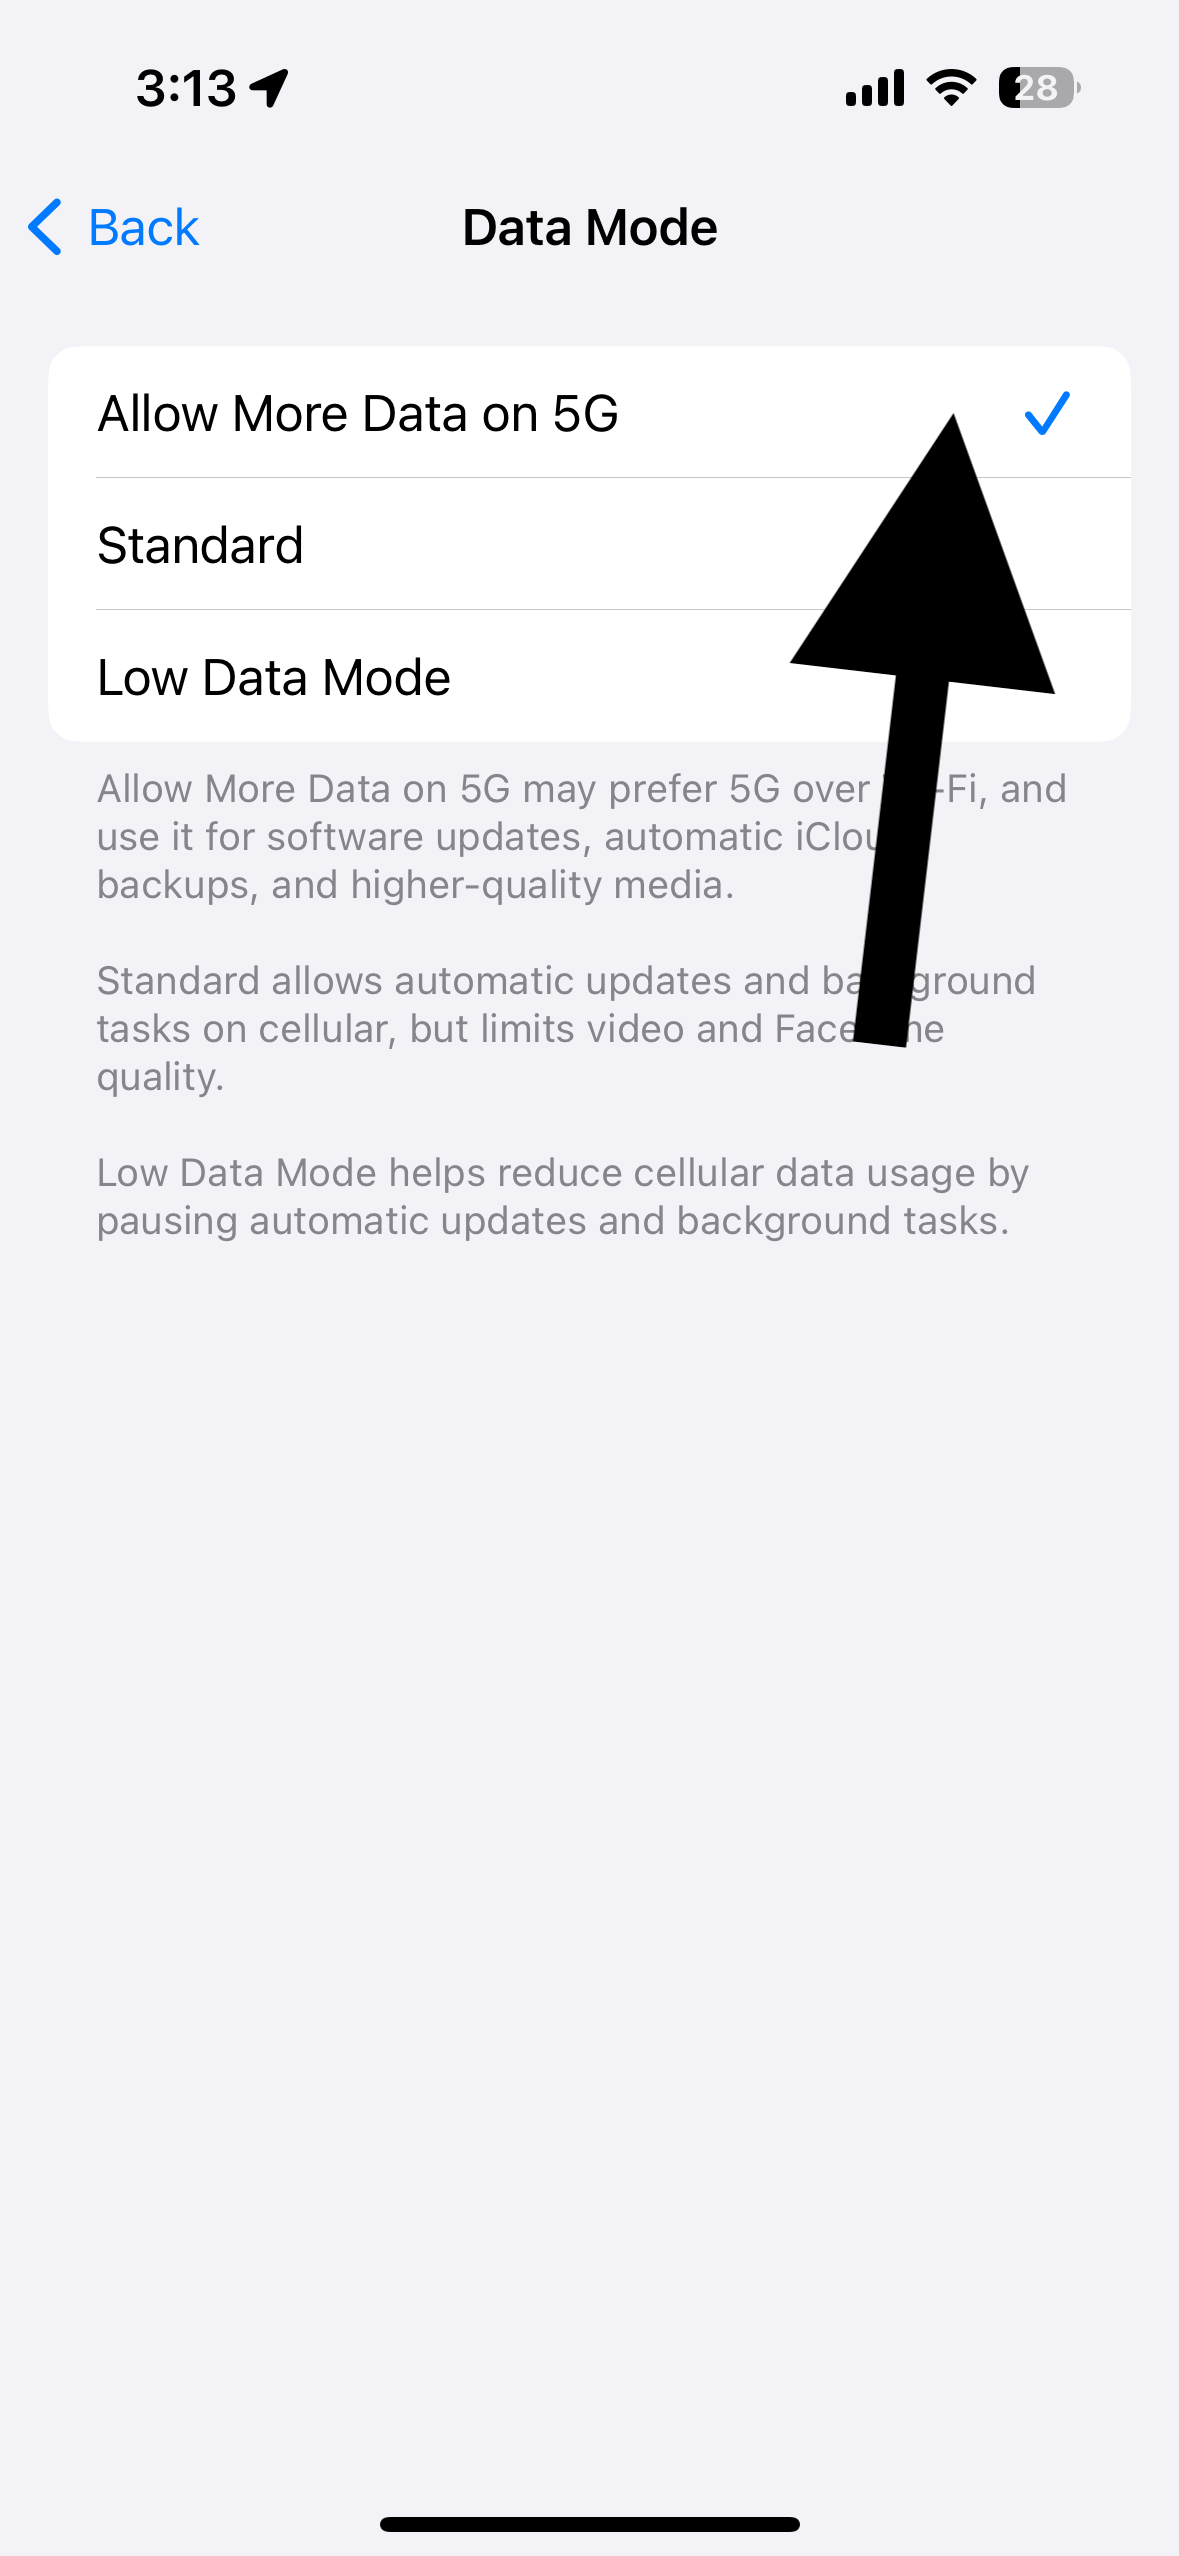
1. Enable iOS and iPadOS updates over cellular
By default, iOS and iPadOS updates may not occur over cellular because these updates may be big and use a lot of data. This can be bad for many because cellular data can be pretty expensive. If you want your iPhone or iPad to update over a cellular network, follow these steps:
- Tap Settings.
- Tap Cellular or tap Mobile Data.
- Tap Cellular Data Options.
- Tap Data Mode.
- Select Allow More Data on 5G.
2. Restart your iPhone or iPad
Simply restart your iPhone or iPad and try again. Restarting may fix this issue because it gives your device a fresh start. If you have not restarted your iPhone for a long time, potential glitches or slowdowns may occur due to accumulations of various processes and applications. Restarting your system may be all you need.
3. Restart your Wi-Fi modem/router
Your Wi-Fi may not be strong enough. Restart your Wi-Fi modem. This is easy:
- Find the power cable attached to your router.
- Unplug the power cable from the back of the router.
- Wait 30 seconds.
- Plug the power cable back into the router.
- Wait until your modem/router starts working fully.
4. Turn off VPN or other security apps
If you have a VPN application, profiles in place or a security application, these might disrupt your Wi-Fi connection, hindering your device from establishing a proper connection. Sometimes, these may interfere with connecting to the iOS or iPadOS update servers. Typically, resolving this involves a straightforward process; if applicable, consider temporarily disabling or uninstalling the security application or VPN or both if you have both. After disabling these, try again to update your iPhone or iPad.
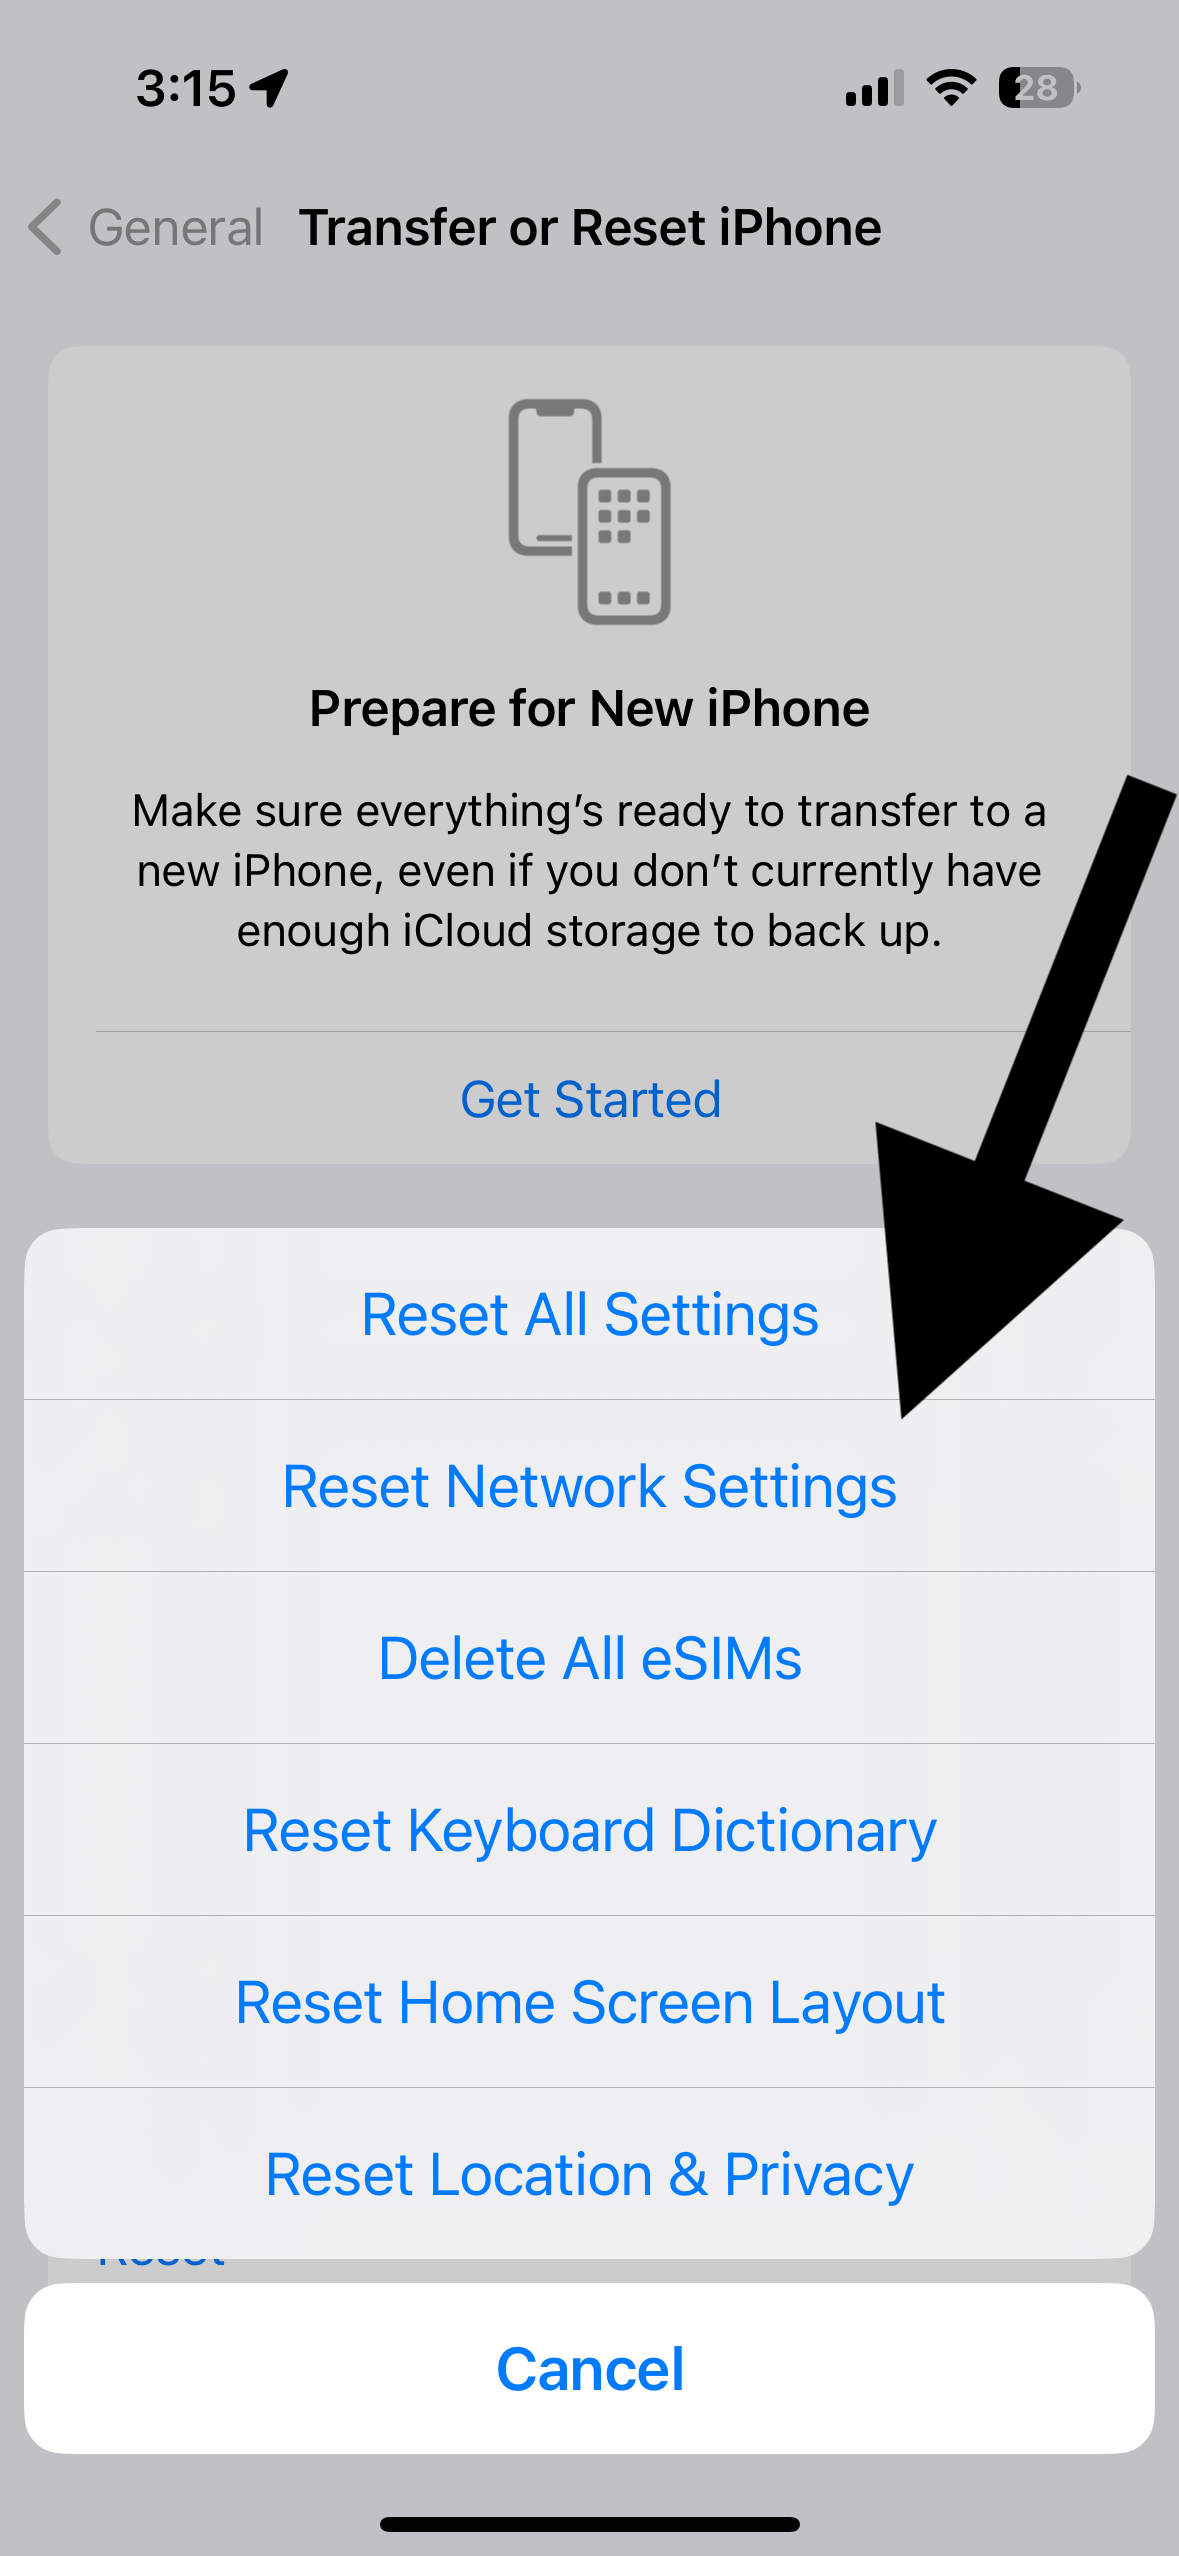
5. Reset network setting
If your issue continues, reset network settings on your iPhone or iPad. Doing so will erase all your network-related preferences and settings back to their default values. This includes Wi-Fi passwords, VPN settings, cellular settings, and more. We previously explained what exactly happens when you reset your network settings. But this will not erase your personal data or apps. Go to Settings > General > Transfer or Reset [iPhone or iPad] > Reset > Reset Network Settings and follow the onscreen instructions.
6. Use your computer
If you still cannot update, you may need to use your computer to update your iPhone or iPad. After updating your device, the next update will probably occur over Wi-Fi. You can use a Mac or PC to update your device. Here is how:
- Back up your device first.
- Open iTunes (if it is a PC) or Finder (if it is a Mac).
- Connect your device to your computer with the USB cable.
- Select your device in iTunes or Finder.
- Click General or Summary, then click Check for Update and follow the onscreen instructions.
Related articles