How To Show Hidden Files On Your Mac
All computer systems, including macOS, contain hidden files and folders. Your Mac hides some files and folders by default. Your Mac is configured to not display hidden files. In general, you should not touch, move or edit these hidden files. These are important system-related files and folders and they perform some essential and sometimes critical functions. macOS stores system settings in hidden files and folders. They are hidden to prevent you from accidentally deleting, moving around or modifying these important files.
You may sometimes need to see hidden files for various reasons. For example, sometimes, some of our articles suggest deleting preference files (these are usually hidden files) by accessing the hidden Library folder as a troubleshooting tip. It may be necessary to access them to fix a Mac problem that you may be experiencing.
See also: Mac Displaying Wrong, Generic Document Icons For Files & Folders, Fix
This article explains how you can display and hide hidden files and folders, including the Library folder, on your Mac.
Important: Viewing these hidden files and folders is a simple process. However, if you do not know what you are doing precisely, do not touch these files.
Show/Hide Hidden Files – The Shortcut
This is the easiest way to reveal hidden files and folders. Here is how:
- Open an active Finder window
- And press these keys together: Shift, Command (⌘), and period symbol (.)
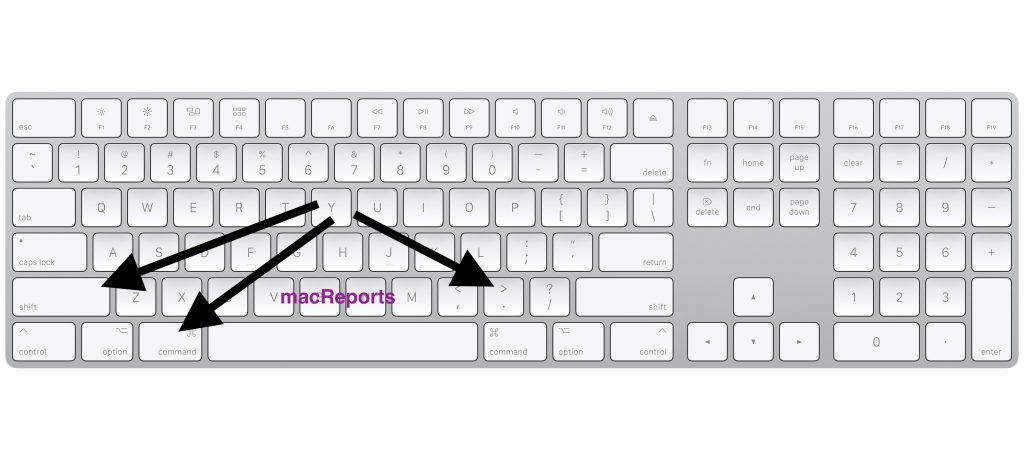
- Pressing these keys will reveal the files
- If you want to hide them, press again to hide them.
Show/Hide Hidden Files – Terminal
The above shortcut method will not work for the Desktop. The terminal method below will reveal all the hidden files on your Mac:
- Open the Terminal app on your Mac (Applications > Utilities). Or use Spotlight to search and open the app.
- In Terminal, enter the following command and hit enter:
defaults write com.apple.finder AppleShowAllFiles YES
For this new change to take effect, we will need to relaunch Finder. Here is how (you can also use the Terminal method which is explained below):
- Press and hold the Option key
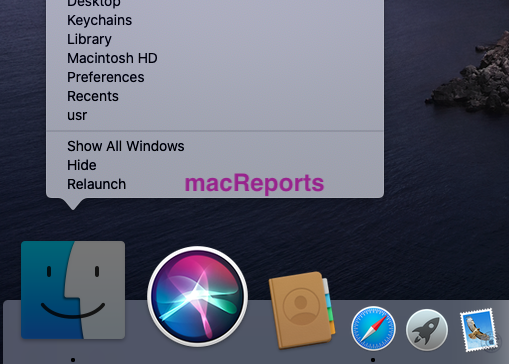
- Right-click the Finder icon in the Dock while holding down the Option key
- Click Relaunch
Now, you will see all of your hidden files. To hide them again, open Terminal and enter the following command and hit enter:
defaults write com.apple.finder AppleShowAllFiles NO
You will again need to relaunch Finder after this. You can restart Finder by following the steps that we explained above, or you can use the Terminal app. Here is how:
- Open Terminal
- Enter the following command and hit enter
killall Finder
How to access the hidden Library folder
The library folder contains user account settings, preference files, and other important data. This folder is hidden by default. There are two ways to access this folder. You may choose one to reveal this folder:
Method 1:
- Go to Finder
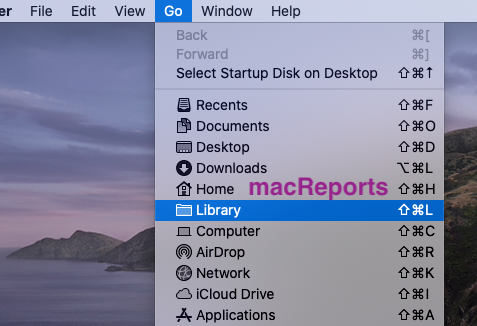
- Press and hold the Option key
- While pressing the Option key, click Go from the menu bar
- Click Library from the drop-down menu
Method 2:
- Go to Finder
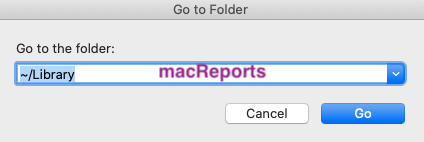
- Click Go and Go to Folder
- This will open a dialogue box, type ~/Library
- Click Go
See also: AMPDevicesAgent? What Is It?



How can I avoid any future documents to be hidden?