How to Use the Kill Command to End a Process Using Terminal on Mac
Sometimes you may want to kill a process because a program is using a lot of resources or fails to respond and freezes. Sometimes, a process may have never shut down properly and needs to be killed. You may use Terminal to identify what processes are running, and you can also easily kill the application process. In this article, I explain how you can do this. We will use the “kill” command to terminate a process defined by the unique process identifier (PID) number.
1. Open Terminal by going to Applications > Utilities.

2. Enter the following command and hit enter:
top
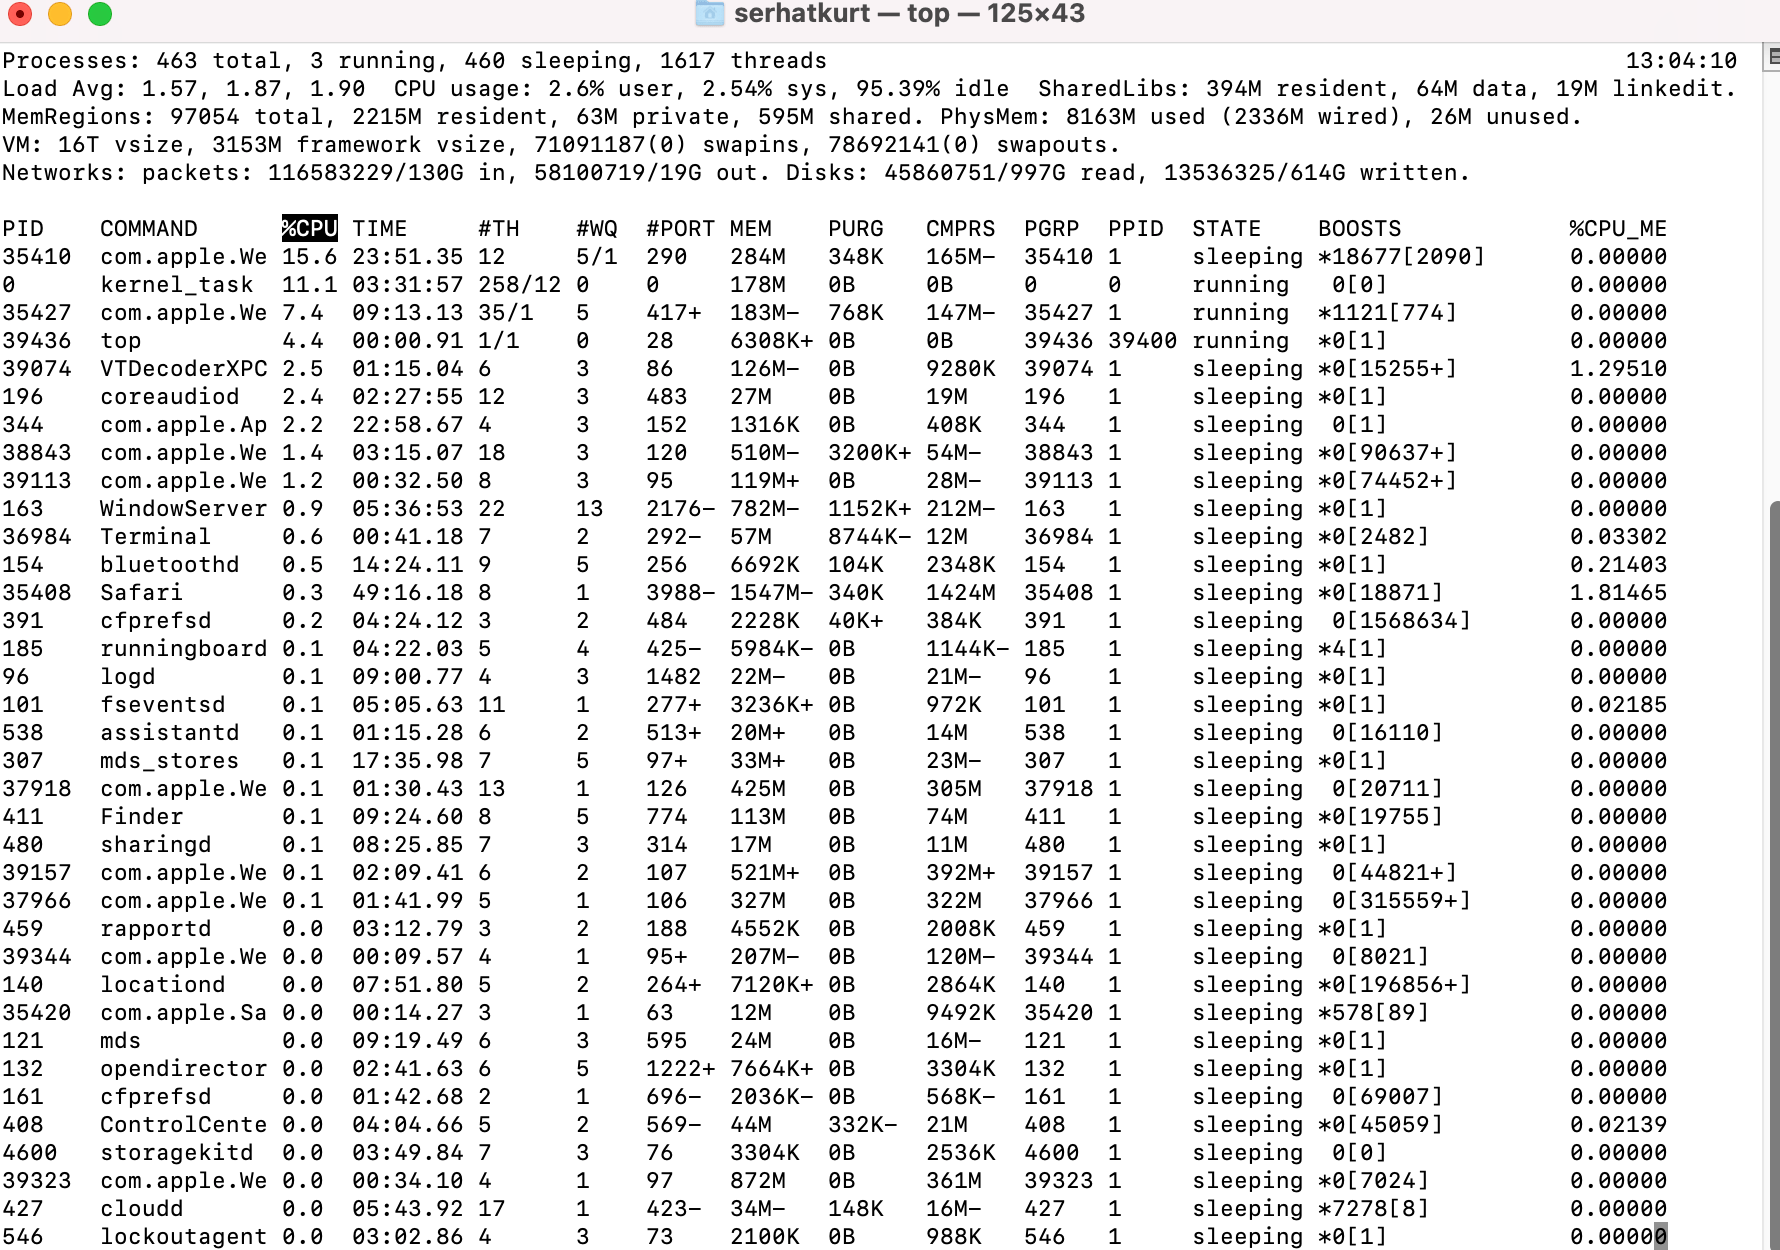
This command will get a full listing of currently running processes on your Mac, as you can see below. Above this list, you will see a summary area including the number of total processes running. As your computer runs, the list will keep changing. Your screen will flicker to update every second or so. You will see how much CPU each process is consuming, and you can identify which may be causing a problem.

3. Write down the PID (the first column) of the problematic process.
4. Now enter the following command and hit enter. This command will quit the previous command.
q5. Note that you should use caution when using the kill command. If you do not know what process you are killing, do not do it. (For more on identifying Mac processes, see What Is This Process Running on My Mac?) Now enter the following command to kill the process. Note that you should replace “PID” in the command with the number you wrote down in step #3. After pressing the enter key, you will be asked to enter your computer password. Enter it, and the process will be killed.
sudo kill PIDRelated articles


