How to Blur Faces, Objects, or the Background of your Photos on Mac
In this article, I will explain how you can blur or pixelate a portion of an image on your Mac. For example, you can blur a face or an object to hide sensitive information from a photo before you may want to share it on social media. You may further want to blur the background of a picture to make your subject stand out in a portrait. And lastly, you may want to blur parts of your screenshots to prevent others from seeing them.
The Preview app and the Photos app have some photo editing features. For example, some users use the ReTouch feature in Photos to blur their photos. But ReTouch will not actually blur. Or you can use Preview to remove the background of a photo to remove distracting info or details. However, their image editing abilities are very limited. In this article, I am using an image editing app called Pixelmator. Pixelmator has two versions: Classic and Pro. I am using the Classic version. You can download the Classic version from the Mac App Store.
How to blur images on Mac
As I said above, I am using the Pixelmator Classic version. Follow these steps:
1. Find your image to edit. And open it with Pixelmator. You can right-click (control-click) the image, select Open With, and then Pixelmator.
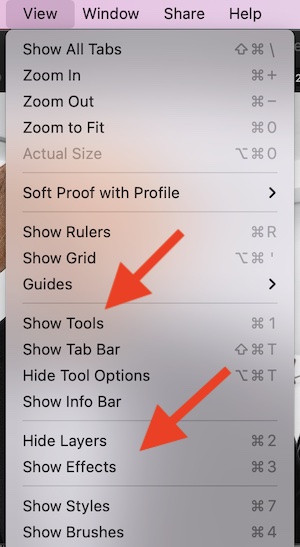
2. In Pixelmator, ensure that Tools and Effects menus are not hidden. If they are missing, go to View and then select Show Tools and Show Effects.

3. In this article, I am going to blur to the dogs’ eyes so nobody can recognize him. Then I will blur the background. Pixelmator Classic includes 6 blur effects. The Pro version includes more blur effects.
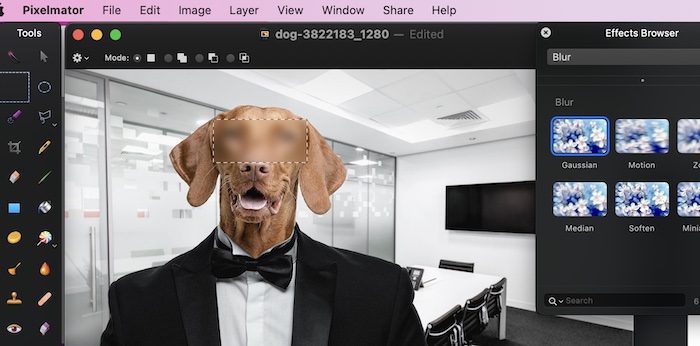
4. In the Tools palette, select the Rectangular Selection tool. And drag over an area you want to select. We will blur this area. We will select the dog’s face.

5. In the Effects palette. Click the All Effects menu and select Blur.

6. After selecting an area, double-click the blur effects you want. There are 6 effects: Gaussian, Motion, Zoom, Median, Soften, and Miniaturize. I am going to use the Gaussian effect. And the effect will be applied.

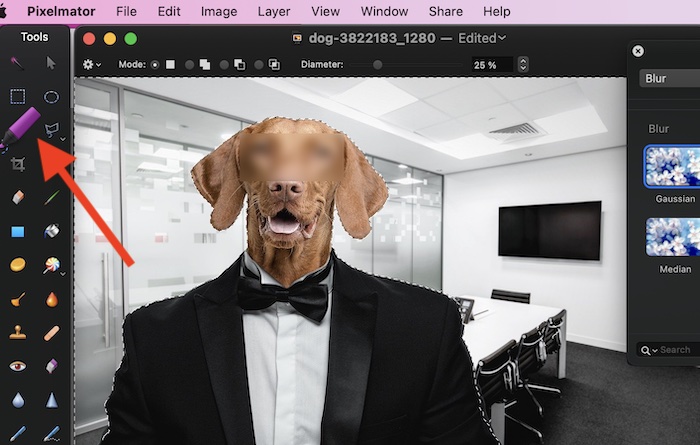
7. And if you want to blur the background, select the Quick Selection tool in the Tools palette. And select the background and then apply the blur effects you like.

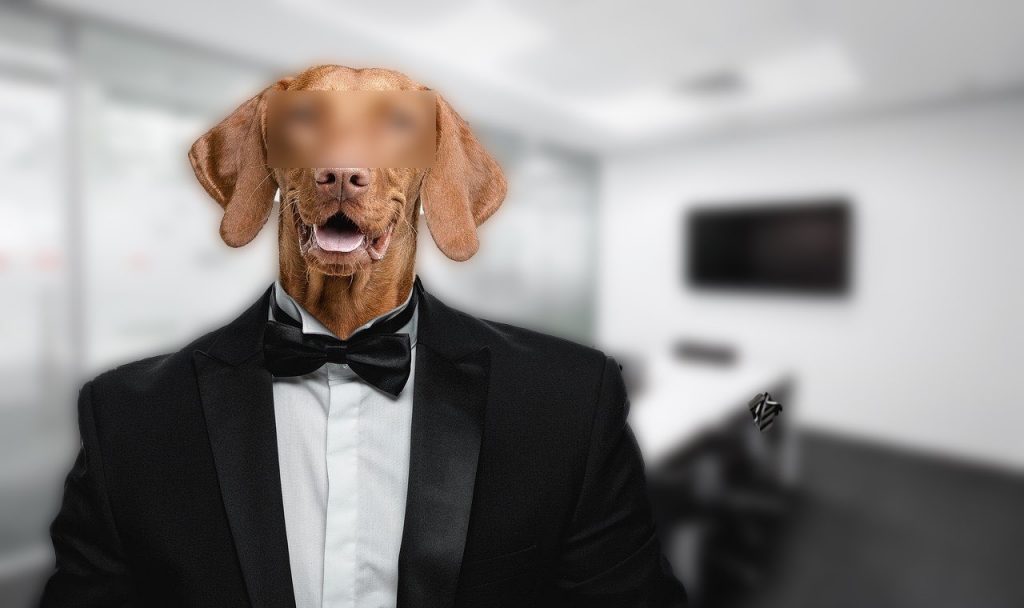
8. And the final result is this:

See also:

