How to Send a Voice Message on iPhone
A lot of people prefer to send a voice message instead of a written message. Probably for those people, it is easier to just speak than to type. Sometimes, people may prefer voice recordings because they think they offer more intimacy. Sometimes, written texts may not be enough to convey how we feel. Lastly, the voice texts can be more appealing in some situations, like while driving. Whatever the reason, it is really easy to record an audio message and then send it using the Messages app on your iPhone. Here is how:
Recording and sending audio messages
- Open the Messages app.
- Open the conversation in which you want to send an audio message.
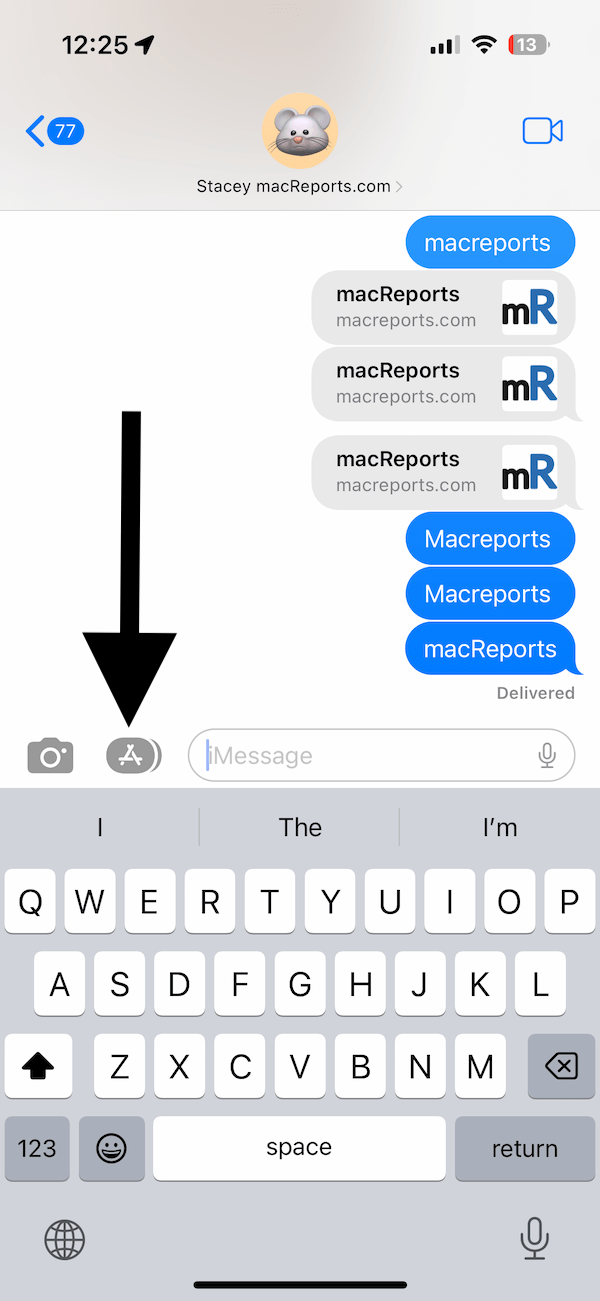
- Check your keyboard; if the app icons are not showing just below the text field, tap the App Store icon to make them appear, as shown below:
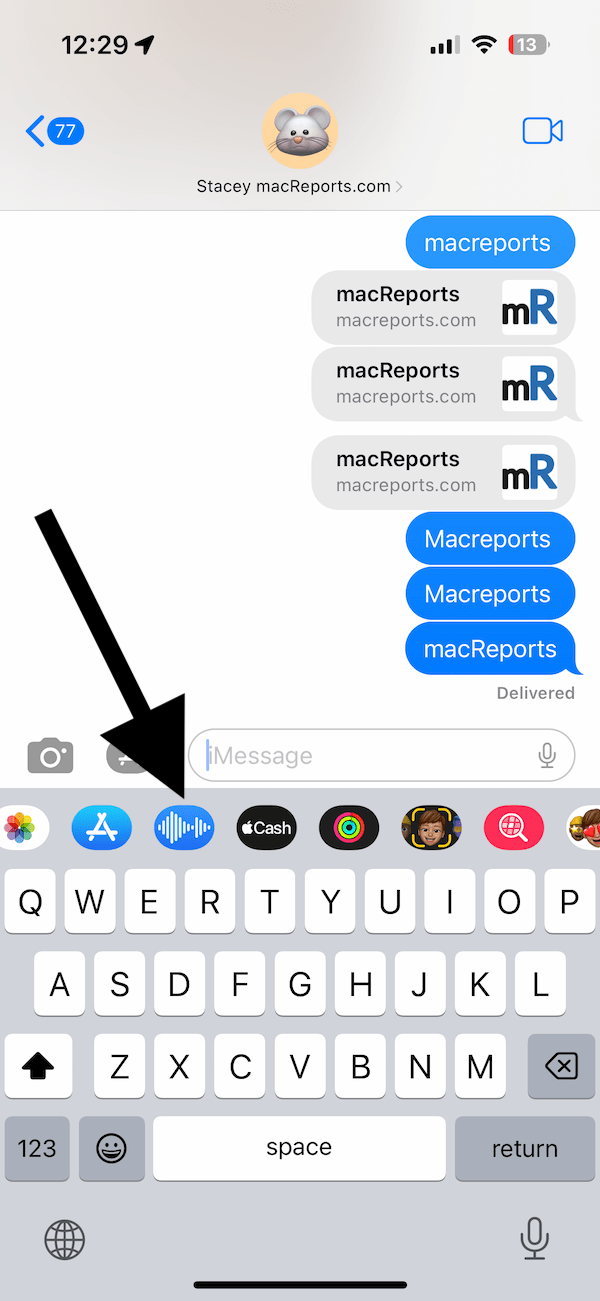
- Tap the Audio icon from the list of apps.
- Now you have two options. The first option is to record your voice and then review it before sending. After reviewing it, you can send or delete it. The second option is to send the audio message as soon as it is recorded without reviewing it. Here is how you can do these:
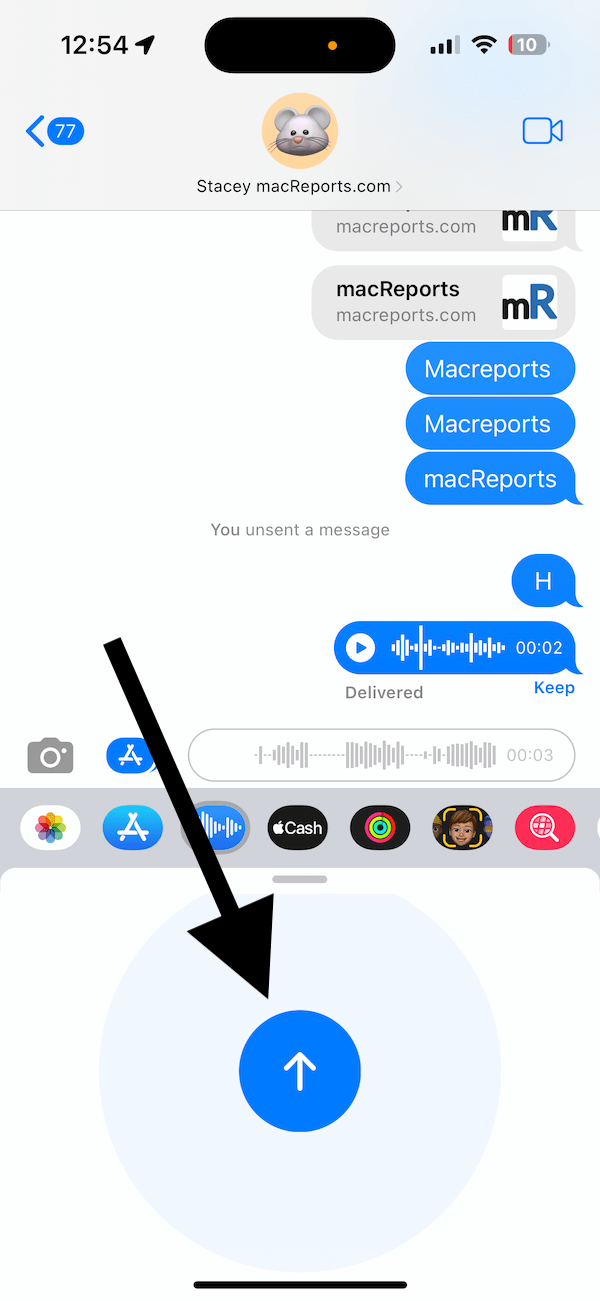
- Review before sending: Tap the microphone once to start the recording and then tap it again to stop the recording. You can tap the Play button to review it. If you want to send it, tap the blue Send button located at the right of the text field. If you want to cancel it, tap the Cancel (X) button at the left end of the text field, as you can see below:
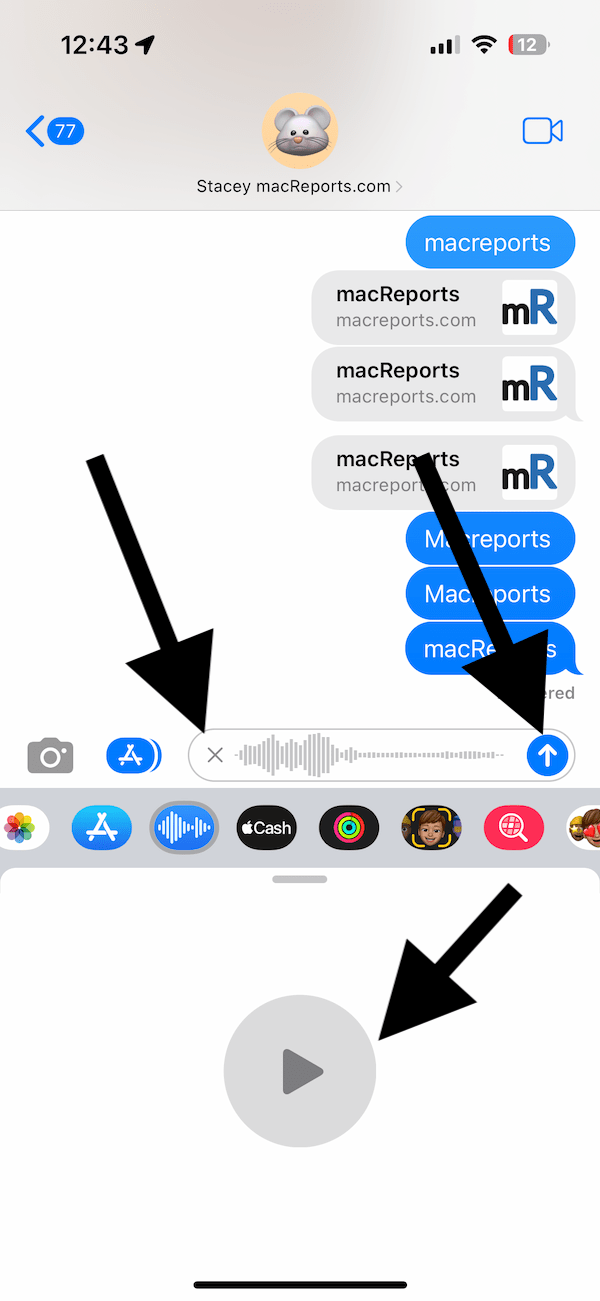
- Send immediately: You can also send the message immediately without listening to it first. This will offer a quicker way to send your voice messages. Of course, you can also always do an Undo Send after you send it. To send it immediately, simply press and hold the Microphone button, and when you are done, release the button, and your voice message will be sent.
Now, you know how to record and send audio messages. The sent audio messages will be saved for two minutes by default. After two minutes, they will be deleted from your device unless you save them. There are two ways to save them:
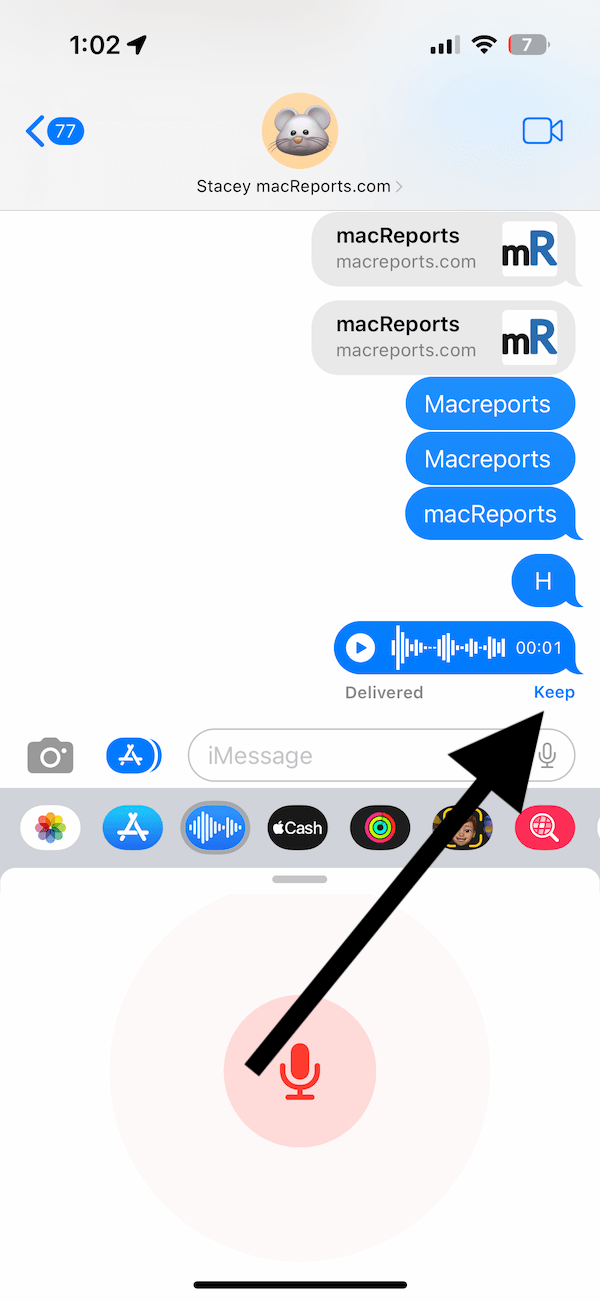
- Tap Keep: As soon as your message has been sent, a Keep button will appear under the message. Simply tap Keep.
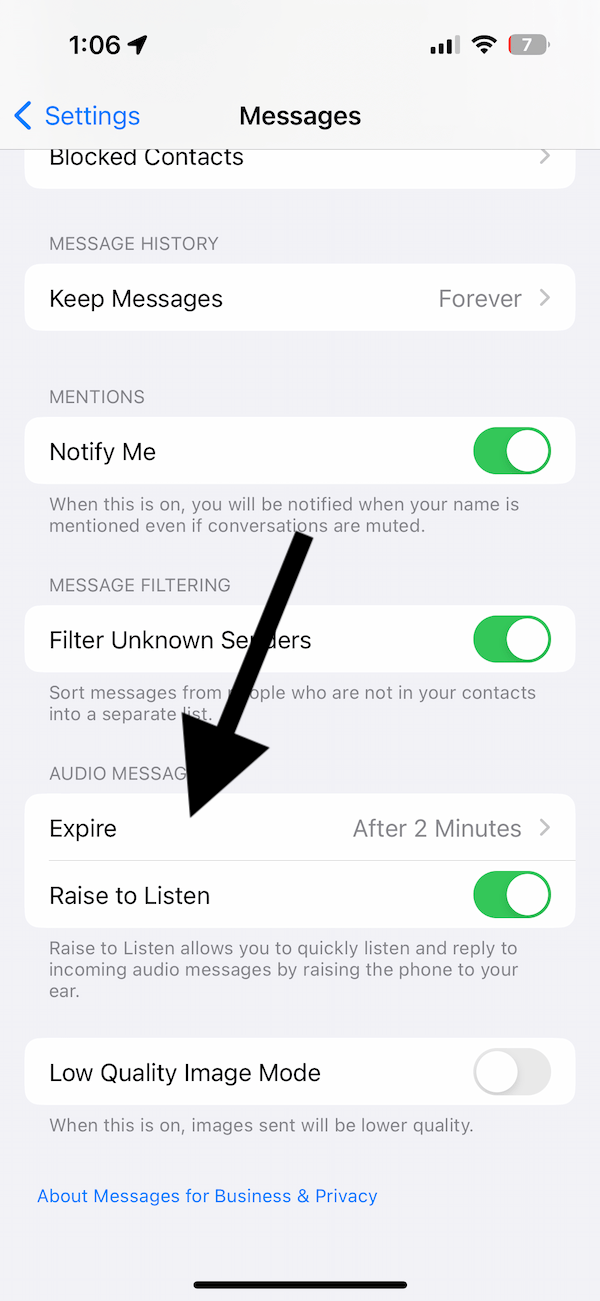
- Change your settings: You can change the audio message settings. Go to Settings > Messages. Then, scroll down and find the Audio Messages section. Tap Expire, and then change After 2 Minutes to Never. You should also know that saved audio messages go to Voice Memos.
You should know that you cannot send audio messages to non-Apple users. Only iMessages can send audio messages. If you try to send an audio message to an Android device, you will get a “Cannot send Audio Messages at this time” message when you tap the Audio button.
Related articles
- How to Turn Off or On Automatic Playing or Recording Audio Messages on iPhone
- iMessage is Signed Out Error in Messages on iPhone, How to Fix
- How To Share Photos, Videos, Or Voice Messages in Messages
- Text Messages Are Disappearing? Fix
- Your Carrier May Charge For SMS Messages Used To Activate iMessage

