Printer Says Encryption Credentials Have Expired, How to Fix
Some Mac users are unable to use their printers and have run into the message “Encryption credentials have expired” when they attempt to print something. Users who have been experiencing this issue said that the issue started occurring suddenly as they were previously able to use the printer without any issues. The problem is that when a document is sent to the printer, the printing job is paused, and the Printer window shows the error message, as you can see below. The same error message may also appear when trying to scan something.
How to fix “Encryption credentials have expired”
Here is how you can resolve this problem. Please try the following, in order, until you fix this problem. You should know that this problem is brand independent. Regardless of your AirPrint printer brand, like Canon, HP, Brother, Samsung, Epson and so on, you may experience this issue. You can try two things to address the issue.
1. Reset the printing system and re-add your AirPrinter
- Open System Settings (or System Preferences) by clicking the Apple menu.
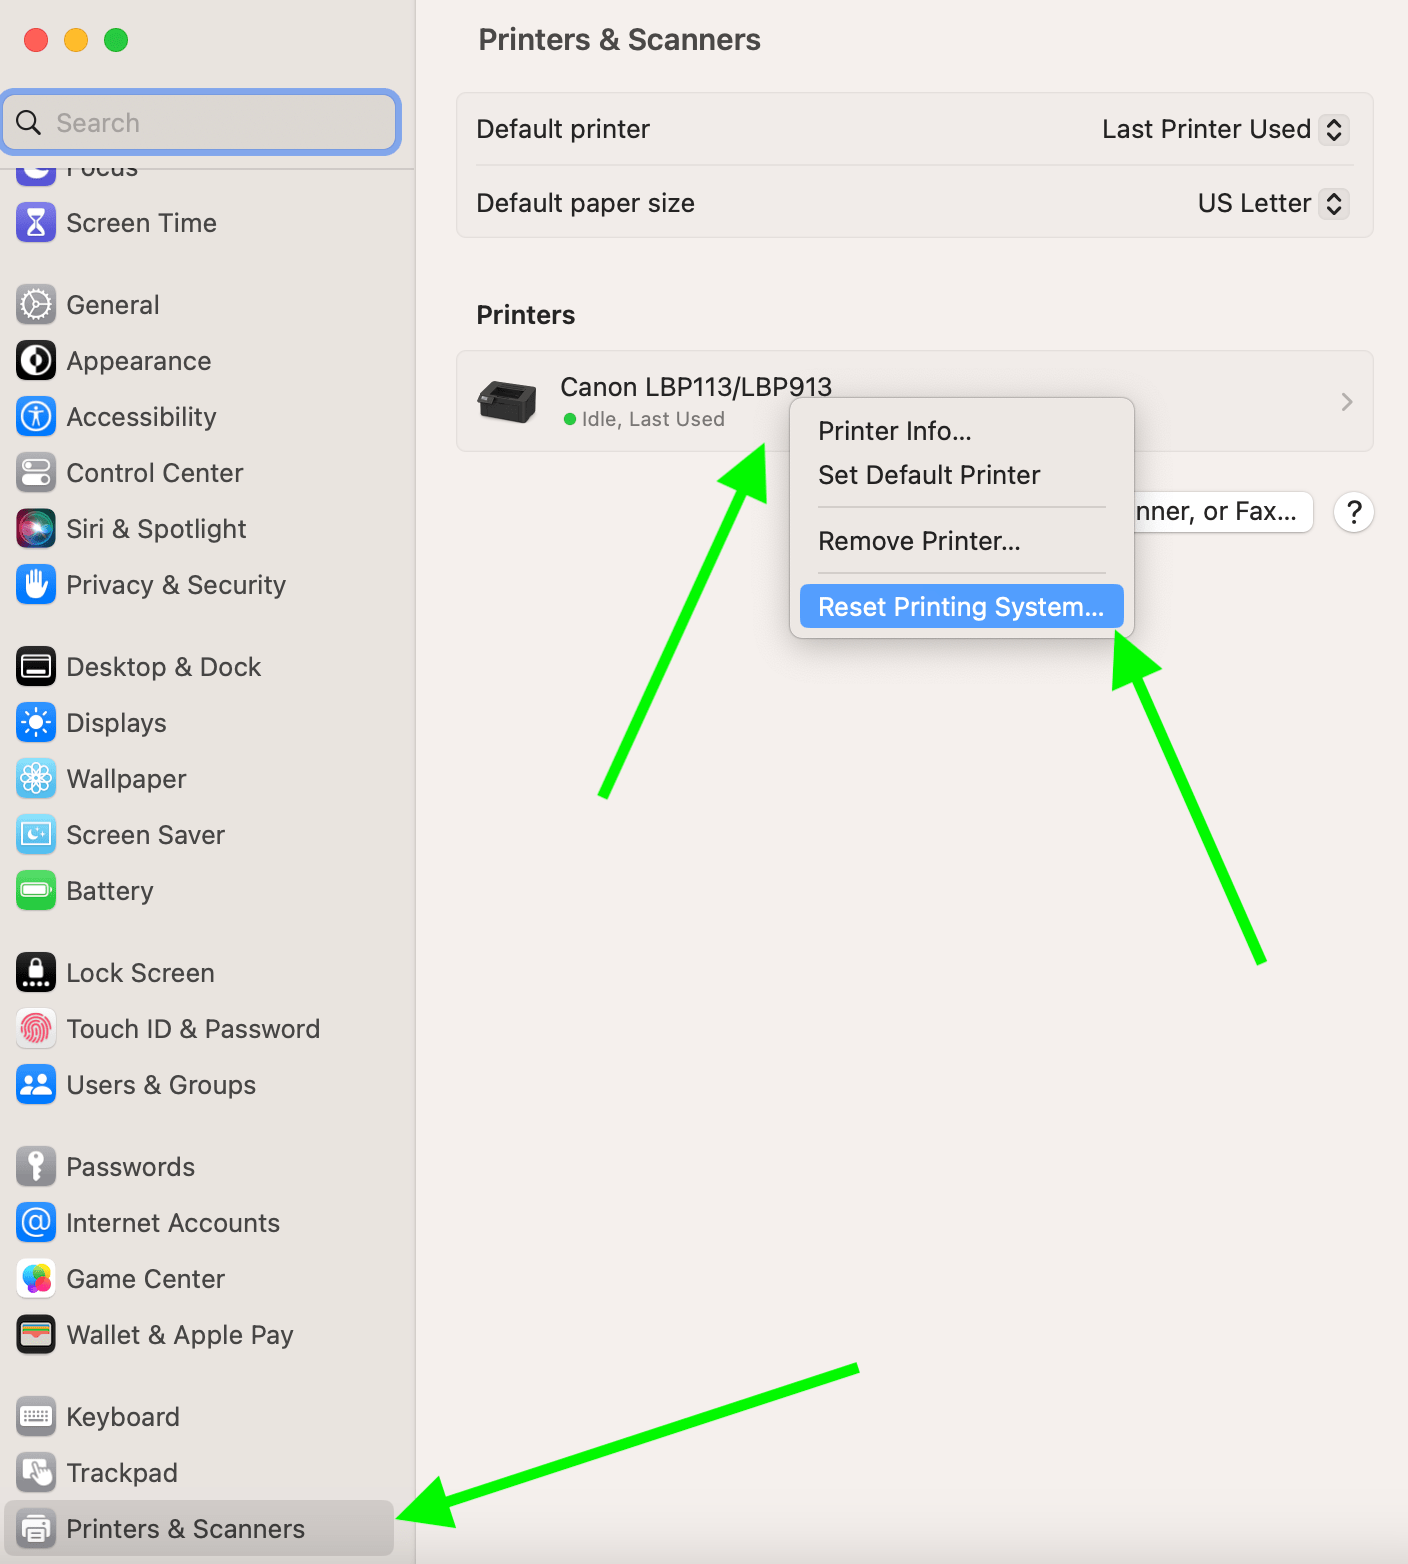
- From the left sidebar, click Printers & Scanners, which is way down the list.
- Hover over your printer, right-click (Control-click) it and select Reset Printing System.
- A popup will appear to confirm this. Click Reset. As the popup says when you click Reset, all of your printers, scanners and faxes will be removed from your Mac. We have previously explained in more detail what Reset does exactly.
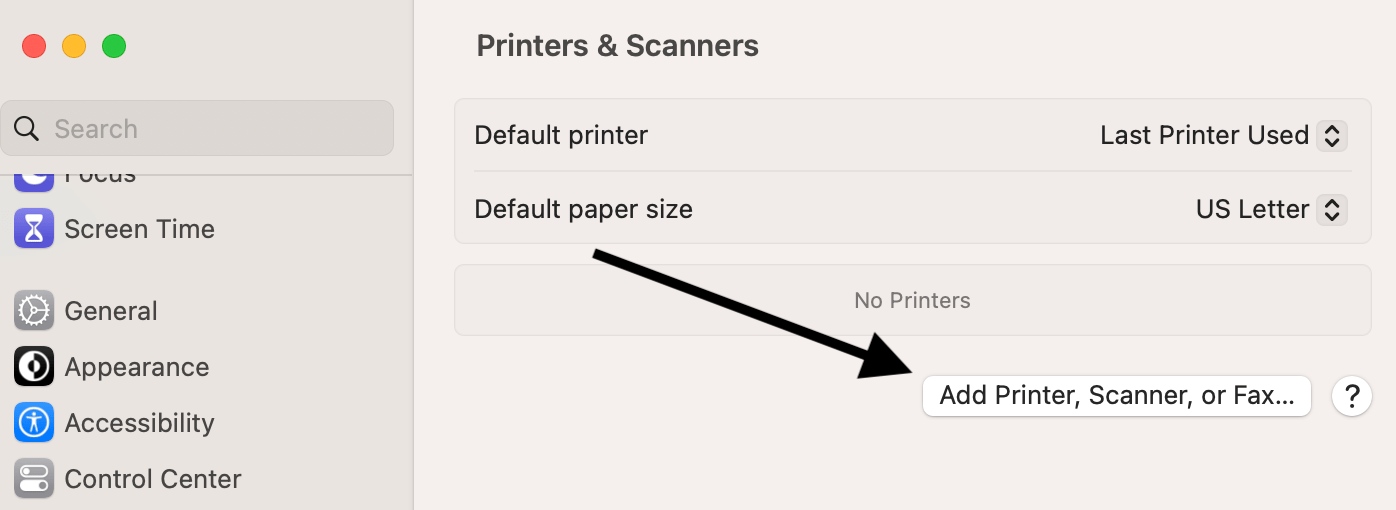
- After resetting and removing everything, go to System Settings > Printers & Scanners. Click the Add Printer, Scanner, or Fax button and re-add your printer.
2. Create a new self-signed server certificate with a valid expiration
If removing and adding does not work, try this. For this, we will need to access the printer’s web interface. Here is how:
- Figure out your printer’s IP address. There are a few places you could locate this. Try these until you find it:
- Go to System Settings > Printers & Scanners and then click on your printer. An info window will appear showing the details of the printer. Check the Location field. Do you have the IP address there? Sometimes, this field is empty; if it is, try the next one.
- Your printer’s IP address may be printed on the printer itself. Check for it. If it is not there, see the next suggestion.
- You can find the printer’s IP address using the control panel that most printers have. Go to the control panel and check the IP address. You may need to go to the printer manual to help you navigate the control panel and find the IP address from among the different menu items.
- After finding the menu, open a web browser and type the following:
http://IP address of the printer

Example: http://192.168.0.17 - Then press the Enter key. If you get an error message or are unable to access the web control, this could be due to one of two reasons:
- Try https instead of http, like https://192.168.0.17.
- Your printer may be set to not allow web access. You will need to check your printer manual to see how to allow it.
- You will be asked to enter a username and password. Again, check your printer manual regarding how to find or set these. Your printer’s control panel will probably let you do this.
- Now, assuming you successfully logged in, follow these steps. The steps may vary by model. But the steps are pretty similar across printers.
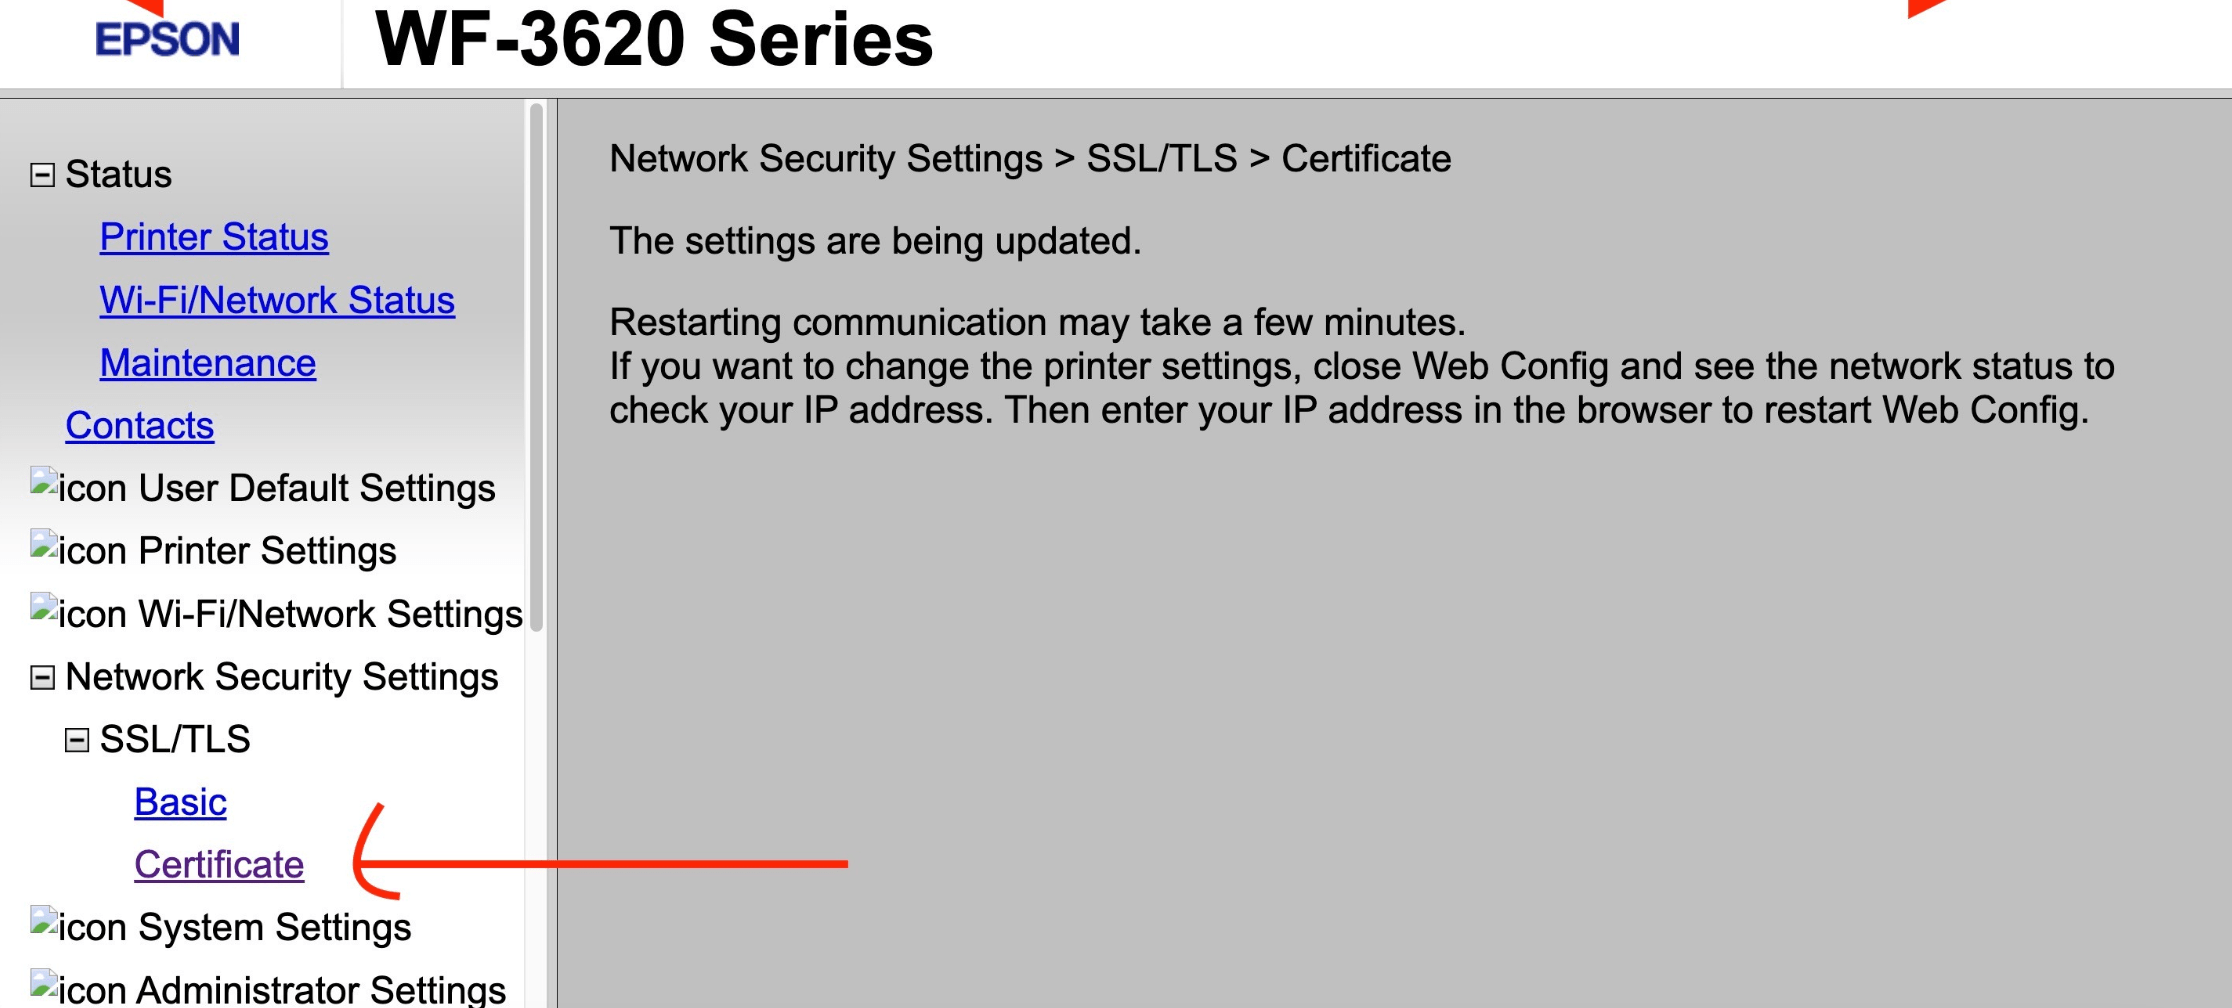
- Find the Network Security settings.
- Find the Certificates section.
- Then, find the option to Create a New Self-Signed Certificate and follow the onscreen instructions.
Related articles


