How to Fix “No Password Provided” Email Error on iPhone
Some Mail users have had issues with getting their mail on iPhone. One of the error messages that can be seen in the Mail app is “No Password Provided.” This message shows up for people using a variety of email services: AOL, ATT, iCloud, and others. In this article, we will give you some ideas to help fix this problem – some provider-specific solutions, and some more general ideas for fixing issues in Mail.
AOL
AOL has there own sign-in method. Some apps don’t support it, and even with apps that do – like Apple Mail on iPhone – you need to set up the account by selecting AOL as the account type. If the account was set up using “other,” or you have had to enter information such as incoming and outgoing mail servers, you were not using AOL’s sign-in method. If your mail app rejects your password or doesn’t provide you with an “AOL sign-in box,” then you should go to your AOL account and get an app password.
- Open Safari (or another browser), go to your AOL account (myaccount.aol.com) and sign in.
- Click on your user icon in the top-right corner and select My Profile.
- Click on Account Security in the menu on the left side of your profile page.
- Here you will see information about how you sign in to AOL. You should see boxes titled: Password, 2-Step Verification and App Password.
- In the box titled App Password, click on “Generate app password.”
- You should see some info about app passwords. Click on Get Started.
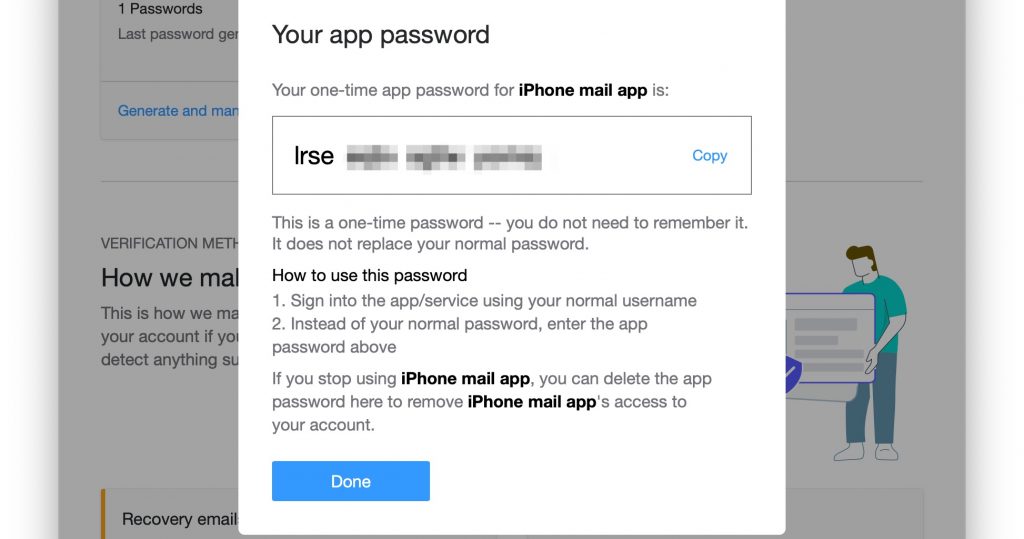
- Enter your mail app name. If you use iPhone mail, just enter “iPhone mail.”
- You will get a password to use just with your mail app.

How to use your app password (iPhone Mail app).
- Go to Settings on your iPhone and scroll down and tap on Mail.
- Select your AOL account.
- Instead of your usual AOL password, enter the generated app password for the incoming and outgoing mail servers.
ATT
Similar to the solution for those using AOL mail, ATT mail users can go to their account page and request a secure key to use with their email. The following has been successful for ATT mail users.
- Go to your ATT account page and sign in.
- Go to your profile, then find where you can request a “secure mail key.”
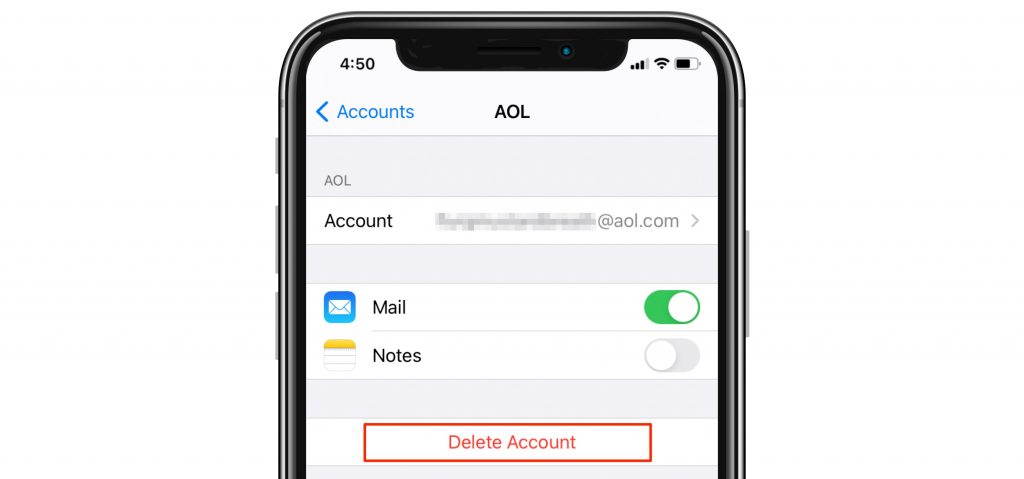
- Go to Settings > Mail and tap on Accounts. Tap on your ATT account. Tap Delete Account.
- From Settings > Mail > Accounts, tap on Add Account. Select “other” then tap on Add Mail Account.
- Enter the information requested on that screen, including Password – which needs to be your new secure mail key, not your usual email password. Tap on Next.
- Select IMAP. Check that the fields are correctly filled in.
- Username: your full email
- Incoming Host Name: imap.mail.att.net
- Outgoing Host Name: smtp.mail.att.net
- Tap on Continue for any “Server Identity” prompts that appear.
- Tap on Save.
Other Things to Try
- For those not using AOL or ATT, you might look to see if your email provider also provides “app passwords,” “mail keys” or something similar, and try using this generated app password for your email account.
- Contact your email provider (System admin if you’re at work). You can verify that your settings are correct and see if they have any troubleshooting tips for you.
- Try removing your email account – then setting it up again. You may need to check with your email provider about the correct settings for your email account.
- First check that your email exists elsewhere. Either check on your computer or log in to webmail.
- On your iPhone, go to Settings > Mail and tap on Accounts.
- Select your email account from the list. Tap on Delete Account.
- From Settings > Mail > Accounts, choose Add Account.
- If your email provider is listed, choose that, otherwise choose “other.”
- Follow the onscreen prompts and fill in the blanks to set up your account.

- If nothing seems to be working to fix the issue, you can contact Apple Support.
Related Articles:


Mail setup is not accepting password. Keeps saying “no password for account”!
None of it worked for me.
I filled out my name, email address, password, and Description was added automatically. For me Sky.
Tapped Next, then I received the usual message of no password entered.
Sure enough, once I cleared that message, the box where my password was had disappeared. Time after time.