How to Record your FaceTime Calls on your Mac
This article explains how you can record FaceTime video and audio calls. You do not need to use a third-party app.
You may want to record these calls for various reasons. Because the ability to record FaceTime calls has a lot of advantages. For example, you can play your recordings back later, if you record them. This allows you to review the details of a meeting later. Or you can share your recording with others who could not join.
Before you record your calls, you may want to ask the other party for permission. There may be legal things to consider depending on where you live.
Unless you tell them, the other party or parties will not know you are recording. Everyone in the call will not be notified the call is being recorded.
In this article, we will use the Screenshot app. Please note that you can also QuickTime to record your calls.
How to record a FaceTime meeting
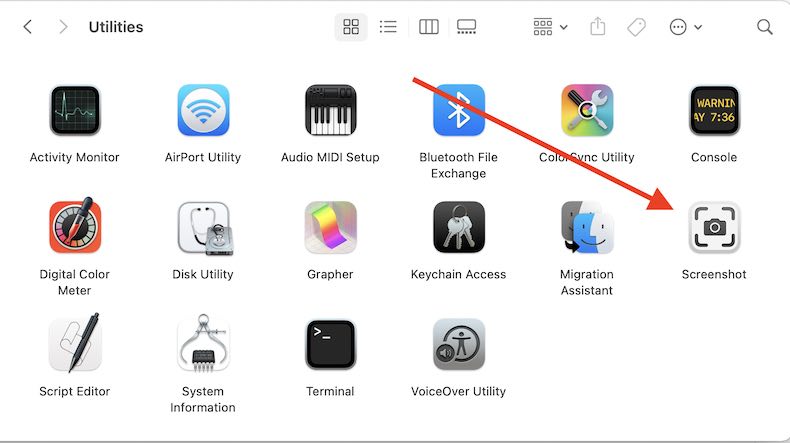
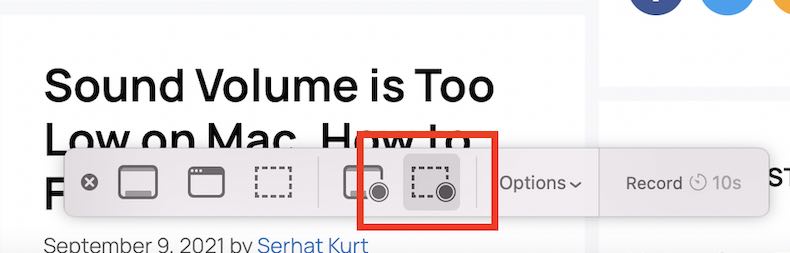
1. Open the macOS Screenshot app on your Mac. You can do so by opening the /Applications/Utilities folder. Or you can press Command + Shift + 5. You can do this right before your FaceTime call or immediately after your meeting starts. You can also set a countdown timer (see #5 below).
2. You will see the screen recording tool on your screen.
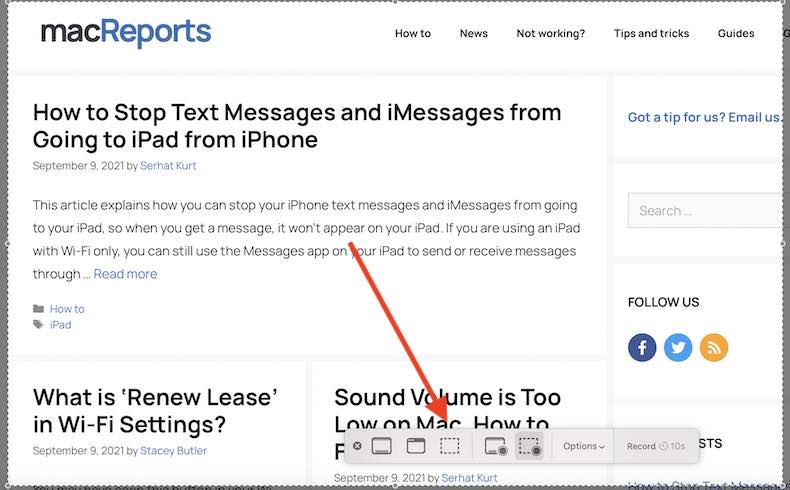
3. Click the Record Selected Portion option.
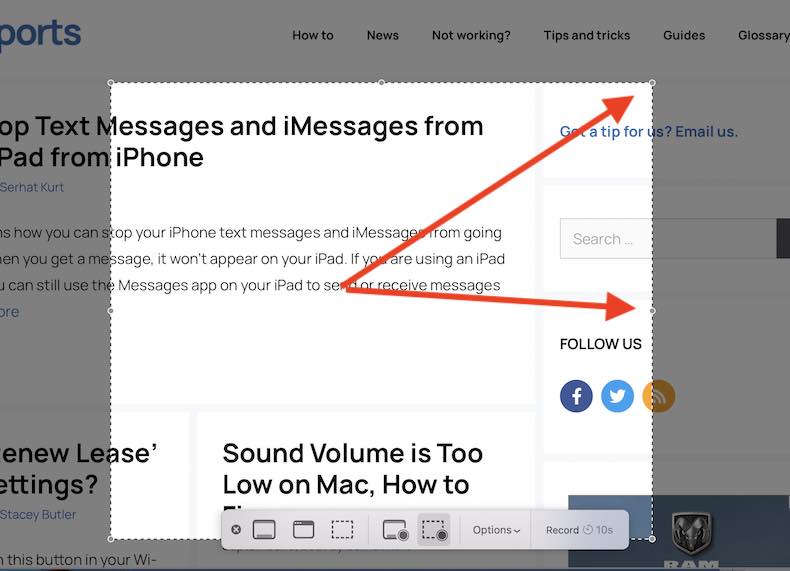
4. Drag to select the FaceTime area of the screen to record. You can also move the entire selection if needed.
5. Click Options. And select:
- Choose a Save to location. This is where to save your recording.
- Set a countdown timer if needed.
- Also select which microphone to use. If you do not select your built-in microphone, your recording will not have audio.
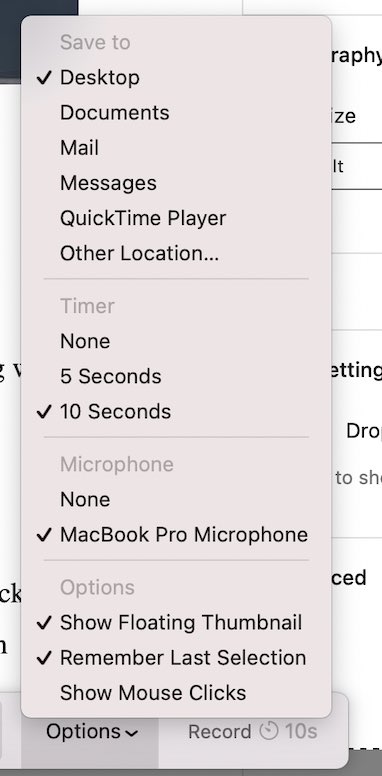
Click the Record button to start your FaceTime recording when you are done.
6. Your FaceTime will now be recorded. The Stop Recording button will appear in your menu bar, click that to end the recording. Or you can press Command-Control-Esc (Escape). After that, you can find it in your chosen location on your Mac.

See also: