How to Schedule an Email to Send Later in macOS Ventura
One of the new features in macOS Ventura (and iOS/iPadOS 16) is the ability to schedule an email to be sent in the Mail app. This feature is useful for a few different scenarios. For example, you may simply want your email to arrive at a particular time of day. Using Scheduled Send in Mail also lets you have some time to consider the email you are sending — just in case you change your mind about its contents. In this article, we’ll tell you how you can schedule an email to send later on your Mac, where to find your Send Later emails and how to unsend them if you need to.
How to use Scheduled Send in macOS Ventura
- After you finish typing your email, instead of clicking on the Send button, click on the small arrow just to the right of the Send button.
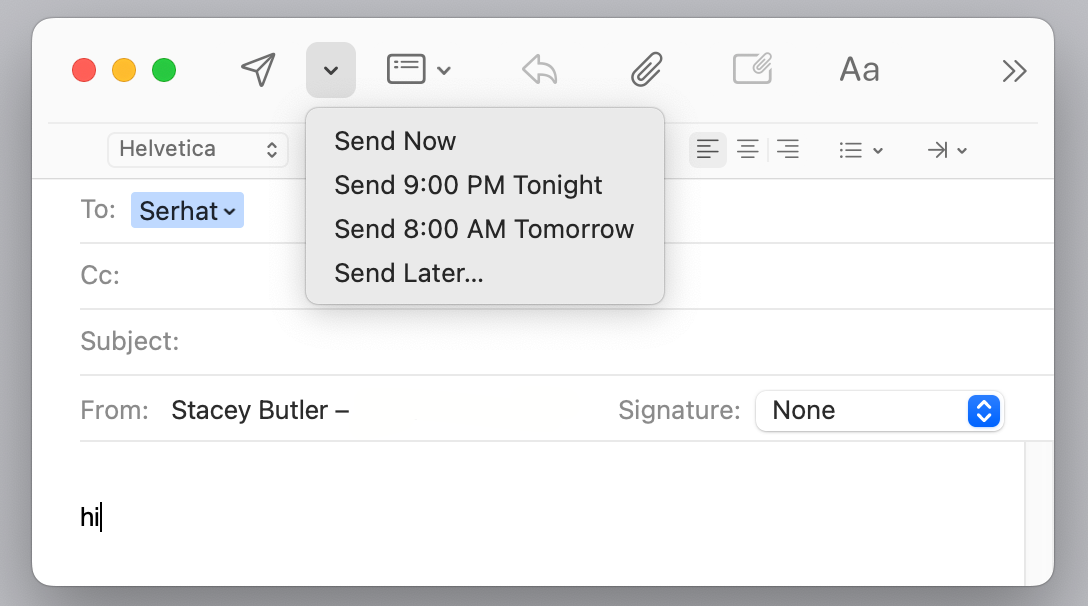
- You’ll see some send options, including Send Now, a couple of specific send times and Send Later. If you don’t like either of the times options shown, click on Send Later.
- From the Send Later window, you can use the calendar to choose the date, then choose the time of day.
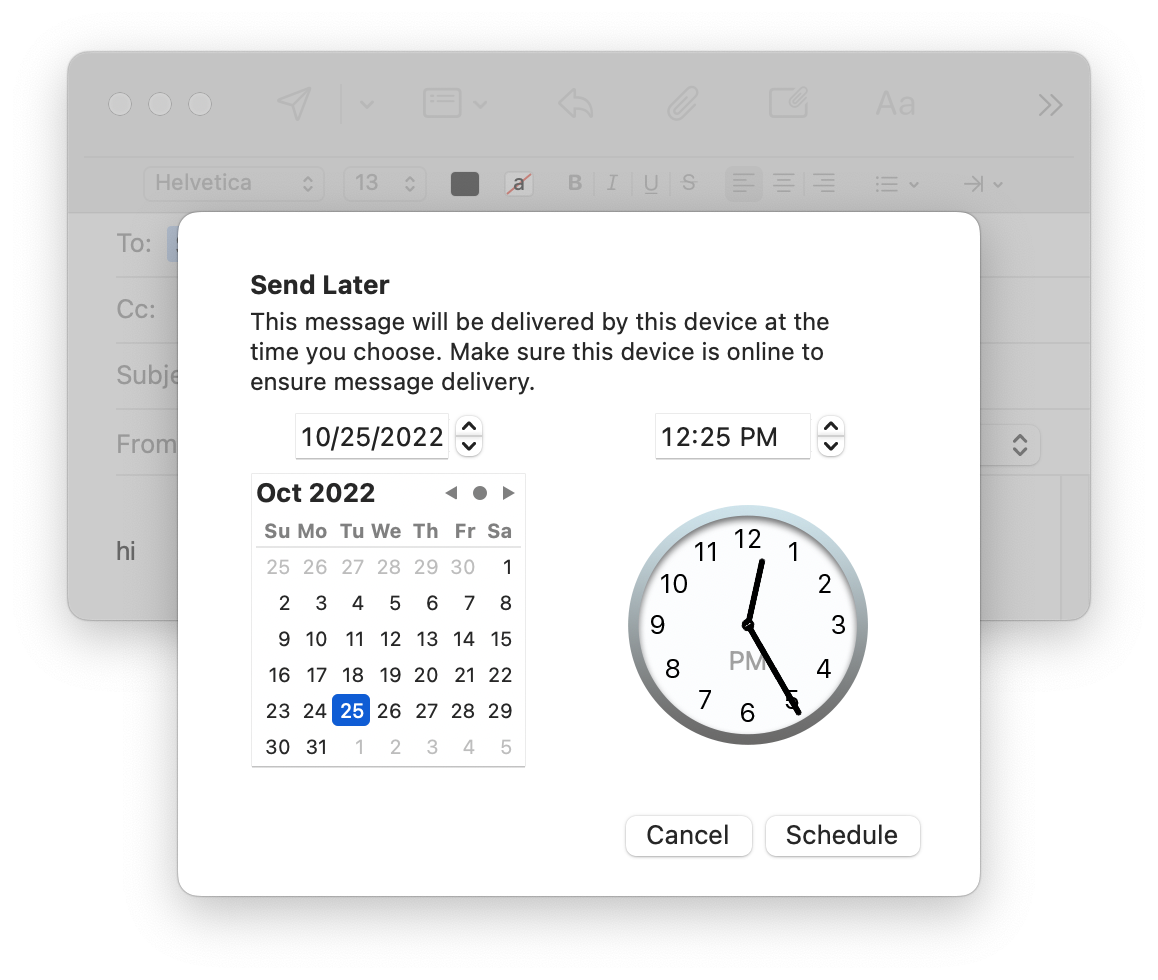
- When you have chosen your time and date, click on Schedule.
Find the Send Later mailbox
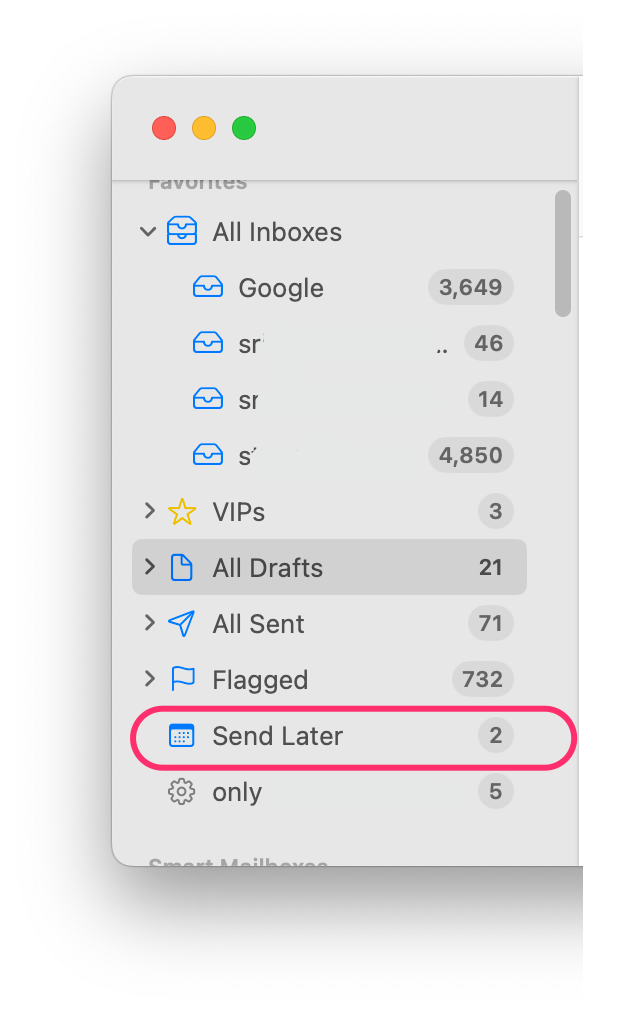
After you schedule the email, you can find it in the Send Later mailbox. If you can’t see the Send Later mailbox:
- If you can’t see your mailboxes in the sidebar in Mail:
- With Mail open, go to the top menu bar and click on View.
- Click on Show Sidebar. If you only see Hide Sidebar, you already have it showing.
- Hover your cursor over Favorites in the sidebar, then next to Favorites, a small round button with a plus sign will appear. Click on it.
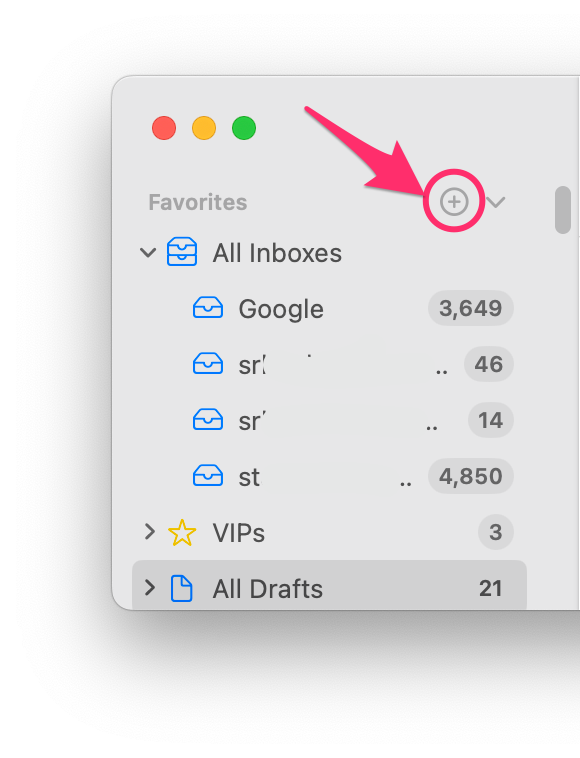
- Next to Mailbox to Add, click on the double-arrow to open the menu of options.
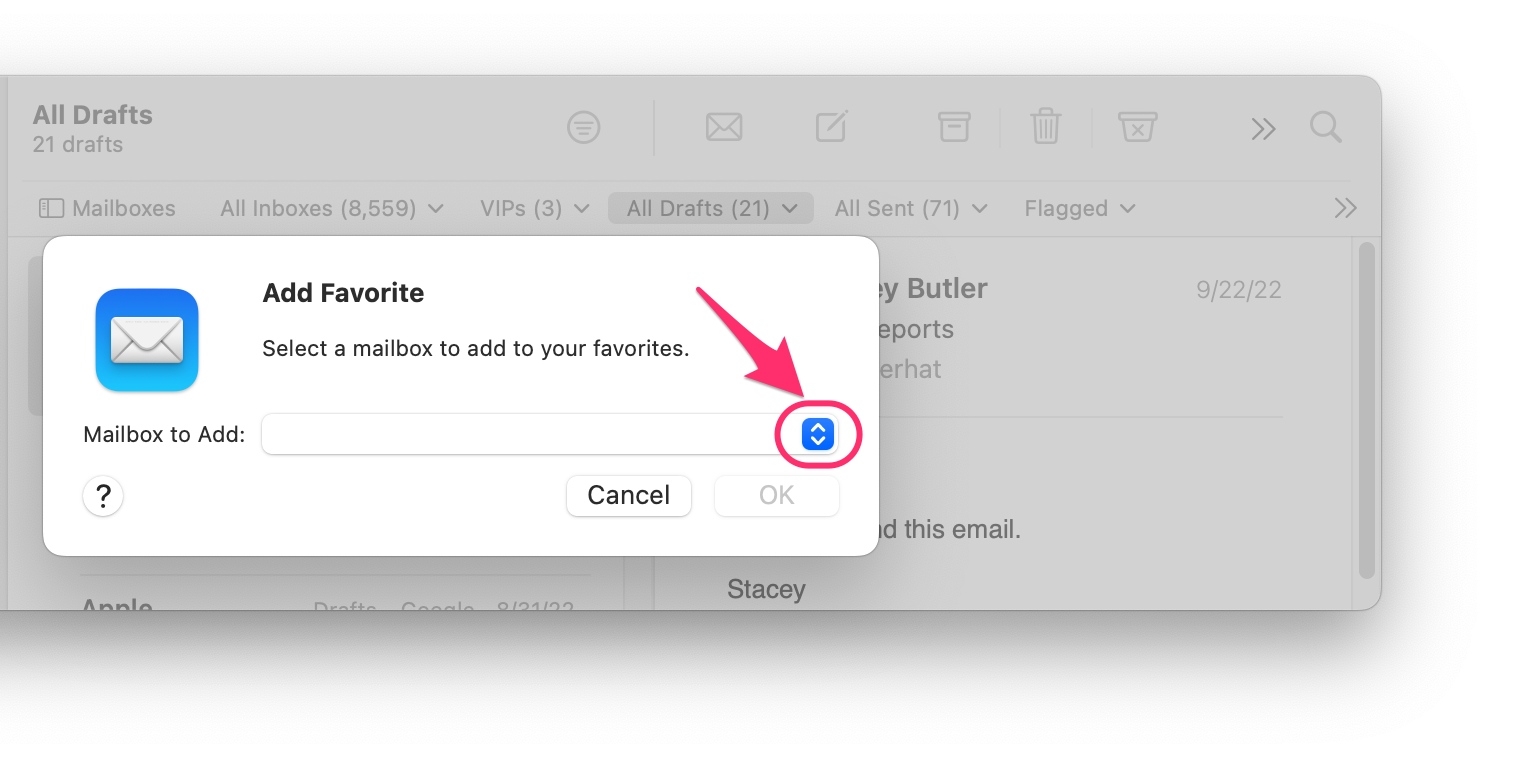
- Select Send Later, then Click OK. Now you should see Send Later appear in the sidebar under Favorites.
How to change the scheduled time and date
You may want to change your scheduled email’s scheduled time and date.
- Find your scheduled email in the Send Later mailbox, then select it.
- At the top of the email, you will see a blue banner saying, “This email will be sent [date] at [time].” There is an Edit button on the right side of this banner. Click on it.
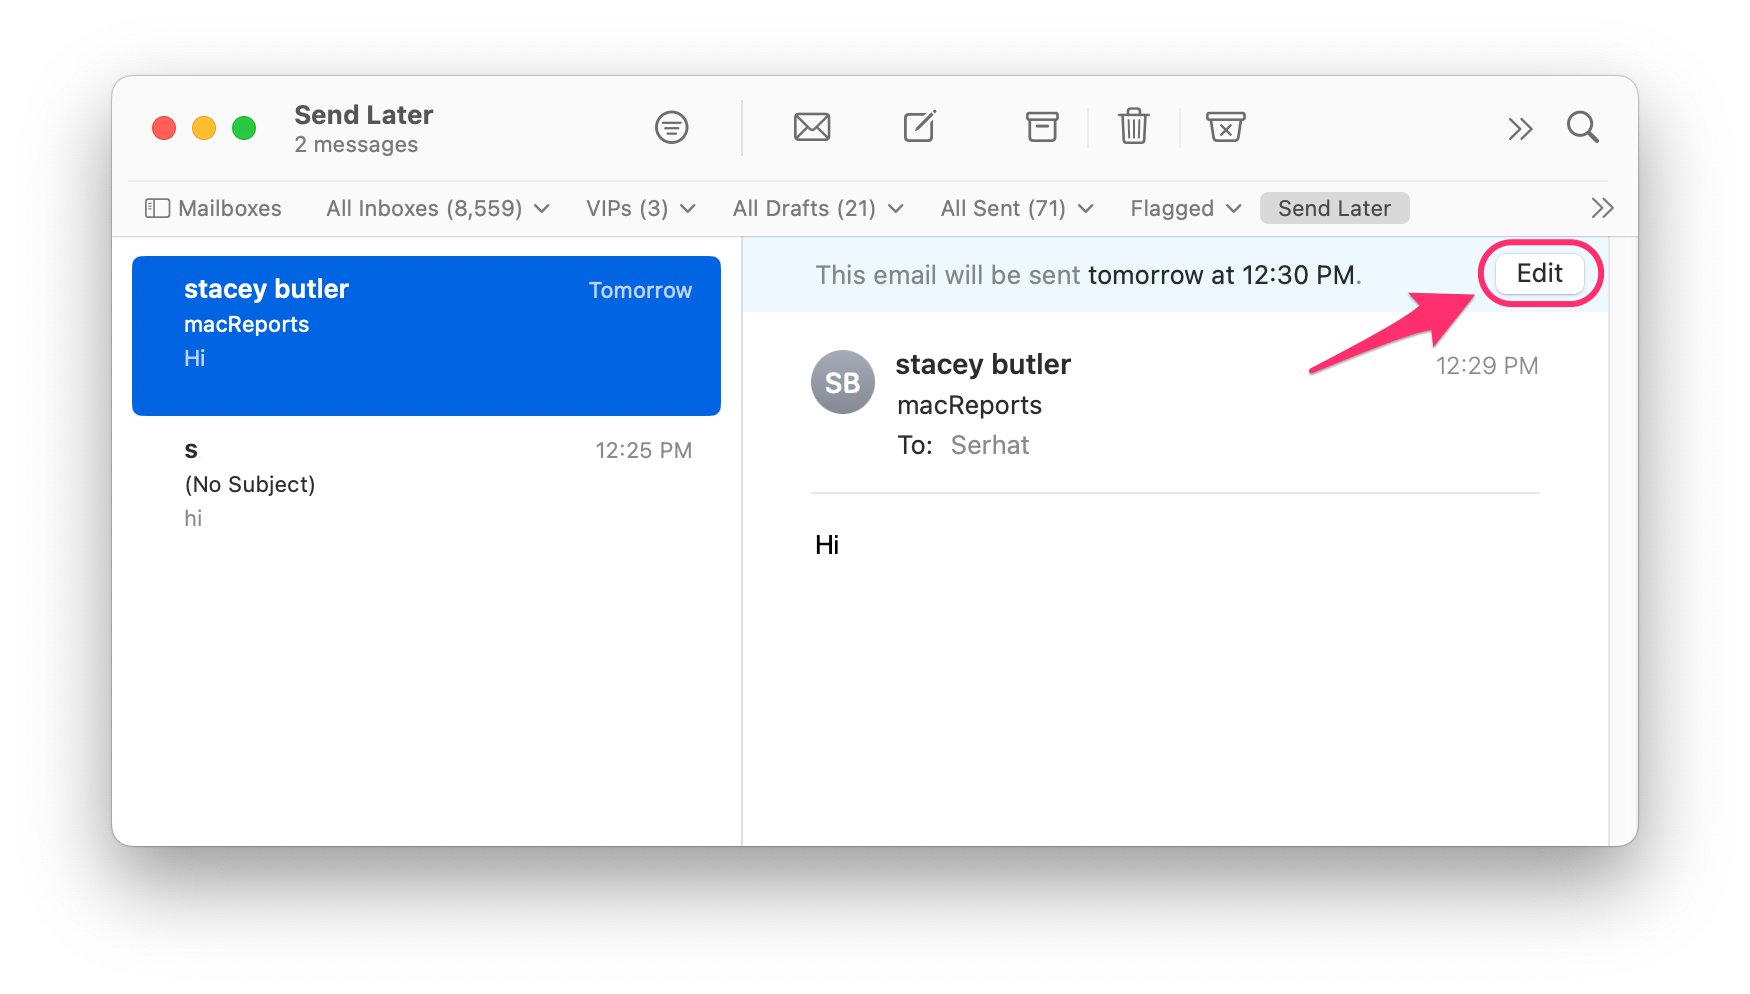
- Choose the new time and date, then click OK.
How to unsend a scheduled email
For a scheduled email, you can delete the email or make it a draft again.
- Find your email in the Send Later mailbox, then double-click to open it.
- You have a few options for moving the email to another mailbox folder. You may want to:
- Delete the email: Click on the Trash button.
- Move to Drafts: Click on Move to… Select Drafts or All Drafts. If you select All Drafts, then select which Drafts folder you want.
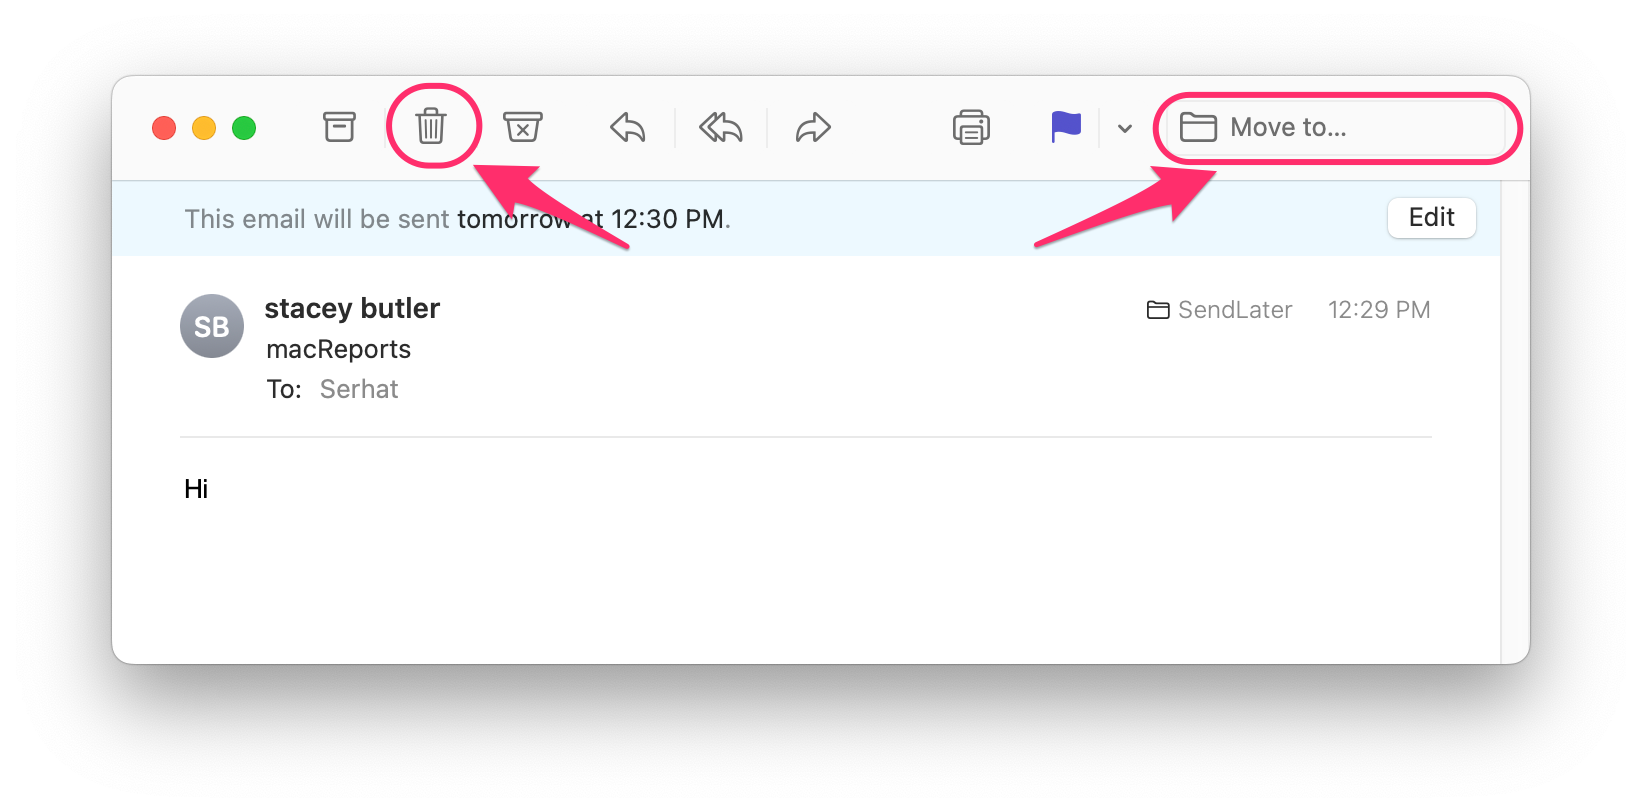
- After choosing one of the options from step 3, your email will no longer be in the Send Later mailbox, which means it is no longer scheduled to send.
Related articles

I have noticed that when using this new feature, messages end up in a folder called “Sent Messages” instead of the regular IMAP “Sent” folder. I haven’t been able to find the setting to resolve this.
I have two emails from last night that were supposed to Send Later this morning. Time is long past. Not only did they not send (at least, there’s no copy in my Sent folder), but when I try Send Again, nothing sends AFAIK.
Hi, Stacey…
I do like this new feature from Ventura OS, but I noticed something: When I schedule an email to be sent later, it does appear in my “Send Later” folder. However, after the time has passed that I scheduled the email for, the email stays in the “Send Later” folder and doesn’t move to the regular “Sent” folder, so I don’t know if it’s been sent out. I did a few tests and can confirm that Mac Mail did send the emails out even though it stays in the “Send Later” folder and indicates it “will be sent out at…”. Seems very odd that a scheduled email does not move to the “Sent” folder or am I doing something wrong?
Jeff