Can you Connect More than One Monitor to a Mac?
Many Mac users, especially those who use MacBooks, may need more screen real-estate than their built-in displays provide. But, how many external monitors can you connect? Also, what are the display options for those connected screens – options like screen mirroring and extended display. Can M1 Macs use external displays as Intel Macs can? In this article, we will answer these questions, and tell you how you can set up your external monitors with your Mac.
How Many Displays can you Connect?
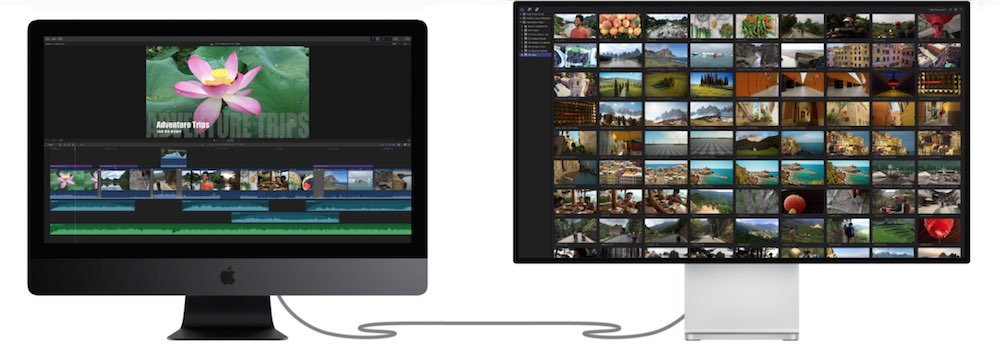
- Intel Macs with Thunderbolt 3 (USB-C): You can connect a display to each port on your Mac using an appropriate cable, adapter and/or hub.
- Apple silicon Macs: You can connect a single external display to your Mac. (Mac mini can have a total of two displays, one using the HDMI port.) Apple may issue a fix for the one external monitor issue in future versions of macOS. Until then, if you are interested, you can do a search for the unofficial ways of connecting more monitors to an M1 Mac; They require purchasing some accessory hardware and installing 3rd party software.
- Macs with MiniDisplayPort, Thunderbolt or Thunderbolt 2: You can connect two displays. You can either connect one Thunderbolt monitor to another and then to your Mac, or if you have two Thunderbolt ports on your Mac, you can connect two monitors separately to your computer.
Display Options
Extended Desktop
An extended desktop allows you to do one of two things with your monitors:
- Option 1: You can have one large desktop that extends across two or more monitors.
- You can open windows that span across monitors.
- Your cursor will move across the screens as if they are one.
- Option 2: You can set things up so that each monitor shows a separate desktop space.
- You will have separate windows open in each monitor.
- When you move your mouse cursor off the edge of one screen, it will move to another screen.
- You can drag a window from one monitor to another.
To set up your monitors to use the extended desktop mode:
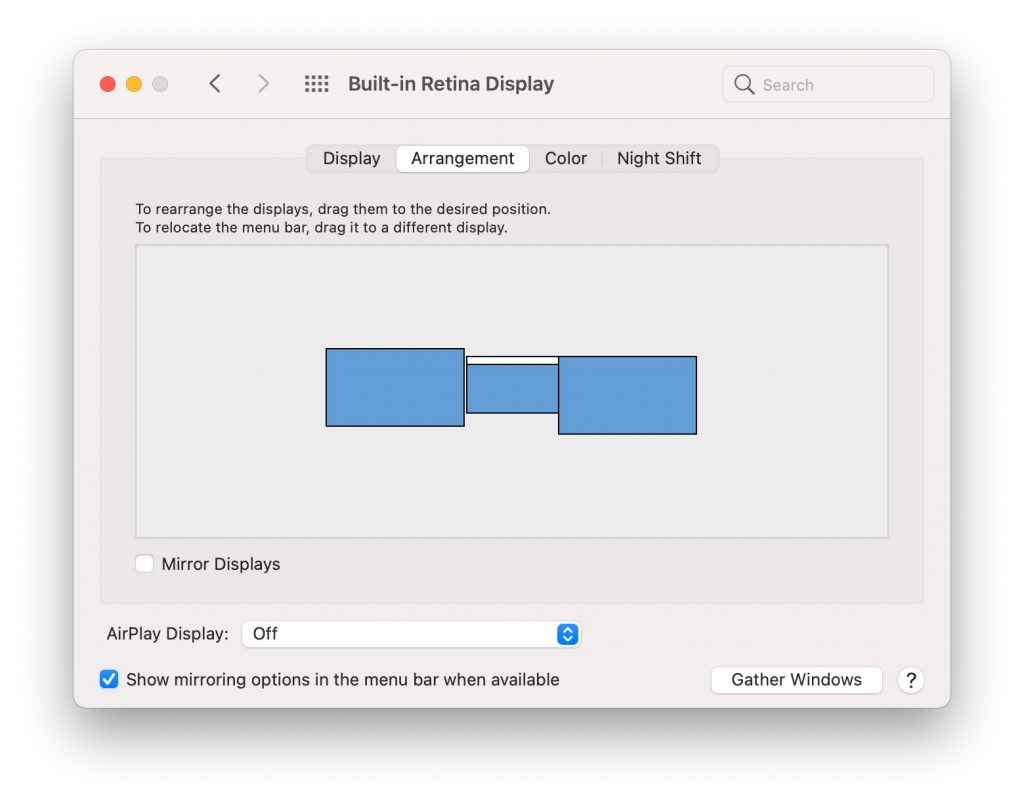
- Go to Apple menu > System Preferences and click on Displays.
- Click on the Arrangement tab.
- Make sure Mirror Displays is unchecked.
- You can rearrange the displays how you would like by dragging the blue rectangle images around. To know which blue rectangle represents which monitor, click it and your monitor will flash a red border on your monitor.
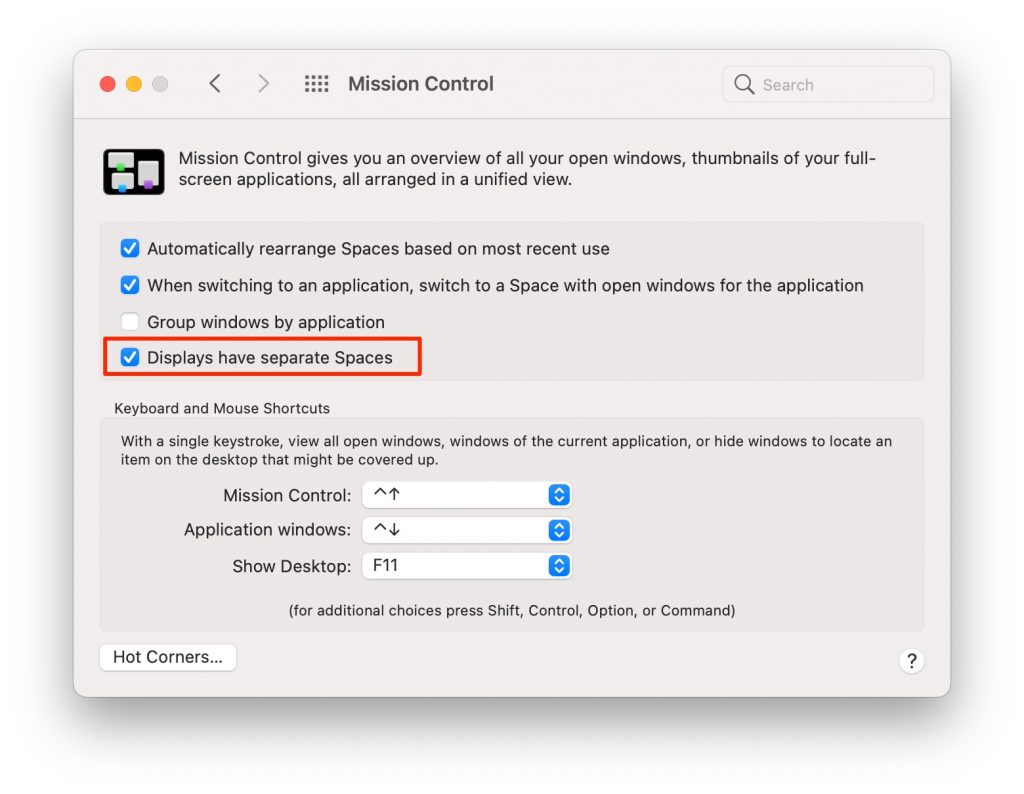
To choose between option 1 and option 2 above, go to System Preferences and click on Mission Control. For option 1, uncheck “Displays have separate Spaces.” For option 2, check the box next to “Displays have separate Spaces.”
Display Mirroring
To set up monitors to mirror your built-in display:
- Go to Apple menu > System Preferences and click on Displays.
- With the Display tab selected, you should set both displays to the same resolution.
- Click on the Arrangement tab.
- Check the box next to Mirror Displays.
Mixed Mirroring and Extended Desktop
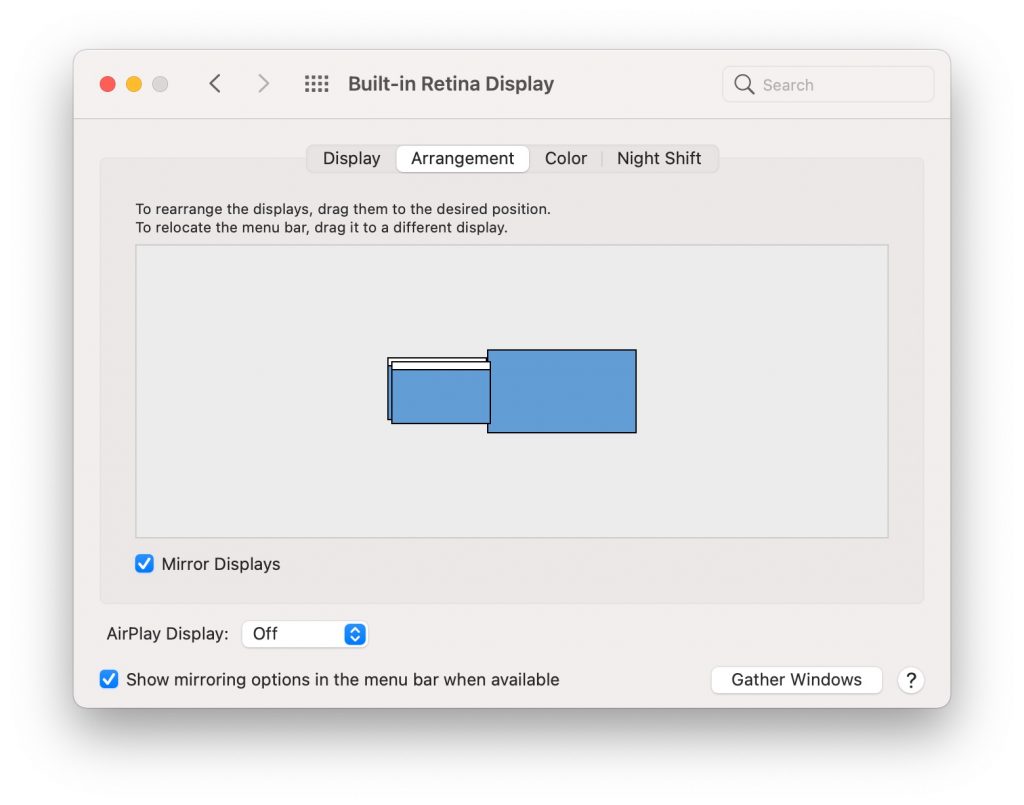
If you have three or more monitors, you can specify that some mirror your main display, and other monitors extend the display.
- Under System Preferences, click on Display, then click the Arrangement tab.
- Make sure Mirror Displays is unchecked.
- To make one display mirror another, press and hold the Option key while you drag one of the blue display icons on top of another.
Tips and Troubleshooting
- Connecting monitors and changing the display settings could cause your Mac to crash.
- If a connected monitor begins to flash or otherwise act crazy, you can press the power button (or disconnect the monitor), then turn it back on (reconnect it).
- If your Mac doesn’t detect a monitor you have connected, try the following:
- Go to System Preferences > Displays and click on the Display tab. Click on the Detect Displays button. If you don’t see the button, press the Option key and it will appear where the Gather Windows button is.
- Put your Mac to sleep – Apple menu > Sleep – then wake it again.
- Check cable connections and power buttons.
- Make sure you are using the right kind of cable/hub. Not all cables or hub ports – such as some USB-C cables, and many USB-C hub ports – will allow the transfer of video/media. See How to Choose a USB, Multi-port Hub for your MacBook for more info.
Related Articles

