How to Back Up your Mac with Time Machine
Time Machine is a built in feature of Mac for creating full backups of your entire system using an external storage device. Time Machine can automatically back up all of your files or you can use it to do a one-time backup.
See also:
Creating a Backup
External Storage Device
In order to create your backup, you will need an external storage device (external hard drive) where your backup will be stored. In this article, we won’t get into all the options that are out there for choice of drive. There is a lot of variety here when it comes to storage capacity and also drive type. If you just need something simple so you can make occasional backups, you can get a hard disk drive (HDD, as opposed to SSD). They should be cheaper for the storage capacity. I purchased one about a year ago for around $60 for 2TB. Many disks come pre-formatted for Windows. Reformatting isn’t a big deal, however, and you’ll be guided to that option when you select the disk in Time Machine.
See also: Messages Won’t Open On Mac, Fix
Connecting an External Storage Device
You will need to make sure, if you are using the external device for the first time, that you have the appropriate connector cables/adapters to connect it to your Mac.
See also: iCloud Backup Failed, Fix
Set your Storage Device as Backup Disk
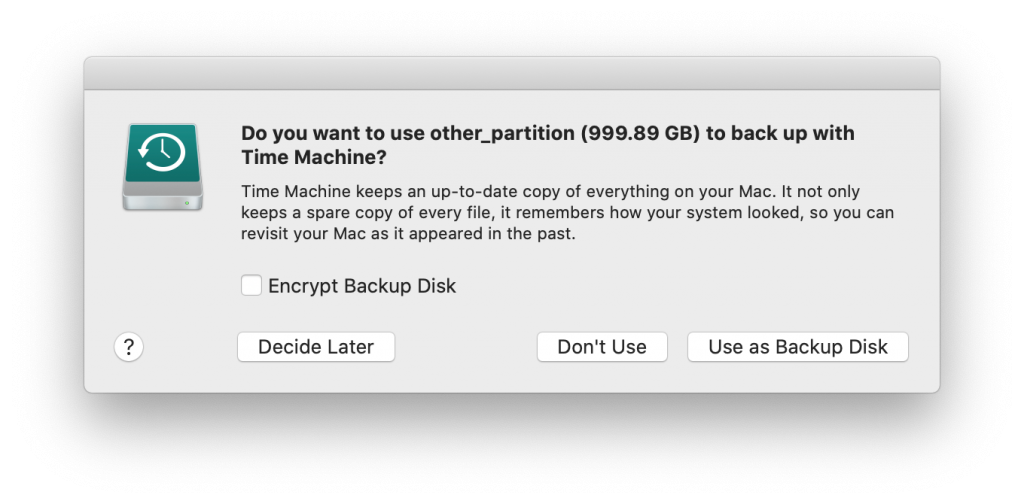
When you connect your external storage device to your Mac, you may be asked if you want to use it with Time Machine.
See also: How to Share Files and Folders in iCloud Drive
- Click to select Encrypt Backup Disk, if you want, then click Use as Backup Disk.
See also: How To Reset Your Macbook To Factory Settings
If you are not asked, you can add it manually.
- Go to Apple menu () > System Preferences. Click on Time Machine.
- Click Select Backup Disk.
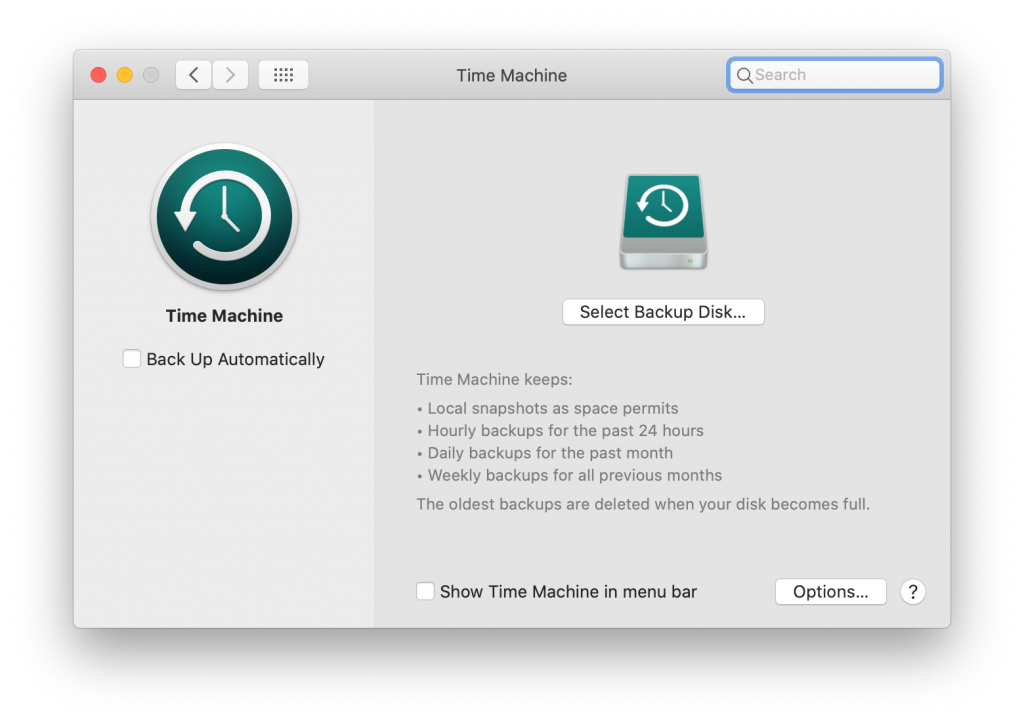
- Select your external hard drive from the list. Click to select Encrypt backups, if you want, then click Use Disk.
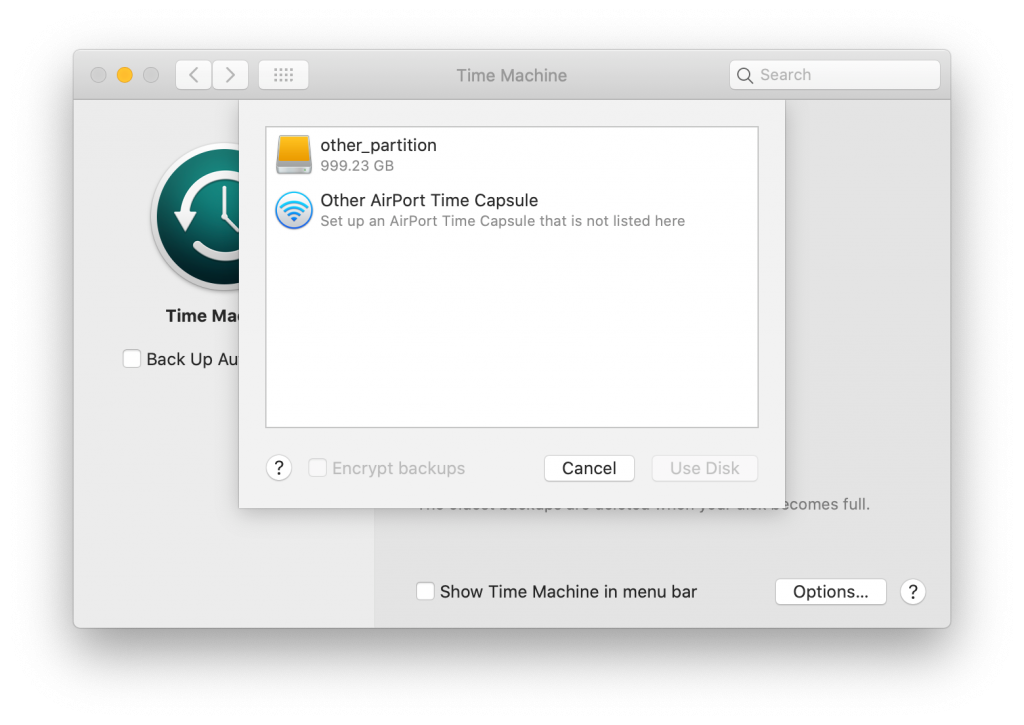
- You may need to format your disk if your disk is new, or if you were previously using it to backup a Windows machine. Formatting it will erase all contents on the disk. If you are prompted to erase the disk, click Erase.
See also: How To Reset Network Settings On Mac
Automatic Backups
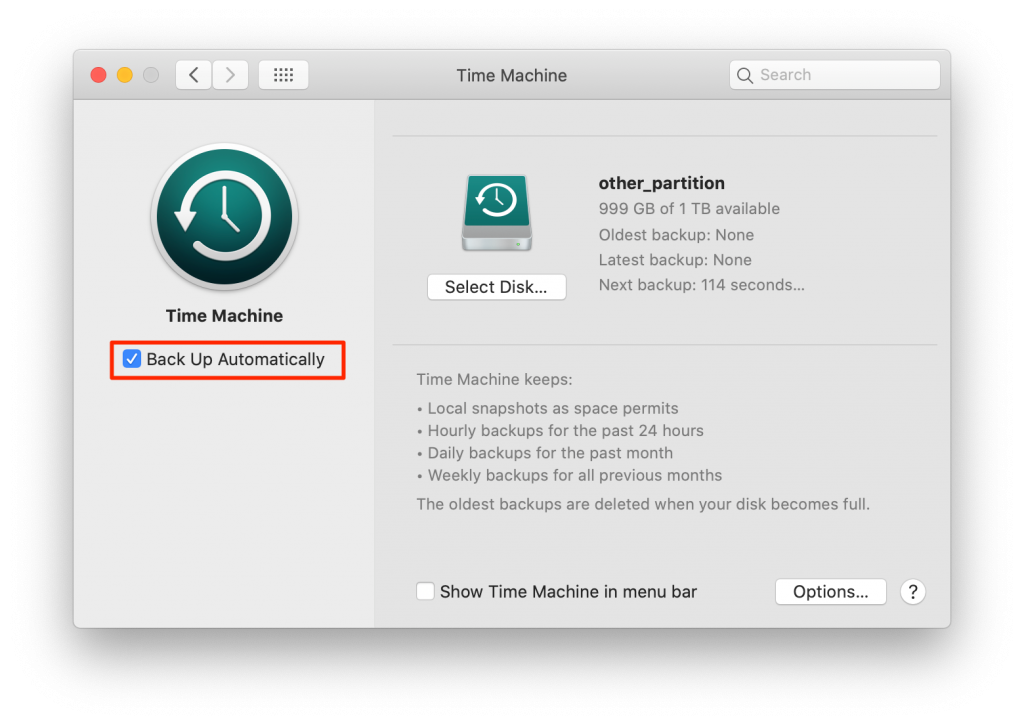
After setting a backup disk, Time Machine will start making backups. It automatically saves backups: hourly for the last 24 hours, daily for the past month and weekly for all previous months. The number of old backups you have will be limited by your devices storage space. The oldest backups are deleted to make room for the newest ones.
See also: How To Zip and Unzip Files In macOS
** Note: Your first backup may take a long time to complete. After that, only the files that have changed will be backed up. You can use your Mac while the backups are underway.
See also: How Do I Password Protect My Files & Folders In macOS?
If you don’t want automatic backups, you can click to toggle off Back Up Automatically.
Manual Backups
If you need to force your Mac to create a backup with the most current changes, such as right before upgrading or making major changes to your system, you can start a backup manually.
See also: How To Upgrade & Downgrade or Cancel Your iCloud Storage Plan
- Go to Time Machine in the menu bar or go to System Preferences > Time Machine.
- Choose Back Up Now.
Recent Articles:

