FaceTime Black Screen On Mac, Fix
This article explains how you can fix the FaceTime black screen problem on your Mac. This is an important problem that you should resolve quickly because if your FaceTime calls are only a black screen, then FaceTime will become useless. If you only see a black or blank screen and nothing else instead of the regular screen, then this article is for you.
Similarly, if you see a green screen, see this article.
Sometimes you may see that the camera’s green light is on indicating that the camera is working but still you may experience this problem.
Please ensure that you follow these instructions in order. Test FaceTime between steps to check if your issue is resolved.
See also: FaceTime is not working.
1. Make sure that you are making video calls. Make sure that your call is not audio. FaceTime lets you make audio and video calls. To make a video call, you need to click the camera icon.
2. Make sure that your Mac’s camera isn’t obstructed. Yes, it can happen. Just check that your nothing is blocking your camera. This, in fact, happened to me. My camera was being blocked by a piece of a tape paper. Most Mac models have built-in cameras that are located near the top edge of the screen. Your camera will automatically turn on when you launch the FaceTime app on your Mac. You will know if your camera is on because you will see a green light.
See also: FaceTime Call Won’t End?
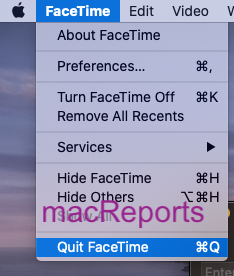
3. Quit FaceTime and then restart again. Here is how:
- In FaceTime, click FaceTime.
- Click Quit FaceTime.
- Now reopen FaceTime and try again.
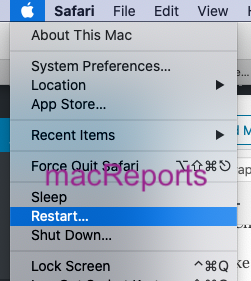
4. Restart your Mac. It is simple but effective. Here is how:
5. Make sure that you have the latest version of the macOS software installed on your Mac. You can easily update your Mac. Here is how:
- If your Mac is running macOS Mojave or later, then click the Apple menu > System Preferences > Software Update. This will check for updates. And if there is an update available, follow the onscreen instructions to update your device.
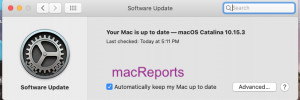
- If your Mac has an earlier version of macOS (macOS High Sierra, Sierra, El Capitan, etc), then on your Mac, open the App Store app, then click Updates. And if there is an update available, follow the onscreen instructions.
6. Reset the SMC of your Mac. The process is slightly different for different Mac models. We previously explained how you can do this. Please read that article:
7. Make sure that your camera is recognized. Here is how you can check this:
- On your Mac open the Utilities folder (Applications > Utilities).
- Click System Information.
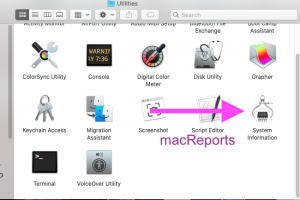
- If your camera is iSight, or if you are using a connected device, click USB. Then check to see if your camera is detected.
- If your camera is the Facetime or FaceTime HD camera, then click the Camera option to see if your camera is detected.
8. if you are using a standalone, connected camera, then please check or do the following:
- Make sure that your camera is turned on.
- Turn off the camera, wait a few seconds and then turn it back on. Test it now to see if it works.
- Turn off your computer, and turn off your camera and unplug it from your computer. Plug the cable back in, then turn on everything. Test to see if your camera works now.
- Make sure that your cable is good and not damaged.
- Use a different port to connect.
9. If you have multiple cameras connected to your Mac, make sure that FaceTime is using the correct camera. Here is how you can check this:
- On your Mac, open FaceTime.
- Click Video from the top menu bar.
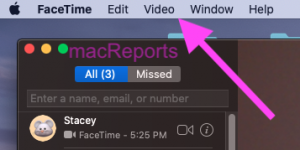
- Check to see if the correct camera is selected.
See this article if your Mac’s microphone is not working.


