Update Unavailable With This Apple ID, Fix
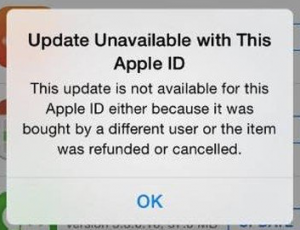
Several users have reported that they get an error message saying”Update Unavailable with This Apple ID. This update is not available for this Apple ID either because it was bought by a different user or the item was refunded or cancelled” when they want to update their apps or games in the iOS, iPadOS, macOS App Store.
This is an important problem. Because if you cannot update your apps on your iPhone, iPad, or Mac, this may greatly reduce the quality of your experience.
See also: To Update This App, You Need To Accept It On The Account Page In The App Store, Fix
This article explains what you can do if you run into problems in which your iPhone, iPad or Mac can’t update apps, then this article is for you.
See also: Automatic App Updates Not Working, Fix
Please try the steps below. After trying each step, try to update your apps to see if you have fixed the problem.
1. System Status
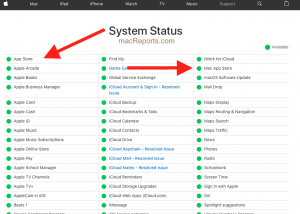
Before you do anything, it is a good idea to check the Apple System Status website. It is possible that there’s an outage for a service affecting app updates on Apple’s side. This means that Apple may be having issues that prevent some customers from completing purchases or updating apps. Here is how:
- Open a browser and visit https://www.apple.com/support/systemstatus/
- This page shows the current state of all the Apple services.
- Find “App Store” and “Mac App Store”.
- This page will indicate if there are issues.
- If “App Store” or “Mac App Store” displays a message, clicking on it will reveal more details about the issue.
2. Apple ID
Most people have only one Apple ID. However, it is possible to have multiple Apple IDs. Do you have multiple Apple IDs or did you have multiple Apple IDs? Or are the apps you want to update purchased under the Apple ID of some else? It is important to point out that an app purchase made with an AppleID is attached to that AppleID. It is not possible to change the Apple ID that an app has been purchased with.
See also: How To Create an Apple ID Without an Apple Device & Credit Card
You can only update an app if you sign in to the App Store with the same Apple ID that was originally used.
App purchases cannot be transferred from one AppleID to another. This means that you cannot update apps that are purchased using a different Apple ID, such as your old Apple ID. To update an app, you will have to use your Apple ID that you originally used to purchase it. If you have no access to your old Apple ID, you will need to remove the app and re-purchase it with your current Apple ID. This is true even if the app is free. Remove it from your device, open the App Store app, and redownload the app that caused this warning message. Here is how:
- Delete the app that you cannot update. If this is an iPhone or iPad, touch and hold the app and select Delete App. If this is a Mac, you can uninstall it, open Launchpad, locate the app in Launchpad, click and hold it until it jiggles, and then click the (x) icon to delete it.
- Then launch the App Store app on your iPhone, iPad, or Mac. Please ensure that you are signed into the store using your current Apple ID.
- Find the app and then redownload it.
Please note that you can delete your Apple IDs that you no longer use.
3. Update your device
Please ensure that you update your iPhone, iPad or Mac to the latest version of iOS, iPadOS, or macOS. Here is how:
- iPhone or iPad: Go to Settings > General > Software Update. if there is an update available, tap Download and Install and then follow the onscreen instructions.
- Mac: On your Mac, if you are using macOS Mojave or later, open System Preferences and then click Software Update. Click Update Now if there is an update available. If you are using an easier version of macOS, then open the App Store app to update your Mac.
4. Date and time
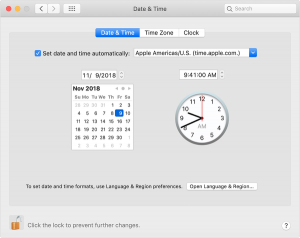
Please ensure that your iPhone’s, iPad’s, or Mac’s date and time are set correctly for your region. You can easily check and change this if needed. if you see the wrong date or time, change it. You may also want to turn on the option to set date and time automatically. Here is how:
- iPhone, iPad: Settings > General > Date & Time. You may want to turn on Set Automatically. See also: ‘Set Automatically’ Grayed Out in Date & Time Settings on iPhone or iPad
- Mac: From the Apple menu, open System Preferences, then choose Date & Time. You may want to select the ”Set date and time automatically” option. You may have to click the Lock icon and enter your password to be able to make changes.
See also:


