How to Fix iPhone Stuck in Bootloop Due to Full Storage
If you have had your iPhone for a while and have ignored the full storage warnings – you also have probably not updated your iPhone in a while because there has not been enough space to update it – you could run into a bootloop problem with your phone. Bootloop means your iPhone will not fully start up; it will just turn on and show the Apple logo and then maybe restart itself (crash) over and over.

In this article, we’ll give you some steps to try and get your iPhone going again. Once you do, it is important that you immediately free up some storage space so you don’t have this problem again.
How to fix a bootlooping iPhone
First of all, if your iPhone does boot up before crashing again, if you are able to keep your iPhone going long enough to do so, the first thing you should try to do is make a backup.
Below we describe the steps for force restarting your iPhone and for updating using iTunes/Finder. If you are successful, you will want to immediately make a backup (using iTunes/Finder or iCloud). After backing up your iPhone, you need to free up storage space. The following articles give some tips on how to do this:
- Exclamation Point on Photos; How to Fix Low Disk Space on iPhone
- “System” Storage And What Can You Do To Clear
- How to Delete Photos from iPhone but Not from iCloud
- Not Enough Space to Transfer Backup to iPhone, Fix
1. Force restart your iPhone
Doing this may allow the phone to start up fully. This is by no means a permanent solution. If your iPhone starts up successfully, you should immediately back it up to your computer and/or iCloud. Then you will need to free up some storage space.
iPhone 8 and later and iPhone SE (2nd gen) and later
Make sure to press the following sequence of buttons quickly. Also, make sure to hold the Side button for quite a while – longer than you might think.
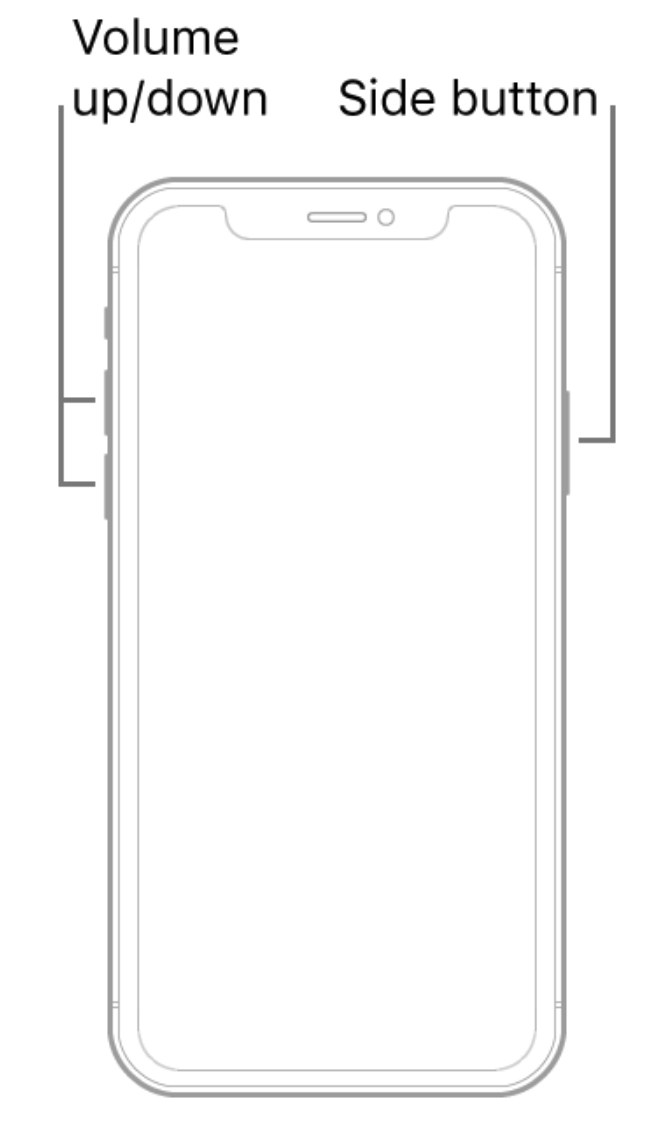
- Press and release the volume up button.
- Press and release the volume down button.
- Press the Side button and hold it until the Apple logo appears.
iPhone 7
- Press and hold the volume down button and the Sleep/Wake button.
- Wait for the Apple logo to appear, then release the buttons.
iPhone 6s or SE (1st gen)
- Press and hold the Sleep/Wake button and the Home button.
- Wait for the Apple logo to appear, then release the buttons.
Now, backup your iPhone to your computer using iTunes or Finder. You can also use iCloud. After backing up your iPhone, start freeing up some storage space.
2. Try Recovery Mode to fix bootlooping iPhone
Before you begin, make sure your Mac has the latest updates, or if you are using a PC, make sure iTunes is updated. The first thing to try here is just updating your iPhone. This will not erase your phone.
Update your iPhone using Finder/iTunes
- Connect your iPhone to your computer using a cable.
- Open a Finder window or iTunes (PC or macOS Mojave or earlier). Tap/click Trust on your iPhone and in Finder/iTunes if asked.
- Put your iPhone in recovery mode:
- iPhone 8 or later: Press and release the volume up button, followed immediately by the volume down button. Press and hold the Side button until you see the recovery mode screen.
- iPhone 7: Press and hold both the top button and the volume down button. Release them when you see the recovery mode screen.
- iPhone 6 or earlier or iPhone SE (1st gen): Press and hold the Home button and the top or side button. Release them when you see the recovery mode screen.
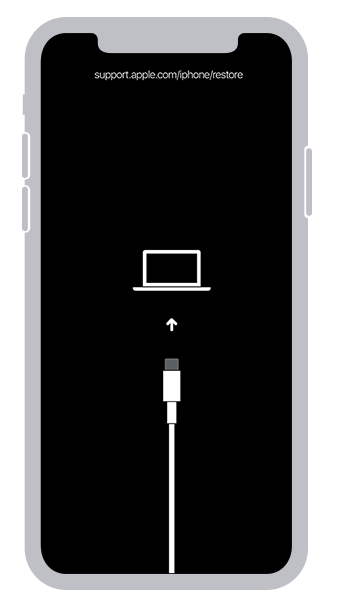
- Click on your iPhone in iTunes or the Finder sidebar. You should see a popup asking if you want to update or restore the phone. Choose Update.
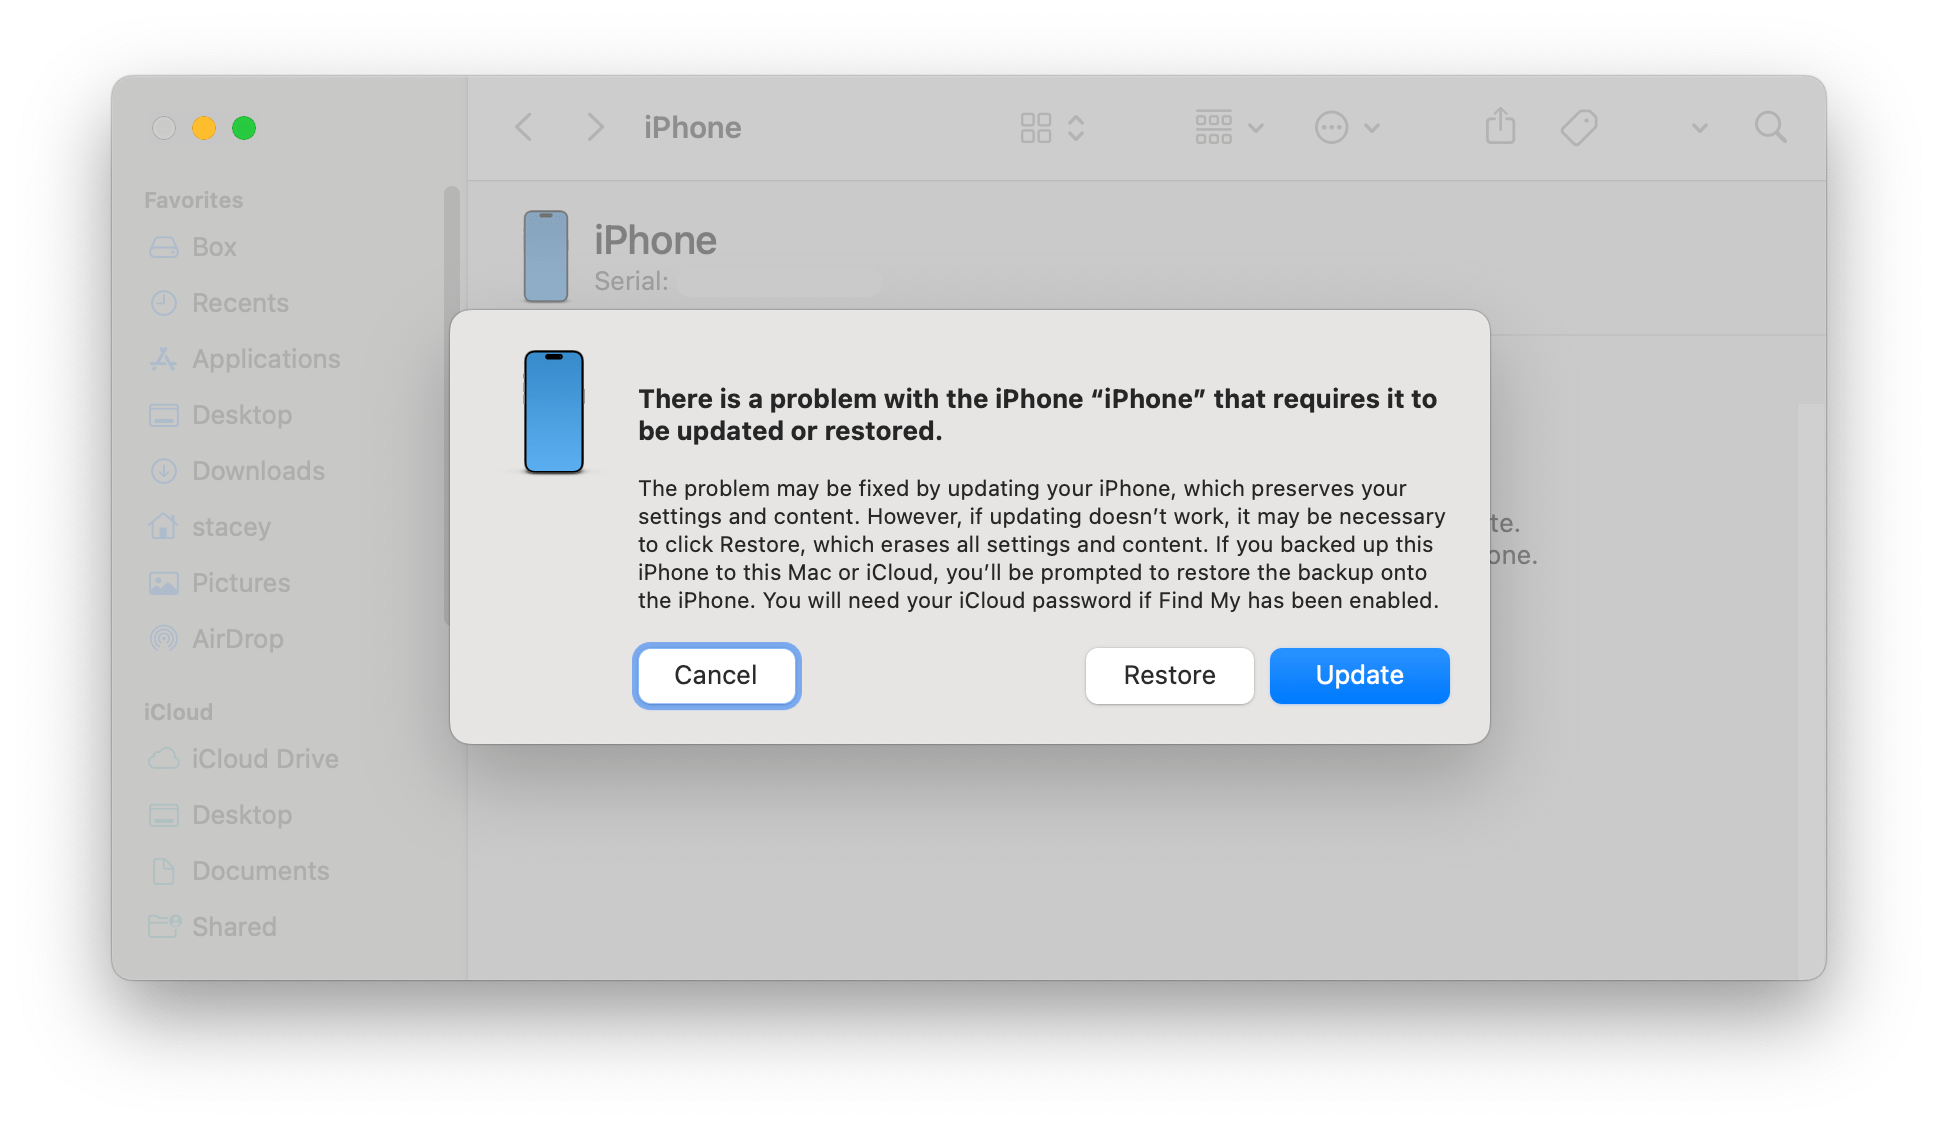
- Wait for the update to finish. If your iPhone quits the recovery mode, wait for the download to finish, then try again. You can try this a few times.
- If you were able to successfully update your iPhone and get it to boot up, immediately create a backup to your computer. You are still in danger of the phone going back to its previous state.
Restore your iPhone
If the update didn’t work, you might need to restore your iPhone. This will erase your iPhone. If you have made recent backups to your computer or to iCloud, this shouldn’t be too much of a problem. You will be able to restore your iPhone from the backup. If you are unsure if you have a recent iPhone backup, you can check:
Check for backups to your Mac/PC:
- If you are still in recovery mode, exit by disconnecting your iPhone from your computer and performing a force restart (see above).
- With your iPhone connected to your computer, look in Finder/iTunes under the General tab to see your backups.
Check for iCloud backups:
You can use one of your other devices to check for iCloud backups of your iPhone:
- iPhone or iPad: Open Settings and tap on your name at the top. Tap on iCloud, then tap iCloud Backup or Manage Storage, then Backups.
- macOS Ventura or later: Open System Settings and click your name at the top of the left sidebar. Click on iCloud, then click the Manage button next to Account Storage. Click on Backups.
- macOS Monterey or earlier: Open System Preferences and click on Apple ID. Click on iCloud, then select Manage. Click on Backups.
- Windows: Open iCloud for Windows and click on Storage. Click Backups on the left.
To restore your iPhone:
If updating failed, repeat the recovery mode steps above, but this time choose Restore instead of Update.
For more details on using recovery mode, see How to Use Recovery Mode with your iPhone or iPad.
3. Try Apple Support
If none of the above has worked for you, or if you are not comfortable trying recovery mode, you can contact Apple Support. You can start a text chat or have Apple Support call you. Apple Support can talk you through troubleshooting steps to help fix the issue. You can also make a Genius Bar appointment at a nearby Apple Store and have an Apple-certified technician help you with your iPhone.
Related articles

