Mac Spotlight Search not Working after macOS Upgrade, Fix

Spotlight Search is a feature that lets you search for apps on your Mac and search your mail, messages and the internet for relevant content. Although Spotlight issues are not a new thing, recently, some users have had trouble with their Spotlight after upgrading to macOS Big Sur. Some people use Spotlight often and some rely on Spotlight for their work. In this article we will give you some troubleshooting tips to try so that you can get your Spotlight Search working again.
If you are having trouble with Mail Search in Big Sur, see:
If you are having problems with Spotlight not working on iOS, see: Spotlight Search Not Working On iPhone / iPad? Fix.
Restart your Mac
It’s good to try this first, as this simple step may resolve the problem with Spotlight.
- Go to Apple menu > Restart.
Check Spotlight Search Categories
If your searches are not turning up results from certain search categories, you should check that you have those categories selected for search.
- Go to System Preferences: Apple menu > System Preferences.
- Select Spotlight.
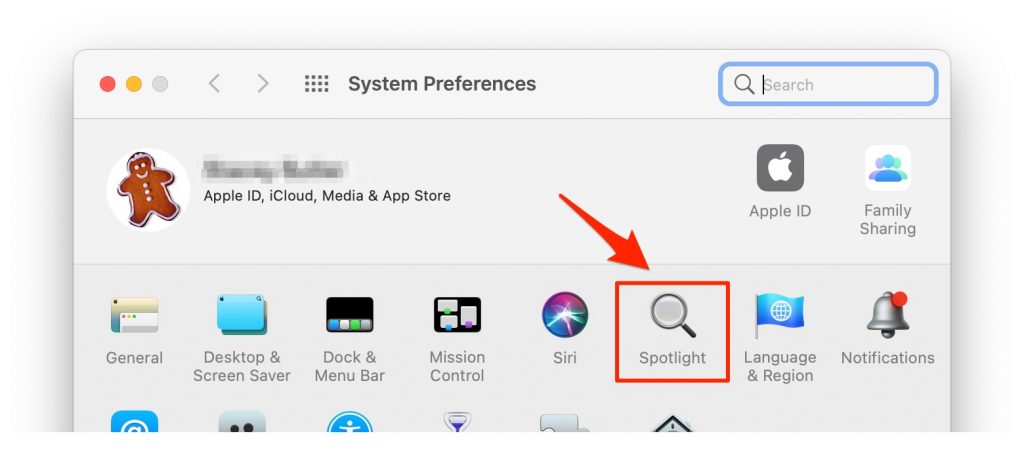
- The categories that are checked are the only ones that will be included in your searches.
Rebuild Spotlight Index
You will remove either your entire disk (Macintosh HD) or selected folders, then add them back. This will force Spotlight to reindex.
Using System Preferences
- Go to System Preferences: Apple menu > System Preferences.
- Select Spotlight.
- Select Privacy, then click the plus (+) button.
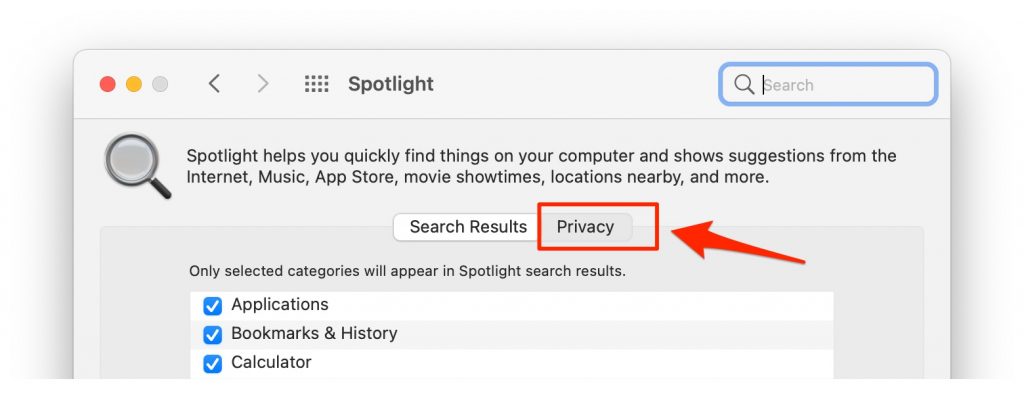
- Select Macintosh HD from the side pane on the left, under locations. If you don’t want to reindex the entire disk, choose folders to add instead of choosing Macintosh HD. Click Choose.
- Click Ok to prevent Spotlight from searching Macintosh HD.
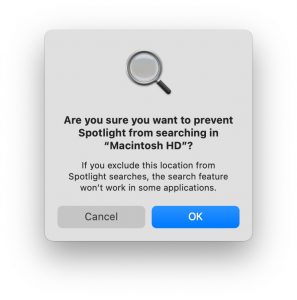
- Now select Macintosh HD from the list and click the minus (-) button.
Note: Reindexing may take awhile. You may want to give it at least several hours to complete.
Using Terminal
If you prefer, you can initiate a reindex from Terminal.
- mdutil manages the metadata stores used by Spotlight.
- The -E flag erases each local store for the volumes indicated. The stores will be rebuilt.
- Open a Terminal window.
- Enter the following command:
sudo mdutil -E /
- Enter your administrator password if prompted.
Restart SystemUIServer Process
You can try killing the SystemUIServer process. It will restart on its own.
- Go to Activity Monitor: Open Finder and select Go from the top menu bar. Select Utilities from the dropdown. Double-click on Activity Monitor in the Finder window.
- Search for the process: Begin typing SystemUIServer in the search field.
- Click on it to select it. Click the Stop sign with an X in it to stop the process.
Restart All Spotlight Processes
- Go to Activity Monitor: Open Finder and select Go from the top menu bar. Select Utilities from the dropdown. Double-click on Activity Monitor in the Finder window.
- Type Spotlight in the search field.
- Select all spotlight related processes and click Stop (Stop sign with an X in it).
Other Options
If the above steps have failed to solve the problem for you, you might, first of all, consider contacting Apple Support for further help. Other ideas include running a disk check or reinstalling Big Sur.
Run a Disk Check
To use First Aid, you will boot into macOS Recovery.
- Shutdown your Mac: Apple menu > Shutdown.
- Turn on your Mac. Immediately press and hold down two keys: Command (⌘) and R. Release the keys when the Apple logo appears.
- If prompted, enter your password (for a user with admin status).
Run First Aid
- After startup is complete, the macOS Utilities menu should appear.
- Select Disk Utility and click Continue.
- Click on View and select Show All Devices.
- Run First Aid on each volume:
- Select a volume, such as Macintosh HD from the sidebar, then click the First Aid button
 . Repeat with each volume (Macintosh HD – Data, etc).
- Select a volume, such as Macintosh HD from the sidebar, then click the First Aid button
- Run First Aid on each container.
- Run First Aid on the storage device. It should be the top level in the sidebar.
- If an error is found and repaired, run First Aid again until there are no reported errors.
- If Disk Utility is unable to repair the disk, or First Aid fails, try once again.
- If you still have trouble with Disk Utility, see Repair a storage device in Disk Utility on Mac.
When you are finished with running First Aid in Recovery Mode, you may restart your Mac (in regular mode) to see if your problem persists.
Reinstall Big Sur
Backup your Mac using Time Machine. Then you can use that backup to reinstall macOS Big Sur.
- Connect your external drive to your Mac.
- Restart your Mac in Recovery Mode:
- Power on your Mac. Immediately hold down 2 keys: Command (⌘) and R.
- Release when the Apple logo appears.
- Choose Restore from Time Machine. Then click Continue.
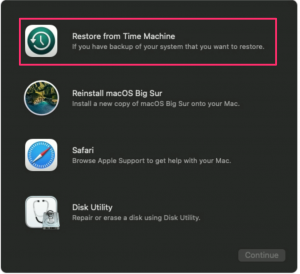
- Click Continue. You should see a screen showing your Time Machine backups. Choose your most recent backup.
Recent Articles:
- How to Downgrade from MacOS Big Sur to Catalina
- Wi-Fi Not Working after Big Sur Upgrade
- How to Fix Big Sur Battery Drain Issues
- How to Change the Login Screen Background in macOS Big Sur

The suggested “Rebuild Spotlight Index” worked for me [I have a MacBook Pro macOS MOnterey Version 12.0.1. Thank you so much!
I found that when I went to the “Privacy” Tab I found my entire Hard Drive was checked. Once I deleted it, I was able to search again. I don’t know why it was in the Privacy tab as I didn’t purposely put it in that list? Anyhoo, I would never have found the problem if not for this article. Many thanks
Kill all processes that come up in a search for spotlight fixed Mail search for me. There were 5.